


7
STEP 4
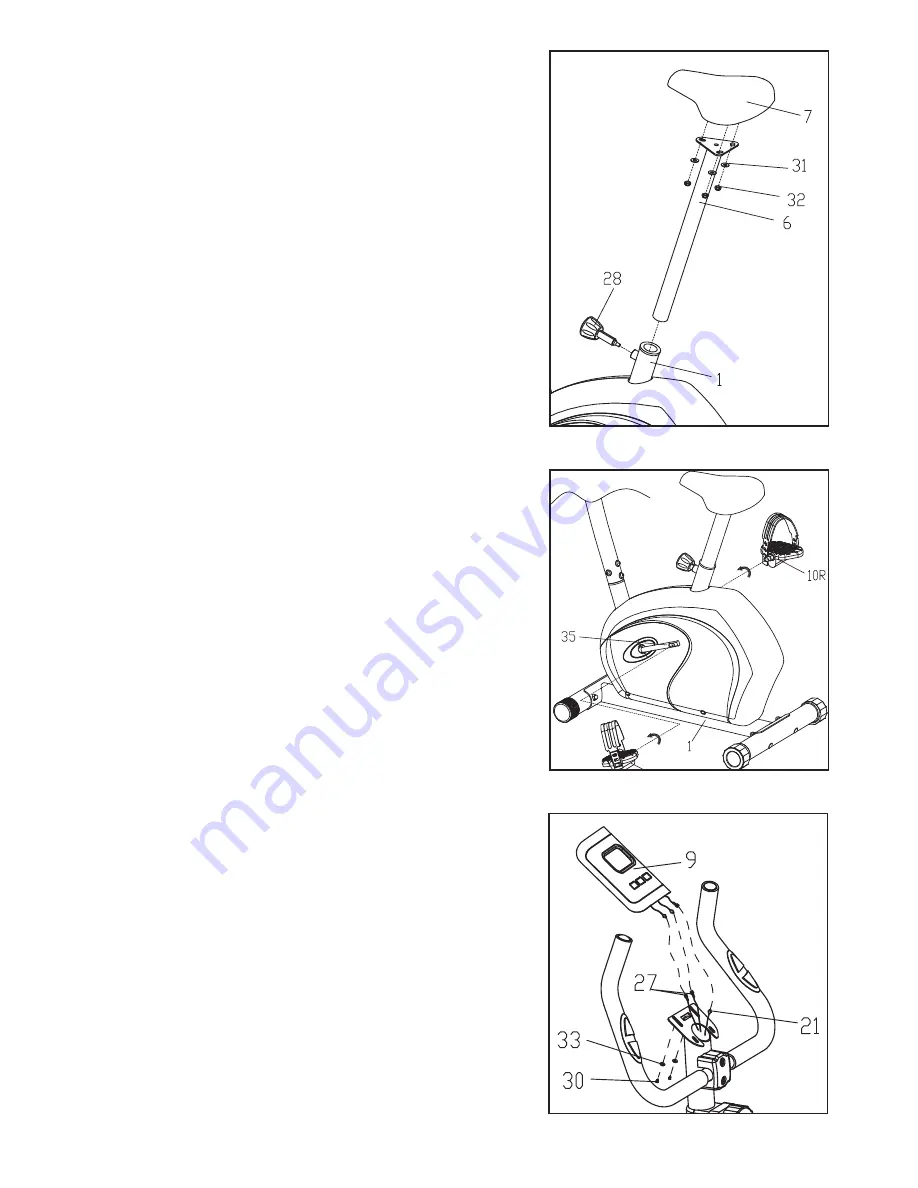
Install the saddle (7) to the Saddle supporting tube (6) with
the Washers (31) and Nylon nuts (32), and then insert the
Saddle supporting tube (6) to the Main frame (1).
Note: You can control the Knob bolt (28) to adjust the ap-
propriate height which is suitable for you.
STEP 5
Assemble the Pedals (10L/R)to the Crank (35L/R).
Note: The right pedal should be fixed by clockwise. How-
ever, the left pedal should be fixed by counter-clockwise.
STEP 6
Pull out the Extended wire (21) to connect with one of wire
on the Computer (9), and connect the Pulse wires(27) with
rest wires on the Computer. Finally fix the computer (9) onto
the top of the Front vertical tube (4) with Screws (34),Wash-
ers (33)
Now, your machine is ready for use.
Содержание PFIVEX79012.0
Страница 12: ...12 EXPLODED DRAWING Model No PFIVEX79012 0 part 1...
Страница 13: ...13 EXPLODED DRAWING Model No PFIVEX79012 0 part 2...
Страница 15: ...15 NOTES...


