background image

12

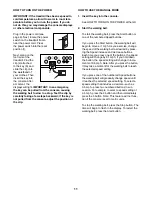
3.   Follow your progress with the displays.

   The display can show the following workout 

information: 


Calories (CALS)—The approximate number of 

calories you have burned.


Calories per Hour (CALS/HR)—The approximate 

number of calories you are burning per hour.


Distance (MI or KM)—The distance that you have 

walked or run in miles or kilometers. To change the 

unit of measurement, press the ST/M button.

   Pace—Your speed in minutes per mile or minutes 

per kilometer.


Pulse (BPM and heart symbol)—Your heart rate 

when you use a compatible heart rate monitor (see 

page 14).


Speed (MPH or KPH)—Your speed in miles per 

hour or kilometers per hour.


Time—The elapsed time.

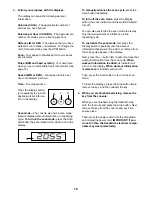
   Press the Display button 

(L) repeatedly to view the 

desired workout informa-

tion in the display.


Scan mode—The console also has a scan mode 

that will display workout information in a repeating 

cycle. To turn on the scan mode, press the Scan 

button (M); the scan indicator (N) will turn on in the 

display.


To manually advance the scan cycle, press the 

Scan button repeatedly.


To turn off the scan mode, press the Display 

button; the scan indicator and the word SCAN will 

turn off.

   You can also customize the scan mode to display 

only the desired workout information in the 

repeating cycle. 

   To customize the scan mode, first press the 

Display button repeatedly until the workout 

information that you want to add to or remove from 

the scan cycle appears in the display. 

   Next, press the +/- button (O) to add or remove that 

workout information from the scan cycle. When 

workout information is added, its indicator will 

turn on in the display. When workout information 

is removed, its indicator will turn off.

   Then, press the Scan button to turn on the scan 

mode.

   To reset the displays, press the Stop button twice, 

remove the key, and then reinsert the key.

4.    When you are finished exercising, remove the 

key from the console.

   When you are finished using the treadmill, step 

onto the foot rails and press the Stop button. Next, 

remove the key from the console and put it in a 

secure place.  

   Then, press the power switch into the off position 

and unplug the power cord. IMPORTANT: If you 

do not do this, the treadmill’s electrical compo-

nents may wear prematurely.

M

O

L

N

Содержание CITY L6

Страница 1: ...anty today go to iconservice ca Call toll free 1 888 936 4266 Mon Fri 7 30 a m 4 30 p m ET excluding holidays or email us at customerservice iconcanada ca Please do not contact the store ACTIVATE YOUR WARRANTY CUSTOMER CARE Serial Number Decal CAUTION Read all precautions and instructions in this manual before using this equipment Keep this manual for future reference ...

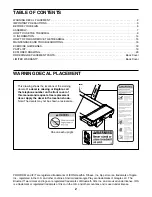
Страница 2: ...is a trademark of Apple Inc registered in the U S and other countries Android and Google Play are trademarks of Google LLC The Bluetooth word mark and logos are registered trademarks of Bluetooth SIG Inc and are used under license IOS is a trademark or registered trademark of Cisco in the U S and other countries and is used under license This drawing shows the locations of the warning decals If a ...

Страница 3: ...recom mended for both men and women Always wear athletic shoes Never use the treadmill with bare feet wearing only stockings or in sandals 13 Plug the power cord into a surge suppressor not included and plug the surge suppres sor into an appropriate outlet see page 9 To avoid overloading the circuit do not plug other electrical devices except for low power devices such as cell phone chargers into ...

Страница 4: ...ly lift 45 lbs 20 kg to move the treadmill 24 When unfolding or using the treadmill make sure that the console is locked securely in the upright position Do not operate the treadmill while it is folded 25 Do not change the incline of the treadmill by placing objects under the treadmill 26 Never insert any object into any opening on the treadmill 27 Inspect and properly tighten all parts each time ...

Страница 5: ...5 ...

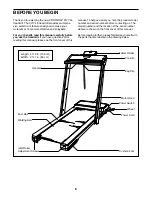
Страница 6: ...ont cover of this manual To help us assist you note the product model number and serial number before contacting us The model number and the location of the serial number decal are shown on the front cover of this manual Before reading further please familiarize yourself with the parts that are labeled in the drawing below BEFORE YOU BEGIN Handrail Console Key Clip Tablet Holder Power Switch Wheel...

Страница 7: ...stomerService registration on your computer and register your product activates your warranty saves you time if you ever need to contact Customer Care allows us to notify you of upgrades and offers Note If you do not have internet access call Customer Care see the front cover of this manual and register your product 1 2 2 Make sure that the power cord is unplugged Using your foot press down the le...

Страница 8: ...e treadmill out of direct sunlight Keep the included hex keys in a secure place one of the hex keys is used to adjust the walking belt see page 17 Note Extra hardware may be included 4 IMPORTANT You must activate your Console 61 to begin using its exclusive features First plug in the power cord see page 9 and turn on the power see page 11 Then using your smartphone or tablet go to iFit com activat...

Страница 9: ...d B into a surge suppressor A and plug the surge suppressor into an appropri ate outlet D that is properly installed and grounded in accordance with all local codes and ordinances The outlet must be on a nominal 120 volt circuit capable of carrying 15 or more amps To avoid overloading the circuit do not plug other electrical devices except for low power devices such as cell phone chargers into the...

Страница 10: ...nd track your workout information You can even listen to your favorite workout music or audio books with the console s sound system while you exercise To turn on the power see page 11 To use the manual mode see page 11 To connect your tablet to the console see page 13 To connect a heart rate monitor to the console see page 13 Note The console can display speed and distance in either miles or kilom...

Страница 11: ...eft 2 Start the walking belt To start the walking belt press the Start button or one of the numbered Speed buttons If you press the Start button the walking belt will begin to move at 1 mph As you exercise change the speed of the walking belt as desired by press ing the Speed increase and decrease buttons Each time you press one of the buttons the speed setting will change by 0 1 mph if you hold d...

Страница 12: ... Scan button repeatedly To turn off the scan mode press the Display button the scan indicator and the word SCAN will turn off You can also customize the scan mode to display only the desired workout information in the repeating cycle To customize the scan mode first press the Display button repeatedly until the workout information that you want to add to or remove from the scan cycle appears in th...

Страница 13: ...k your workout information Follow the instructions in the iFit Workouts at Home app to record and track your workout information 5 Disconnect your tablet from the console if desired To disconnect your tablet from the console first select the disconnect option in the iFit Workouts at Home app Then press and hold the iFit Sync button on the console until the LED on the console turns solid green Note...

Страница 14: ...ou to continuously monitor your heart rate while you exercise helping you to reach your personal fitness goals To purchase a chest heart rate moni tor please see the front cover of this manual Note The console is compatible with Bluetooth Smart heart rate monitors P IC INFORMATION This device contains licence exempt transmitter s receiver s that comply with Innovation Science and Economic Developm...

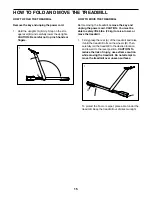
Страница 15: ... CAUTION You must be able to safely lift 45 lbs 20 kg to raise lower or move the treadmill 1 Firmly grasp the rear A of the treadmill and raise it until the treadmill rolls on the wheels B Then carefully roll the treadmill to the desired location and lower it to the level position CAUTION To reduce the risk of injury use extreme caution while moving the treadmill Do not attempt to move the treadmi...

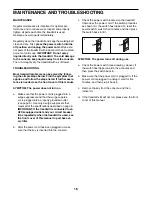
Страница 16: ...e surge suppres sor is plugged into a properly grounded outlet see page 9 Use only a surge suppressor that meets all of the specifications described on page 9 IMPORTANT If the treadmill is connected to an AFCI equipped outlet and your circuit breaker trips repeatedly when the treadmill is used see the front cover of this manual to purchase an arc filter b After the power cord has been plugged in m...

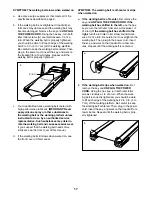
Страница 17: ... suspect that the walking belt needs more lubricant see the front cover of this manual d If the walking belt still slows when walked on see the front cover of this manual SYMPTOM The walking belt is off center or slips when walked on a If the walking belt is off center first remove the key and UNPLUG THE POWER CORD If the walking belt has shifted to the left use the hex key to turn the left idler ...

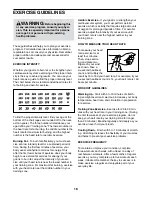
Страница 18: ...orm aerobic exercise which is activity that requires large amounts of oxygen for prolonged periods of time For aerobic exercise adjust the intensity of your exercise until your heart rate is near the highest number in your training zone HOW TO MEASURE YOUR HEART RATE To measure your heart rate exercise for at least four minutes Then stop exercis ing and place two fingers on your wrist as shown Tak...

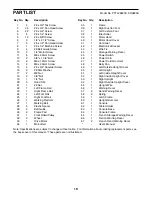
Страница 19: ...33 1 Drive Motor 34 1 Motor Belt 35 1 Frame 36 1 Right Cushion Foot 37 1 Left Cushion Foot 38 1 Idler Roller 39 1 Motor Hood 40 1 Motor Hood Cover 41 1 Controller 42 1 Electronics Bracket 43 7 Wire Tie 44 1 Storage Warning Decal 45 1 Power Switch 46 1 Power Cord 47 1 Power Cord Grommet 48 1 Belly Pan 49 1 Left Outside Upright Cover 50 1 Left Upright 51 1 Left Inside Upright Cover 52 1 Right Inside...

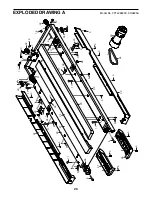
Страница 20: ... 3 5 5 29 18 19 32 12 3 30 18 6 11 17 28 28 11 11 32 12 3 11 17 11 38 3 3 3 3 5 3 3 3 3 5 11 30 9 5 5 1 1 31 10 22 23 26 24 27 25 6 37 36 6 5 5 28 28 7 35 33 34 EXPLODED DRAWING A Model No PFTL28820C 0 R0820A ...

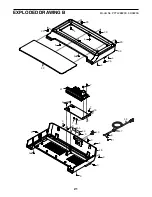
Страница 21: ...21 40 39 8 21 47 46 20 20 3 3 3 20 20 4 4 20 4 4 3 3 3 3 3 3 44 3 4 4 65 45 48 42 41 7 2 7 7 16 16 EXPLODED DRAWING B Model No PFTL28820C 0 R0820A ...

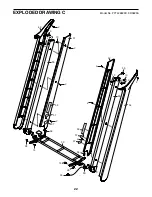
Страница 22: ...22 58 2 2 54 2 2 2 58 55 49 52 55 13 13 13 56 57 2 2 50 53 51 13 59 57 67 66 67 14 28 14 28 60 13 13 2 EXPLODED DRAWING C Model No PFTL28820C 0 R0820A ...

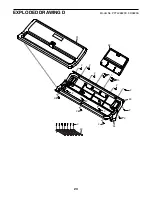
Страница 23: ...23 61 62 64 43 63 2 2 2 2 2 2 2 2 2 2 15 15 2 2 2 2 EXPLODED DRAWING D Model No PFTL28820C 0 R0820A ...

Страница 24: ...s used as a store display model 2 if all instructions and warnings in this manual are not followed 3 if the product is abused or improperly or abnormally used or 4 if the product is used for commercial or rental purposes No other warranty beyond that specifically set forth above is authorized by ICON ICON is not responsible or liable for the following damages 1 indirect special or consequential da...

Отзывы: