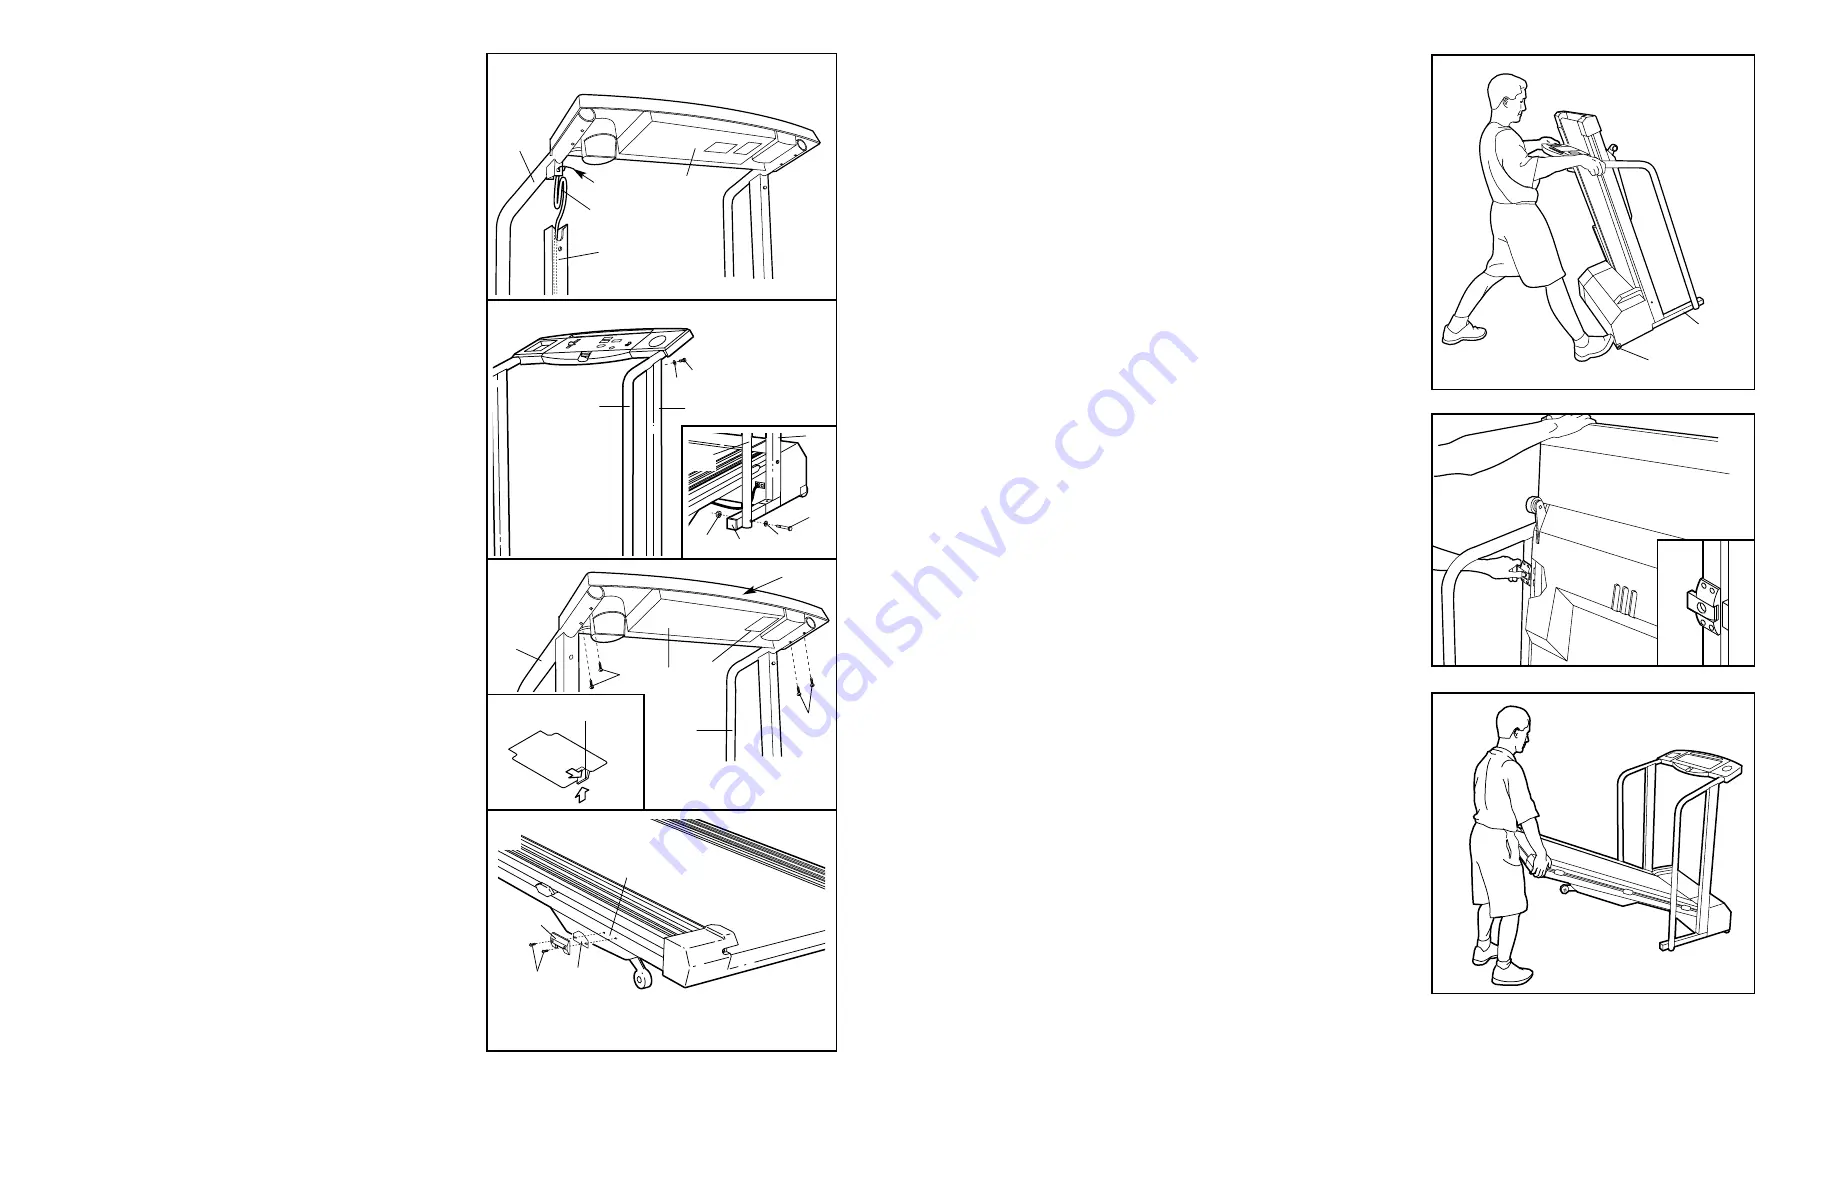
3. With the help of a second person, hold the Console
Base (71) and the Right Handrail (32) in the position
shown. Feed all of the excess Wire Harness (53) into
the Right Handrail, through the indicated bracket, and
down into the right Upright (38); bend the Wire
Harness, if necessary.
Cut the indicated plastic tie off the Right Handrail
(32). Make sure that the Wire Harness (53) is in the
bracket, and insert the bracket into the right Upright
(38). Make sure that the Wire Harness is not
pinched.
4. Thread a Handrail Bolt (92) with a Handrail Washer
(40) into the right Upright (38) and the Right
Handrail (32). Do not tighten the Handrail Bolt
yet.
Attach the lower end of the Right Handrail (32) to
the Extension Leg (44) with a 5/16” x 3 1/2” Bolt
(80), a 5/16” Flat Washer (98), and a 5/16” Nylon
Locknut (97).
5. Attach the Console Base (71) to the Left and Right
Handrails (4, 32) with four Handrail Screws (5).
Tighten all parts used in this step and in
steps 2 and 4.
The Console (11) requires three 1.5V batteries (not
included); alkaline batteries are recommended.
Open the Battery Cover (12) and press the batteries
into the Console; the negative (–) ends of the batter-
ies must touch the springs. Close the battery cover,
push up on the tab, and then push the tab forward as
shown in the inset drawing. Make sure that the tab
locks into place.
6. Attach the Catch (94) and the Frame Guide Spacer
(66) to the left side of the Frame (74) with two
Handrail Screws (5). Be careful not to overtighten
the Handrail Screws.
4
11
6
HOW TO MOVE THE TREADMILL
Before moving the treadmill, convert the treadmill to the
storage position as described on page 10. Make sure that
the storage latch is locked fully over the frame guide.
1. Hold the upper ends of the handrails. Place one foot on
one of the front wheels as shown.
2. Tilt the treadmill back until it rolls freely on the front
wheels. Carefully move the treadmill to the desired loca-
tion. Never move the treadmill without tipping it back,
or the base pads may come off. To reduce the risk of
injury, use extreme caution whilst moving the tread-
mill. Do not attempt to move the treadmill over an
uneven surface.
3. Place one foot on the base, and carefully lower the tread-
mill until it is resting in the storage position.
HOW TO LOWER THE TREADMILL FOR USE
1. Hold the upper end of the treadmill with your right hand
as shown. Using your left hand, slide open the storage
latch. Pivot the treadmill until the frame guide and the
foot rail are past the storage latch.
2. Hold the treadmill firmly with both hands, and lower the
treadmill to the floor. To decrease the possibility of
injury, bend your legs and keep your back straight.
92
40
32
38
32
53
38
Plastic Tie 71
5
5
4
32
5
71
11
12
Base Leg
Front Wheels
7. Make sure that all parts are properly tightened
before you use the treadmill. Note: Some parts
may be left over after assembly is completed. Save
the included allen wrench for adjusting the walking
belt. To protect the floor or carpet from damage,
place a mat under the treadmill.
66
74
94
5
3
6
Battery Cover Tab
98
97
80
32
38
44


