Assembly
Page GB-13
(13)
(14)
(15)
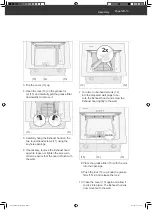
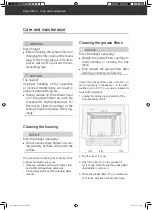
3. Flip the cover (13) up.
4. Open the lock (14) on the grease fil-
ter (15) and carefully pull the grease filter
downwards to remove it.
(11)
(11)
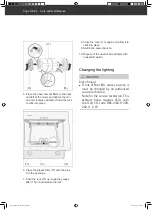
5. Carefully hang the Exhaust hood on the
two round-head screws (11) using the
keyhole openings.
6. If necessary, remove the Exhaust hood
again to loosen or tighten the screws in
order to ensure that the hood is flush with
the wall.
2x
(12)
(12)
7. Turn two round-head screws (12)
into the prepared wall plugs to se-
cure the Exhaust hood, and screw the
Exhaust hood tightly to the wall.
(15)
(14)
(13)
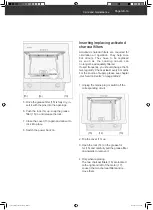
8. Place the grease filter (15) with the pins
into the openings.
9. Push the lock (14) up; snap the grease
filter (15) in and release the lock.
10. Close the cover (13) again and allow it
to click into place. The Exhaust hood is
now mounted to the wall.
196374_GB_20180516.indd GB-13
196374_GB_20180516.indd GB-13
17.05.2018 14:13:09
17.05.2018 14:13:09


