background image


Mt3 Series 


Operator’s Manual 


©Printek, Inc.  2003 

1517 Townline Road 

Benton Harbor, MI  49022 

(800) 368-4636 

www.printek.com


PN 5692 RevA 


Содержание Mt3 Series

Страница 1: ...Mt3 Series Operator s Manual Printek Inc 2003 1517 Townline Road Benton Harbor MI 49022 800 368 4636 www printek com PN 5692 RevA...

Страница 2: ...f this equipment does cause harmful interference to radio or television reception which can be determined by turning the equipment off and on the user is encouraged to try too correct the interference...

Страница 3: ...arts is required to warrant proper safe operation Any alteration or modification of this device voids the user warranty and may make the product unsafe to operate The printhead and motors get hot duri...

Страница 4: ...st notwendig um ordnungsgem en sicheren Betrieb zu gew hrleisten nderungen oder Modifikationen dieses Ger ts machen die Garantie ung ltig und k nnen den sicheren Betrieb des Produkts gef hrden W hrend...

Страница 5: ...TA CONNECTIVITY 13 Dip Switch Location 14 Dip Switch Selection 14 Dip Switch Setting 15 Serial RS232C Connections 16 Bluetooth Wireless Data Communication 17 Programming Information 18 ASCII Control C...

Страница 6: ...Media Specifications 29 Printer Supplies Accessories 29 Warranty 31 Warranty Service 31...

Страница 7: ...media up to 3 in width Mt3B includes Bluetooth Wireless connectivity for ultra convenient data communication no need for cables or line of sight orientation Either model can be purchased in many diffe...

Страница 8: ...ion and how to choose the correct media for your application CONFIGURATION AND DATA CONNECTIVITY provides detailed information on how to setup the printer to work with your host and your communication...

Страница 9: ...3 GETTING STARTED Printer Features The printer comes with a battery cartridge a belt loop system and a roll of paper supply already loaded in the printer...

Страница 10: ...not store a fully charged battery at temperatures greater than 104 degrees F 40C for long periods of time the battery may permanently lose charge capacity Be sure to use a fully charged battery befor...

Страница 11: ...e battery pack in the printer 1 Unlock the battery door by sliding down the battery door releases and open the battery door 2 Insert the battery as shown in diagram The end with three contact terminal...

Страница 12: ...inimum of 3 normal usage charge and discharge cycles Recycling your Batteries The Rechargeable Battery Recycling Corporation RBRC is a non profit organization created to promote recycling of rechargea...

Страница 13: ...printer paper 1 Open the paper supply cover by placing your fingers under the T pull lever and pulling up firmly on the supply cover until the lever stops moving Note Do not pull too hard Use enough f...

Страница 14: ...r acts as a tear bar Pull one edge of the paper against the tear bar as shown below then tear down and across against the tear bar to remove receipts Caution The tear bar may have sharp edges Using th...

Страница 15: ...witch settings 1 To start the self test press and hold the FEED button then press ON The printer will start printing the self test messages 2 Press the OFF or FEED to stop or cancel the self test prin...

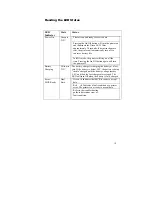
Страница 16: ...he On Off button again will turn the printer off Battery Charging Yellow is ON The battery charger is charging the battery at a fast rate If the battery is below 5 0V the battery is being trickle char...

Страница 17: ...der and the application software asks for the card to be read Quickly swipe the card through the reader either left to right or right to left The magnetic stripe must be facing toward the paper supply...

Страница 18: ......

Страница 19: ...eters Baud rate Data Bit and Parity must be set An optional serial cable is available for Serial RS232 communication part 91251 for DB9 terminated part 91252 for unterminated Printer drivers for Windo...

Страница 20: ...14 Dip Switch Location Dip Switch Selection...

Страница 21: ...On 9 600 On Off 2 400 On On 4 5 Parity bit SW4 SW5 No Parity Off Off Odd Parity On Off Even Parity On On 6 Hardware Reset SW6 Enable Reset On Disable Reset default Off 7 Not Used SW7 8 Printer Power C...

Страница 22: ...Interface to the host computer The Table below lists the Serial Interface signals and pin outs on the RJ connector and the connector pin locations are shown A minimum of two connections are required...

Страница 23: ...cation of the referenced dip switch settings Dip switch 3 ON Dip switch 4 ON The Mt3B printer has been electronically modified to help extend the life of the internal battery cartridge due to the curr...

Страница 24: ...r to the Mt3 Series Programmer s Manual for further details Further information for Developers is available in the Developers Kit ASCII Control Characters Character Hex Dec CONTROL ACTION EOT 04 04 En...

Страница 25: ...cts International character set ESC F 2 Selects PC Line Draw character set ESC U 1 Enable emphasized print ESC U 0 Disable emphasized print Printer Graphic Commands Printer Command String Printer Acti...

Страница 26: ...t Feed ESC Q Q n Set Out of Paper Sensitivity ESC Q F m Set Forward Black Mark Seek ESC Q B m Reverse Black Mark Seek Printer Supervisory and Control Commands Command String Printer Action V Buffer po...

Страница 27: ...21 Resident Character Sets Characters 32 through 255 Esc 6 for International Esc 7 for PC Line Draw...

Страница 28: ......

Страница 29: ...nd clean the print head 4 Clean the platen roller with a dry cloth or small brush You can also use another cotton swab moistened with isopropyl alcohol Turn the platen roller with your finger and run...

Страница 30: ...st charge is initiated each time the power adapter is connected to the printer The fast charge controller checks the battery s voltage and temperature before the start of the fast recharge process If...

Страница 31: ...EED switch then press and release the ON switch and FEED switch 4 The printer will print a self test receipt as illustrated If the selfl test receipt is printed the DC power is ok 5 Press OFF and wait...

Страница 32: ...int head is dirty Check or recharge the battery Clean the print head Paper not feeding Obstruction in paper path or improperly installed Check the paper path Verify installation Use paper with the cor...

Страница 33: ...place the battery Make sure the paper is loaded correctly not backwards Verify communications between the host device and the printer by performing a printer self test If the problem is not identified...

Страница 34: ...to 85 non condensing Storage Humidity Limits 5 to 95 non condensing Print head 3 inches wide 80mm 203 dpi 8 dots per mm Printing Method Thermal Direct Print Speed Up to 2 0 inches per second Supporte...

Страница 35: ...mm Maximum Print Area 2 85 inches 72 mm X 8 0 inches 203mm Approved Vendors Kansaki P300 P310 P350 P354 P390 P530UV TO281CA OP200 TO381N F180 F380 F550 Jujo TF 50KS E2C Honshu FH65BV 3 Printer Suppli...

Страница 36: ...lt Loop System 91261 Shoulder Carrying Strap 91251 Coiled Data Cable Terminated DB9 91252 Coiled Data Cable Unterminated Available from Printek Email info Printek com Windows 95 98 NT 2000 Drivers Dow...

Страница 37: ...cally disclaims any implied warranties of merchantability or fitness for a specific purpose and will not be liable for any direct indirect special incidental or consequential damages Printek s total l...

Отзывы: