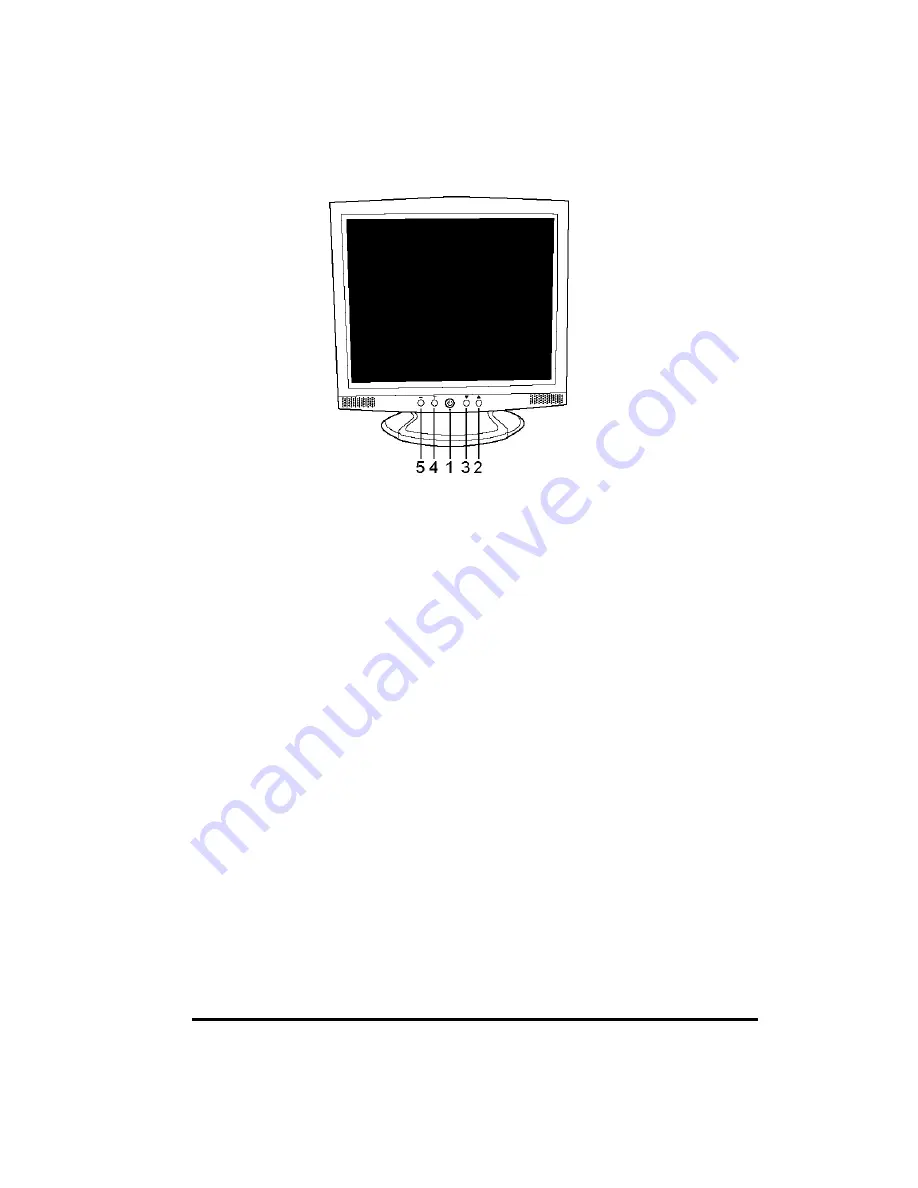
Princeton LCD17D Скачать руководство пользователя страница 6

Taking a Look 


1.


Power Switch 

Pressing this button turns the display system power 

on

 or 

off

2.


Menu/Select


▲  

Pressing this button pops up the OSD menus on the screen, and used to 

select  (“Up” direction) the OSD control options on the screen. 

3.


Select  

▼   

This button is used to select  (“Down” direction) the OSD control options on 

the screen. 

4.


    This button is used to increase the value of the selected OSD control option. 

5.


0

    This button is used to decrease the value of the selected OSD control option. 


Quick Adjustment Function 

When the OSD Menu is not active, the following functions are available for the quick 
adjustment. 


y


Pressing  

 button once pops up the OSD Function Main Menu .


y


Pressing 

 button once pops up the small Brightness icon.  Use 

or 

0

button to adjust 

the Brightness level. 


y


Pressing  

 button once pops up the small Volume icon.  Use 

or 

0

button to adjust the 

Volume level. 


y


Press  

0

 button to switch to the digital interface


Содержание LCD17D

Страница 1: ...D I G I T A L R E F E R E N C E M A N U A L LCD17D...

Страница 2: ...ating instructions Improper adjustment of other controls may result in damage and will often require extensive work by a qualified technician to restore the product to normal operation If the product...

Страница 3: ...an experienced radio TV technician for help This device complies with Part 15 of the FCC Rules Operation is subject to the following two conditions 1 This device may cause harmful interference and 2 t...

Страница 4: ...3...

Страница 5: ...llowing items y 17 TFT liquid crystal monitor y D sub 15 pin signal cable for analog input y Audio cable y AC power cable y Power adapter y User s manual Product Features y High contrast color TFT LCD...

Страница 6: ...se the value of the selected OSD control option 5 0 This button is used to decrease the value of the selected OSD control option Quick Adjustment Function When the OSD Menu is not active the following...

Страница 7: ...your computer Tighten by turning clockwise the two thumb screws to ensure proper grounding 3 Connect one end of the DVI cable p to the monitor and connect the other end to the computer 4 Connect one...

Страница 8: ...tically for optimal display status z H POSITION Pressing moves the display image to the right Pressing moves the display image to the left z V POSITION Pressing moves the display image upward Pressing...

Страница 9: ...system unit by software From indicated inactivity to Power Saving Position Off the to total time must not be set to more than 70 minutes Mode Power LED Color Power Consumption On Green 48W max Off Ora...

Страница 10: ...SA75 37 500 75 000 31 500 6 800X600 SVGA 35 156 56 250 36 000 7 800X600 SVGA 37 879 60 317 40 000 8 800X600 VESA72 48 077 72 188 50 000 9 800X600 VESA75 46 875 75 000 49 500 10 1024X768 VESA60 48 363...

Страница 11: ...n SXGA 1280 x 1024 Contrast Ratio 400 1 Brightness 300 Cd m2 Response Time 25 ms Display Color 16 2 Million Colors Viewing Angle 150o L R 125o U D Input Signal Video R G B Analog 0 7V peak peak Sync T...

Страница 12: ...Altitude To 10 000 Feet Storage Conditions Temperature 20o C 60o C 4o F 140o F Humidity 10 90 no condensation Dimensions HxWxD 385 x 390 x 195 mm Weight Net 5 3 Kg Certifications C UL FCC TUV GS CE EP...

Страница 13: ...Part No 14MP1705A00 Ref No 00300000346 2003 Princeton Digital USA Corp All rights reserved Product Specifications are subject to change without notice www princetondigitalusa com...

Отзывы: