2
1
Unpacking Your Autoloader
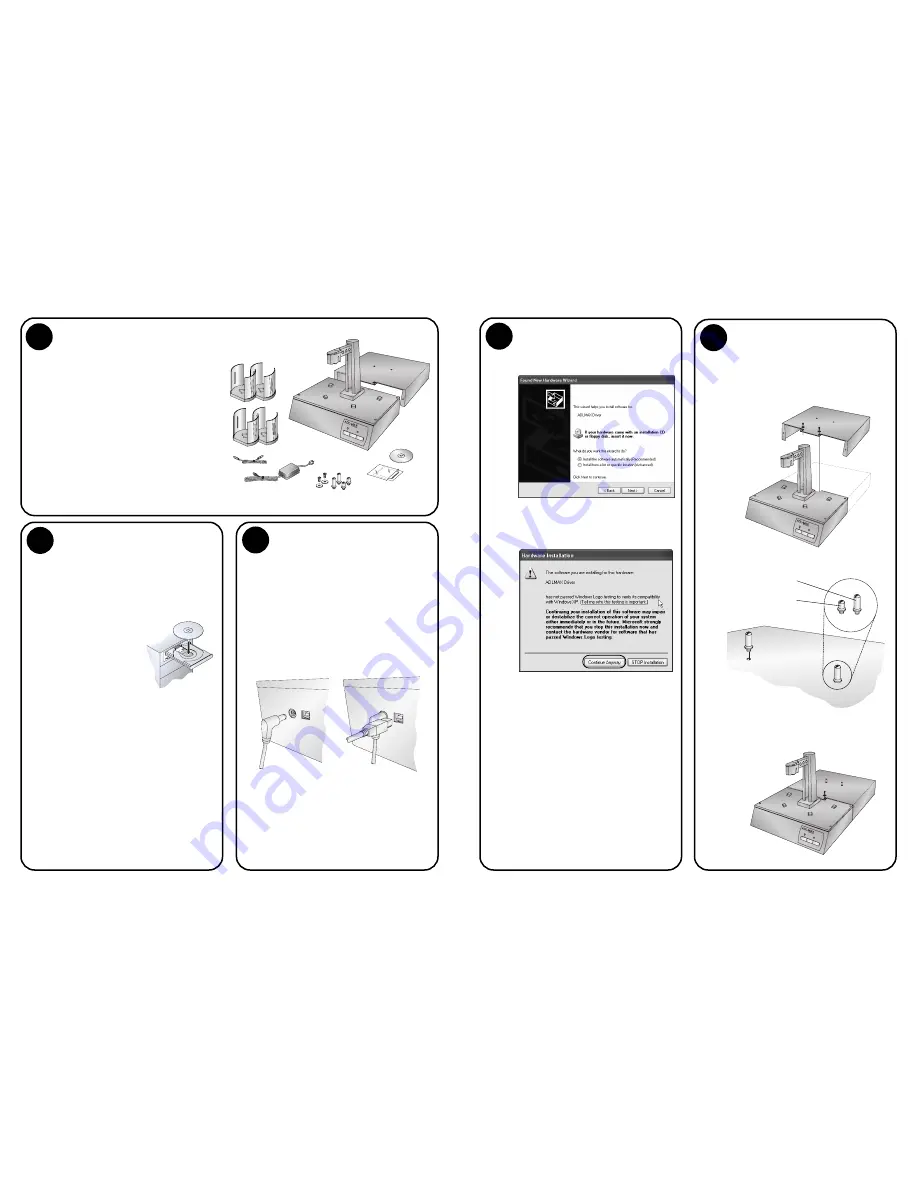
The following items are contained inside the box:
•
ADL-MAX
•
Disc Publisher Stand
•
4 Gray Plastic Input and Output Bins
•
Power Cord and Converter
•
USB Cable
•
Disc Publisher Mounting Pegs
•
2 Disc Publisher Stand adjustment Bolts
and Washers
•
Warranty Card
•
This Operator's Manual, Quick Start Guide
and Other Printed Information
Save the carton and packing materials. They will
come in handy later if you ever need to transport the
Autoloader and/or any of its parts and accessories.
Installing the Software
Important Note:
You must install the software
for your Disc Publisher before you install the
ADL-MAX software.
The Installer Disc has a menu that will guide
you through the process of setting up your
Autoloader. Please refer to the following for
more information on each step:
1. Place the Autoloader
Installer CD in your
CDRom Drive. The
Installer application
should automatically
launch in a few
moments. If it does,
proceed to Step 2.
If it does not automatically launch, follow
these steps:
•
Double-click the My Computer Icon,
then double-click the icon of the
appropriate CD drive containing the
Software Installer disc.
•
Double-click Installer.exe
2. In the Installer Application, click the
Standard Install button. The on screen
instructions will guide you step-by-step
through the installation process. To com-
plete the installation and setup you may
follow the on screen instructions or the
instructions that follow.
3
Connecting the Cables
3
Connecting the Cables
Installing the Disc
Publisher Stand
•
Lower the Disc Publisher Stand onto the
Autoloader so that the metal tab on the
stand overlaps the base plate and the holes
on the stand line up with the screw holes
on the base plate.
•
Attach the appropriate mounting pegs to
the stand.
•
Attach the stand to the unit using the
adjustment bolts and the washers.
Do not tighten the bolts at this point!
4
•
Remove the tape securing the arm to the
base plate of the Autoloader.
•
Locate the power cord supplied with
your unit.
•
Plug the adapter into a surge protected
outlet, and plug the power plug into the
power port on the rear panel of the
Publisher.
•
Connect the unit to your PC with your
beige USB Cable. After a few moments,
Windows will tell you it has found new
hardware and is looking for software to
install it.
Power
USB
(continued)
•
Select "Install the software automatically"
and click
Next
.
You may see a notice like the one shown here
stating that the software has not passed
Windows Logo Testing. Click
Continue
Anyway
to continue installing the driver for
your Autoloader.
Disc Publisher Pro
Disc Publisher II


