


A. Press
button to select METAL MODE.
B. Hold the tool in the air and Click Scan button, the
decreasing bars will disappear and buzzer will beep on time
and the sensitivity reset is completed. (This will ensure that
it calibrates away from any metal objects and gets highest
sensitivity to metal.)
C.
Find the metal at highest sensitivity:
Place the tool flat
against the wall and the slide slowly across the surface. The
middle bar will rise up as the tool is getting close to the
metal. Mark the point where you get the highest metal
indication( the top indicated arrow will show up and a steady
beep will sound), Continue in the same direction until
display bars reduce. Reverse direction and mark the spot
where the display bars peak from the reversed direction.
The midpoint of the two marks is the location of the center
of the metal object.
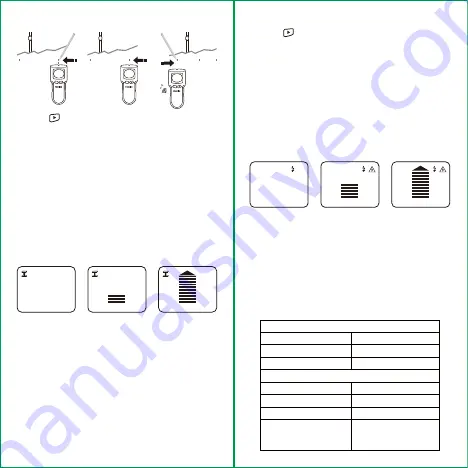
A. Press
button to select AC SCAN MODE.
B. Place the tool on the wall and click Scan button, the
decreasing bars will disappear and buzzer will beep on time
and the sensitivity reset is completed.
C.
Find the metal at highest sensitivity:
Place the tool flat
against the wall and the slide slowly across the surface. The
middle bar will rise up as the tool is getting close to the AC
cable. Mark the point where you get the highest metal
indication( the top indicated arrow will show up and a steady
beep will sound), Continue in the same direction until
display bars reduce. Reverse direction and mark the spot
where the display bars peak from the reversed direction.
The midpoint of the two marks is the location of the center
of the AC cable.
D.
Narrow the detecting field:
To further pinpoint the
location of the AC cable target, scan the area again. Place
the tool on one of the previous marks and click scan button.
It will reset the tool to a lower sensitivity and narrow the
scan area.
E. Scan in both directions and repeat the step C and D until
the AC cable is located precisely.
Note: AC Scan will only detect live(hot) unshielded AC
wiring. Please refer to the AC WIRE WARNING for more
important details and warnings about AC detection.
D.
Narrow the detecting field:
To further pinpoint the
location of the metal target, scan the area again. Place the
tool on one of the previous marks and click scan button. It
will reset the tool to a lower sensitivity and narrow the scan
area.
E. Scan in both directions and repeat the step C and D until
the metal is located precisely.
Note: If any bars display on the screen, metal is
present. Small targets or targets deep within the
surface may only illuminate some of the bars and not
the center line or audio tone. In this case, use the
highest indication to determine the metal position.
6. MEASURING IN METAL MODE.
7. MEASURING IN AC WIRE MODE.
7
8
ON/OFF
ON/OFF
ON/OFF
Figure A
Figure B
Figure C
Technical specifcation
Power supply
1 x 9V alkaline battery
Weight(battery not included)
Dimension
3*7*16cm
142
Measuring depth
Metal
Metal or wood Stud
Non-magnetic metal
Charged wire 100-230 volts
80mm
2in. (50mm)
1) 1/2 in(13mm)
2) 1 in.(25mm)
3) 3/2 in.(38mm)
2.36in. (60mm)


