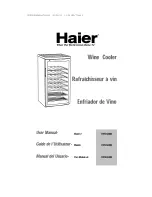
3
Drive gear
Stirring
rod gear
FIG. c
Pivot
Stirring rod gear
Stirring rod
Pivot
Cover tab
Kettle knob
POPPER kETTlE PARTS
FIG. A2
Kettle plug
FIG. b
Support
bracket
hooks
How To Use
1. Open the cabinet door and insert the popper kettle
so the plug is toward the back of the cabinet. Tilt the
kettle slightly so the stirring rod is pointed toward you
and the kettle knob is on your right. Position the pivots
on the kettle in the support bracket hooks (Fig. B).
note: if the kettle does not fit between the support
brackets, the brackets may need to be adjusted
slightly. To adjust, carefully push the brackets inward
or outward until the kettle fits between them. Then,
position the pivots on the kettle in the hooks.
When the kettle is positioned correctly on the bracket
hooks, the stir rod gear will automatically engage
with the drive gear (Fig. C). if the stir rod gear is not
fully engaged with the drive gear, the stir rod will not
rotate.
2. Plug the kettle into the outlet in the ceiling of the popping chamber
located on the right hand side of the cabinet towards the front (Fig. C).
Do not plug popper kettle directly into a wall outlet.
3. Place the popcorn tray in the bottom of the popping chamber.
4. Plug the unit into a 120 volt wall outlet and turn the cabinet light on by
pressing the “
|
” symbol on the “LiGhT” button (Fig. A1).
5. Lift the tab on the kettle cover and hold the cover open. Using the
measuring cup and measuring spoon provided, pour a level 1/3 cup
popping corn and 1 tablespoon popping oil into the kettle.
6. Close the kettle cover and the door on the popper cabinet.
Important:
If the kettle cover or cabinet door are not closed, hot
kernels and oil may be ejected from the popper during popping causing
possible injury.
7. Press the “
|
” symbol on the “PoP” button to turn the unit on (Fig. A1).
When using the popper for the first time, a slight odor may be
noticeable as manufacturing residue evaporates. This is normal during
initial use.
8. Popping will take approximately 5 minutes for the first batch.
When making successive batches, popping may be completed in
approximately 3 minutes as the unit is already heated up.
Important:
never leave popper unattended while in use.
When popping slows to approximately 2 to 3 seconds between pops,
popping is done. Turn unit off by pressing the “
0
” symbol on the
“PoP” button, then using a hot pad, grasp the black knob on the popper
kettle and tilt the kettle down to empty any remaining popcorn.
caution:
occasionally a hot unpopped kernel may be thrown from the popper kettle as you are emptying it. To avoid
contact with hot kernels, keep face away from door opening when emptying kettle.
9. Popcorn is ready to serve. Season as desired.
10. Before making additional batches, carefully remove any popped corn that may have gotten trapped in the kettle
stirring arm during popping. Then repeat steps 3 through 9.
11. When popping is complete, unplug unit from wall outlet and then unplug popper kettle from popper cabinet. Allow to
cool completely before removing kettle and before cleaning.