background image

Eng - 

2

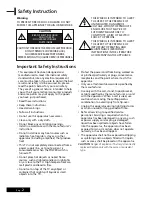
Warning

TO PREVENT FIRE OR SHOCK HAZARD. DO NOT
EXPOSE THIS APPLIANCE TO RAIN OR MOISTURE.

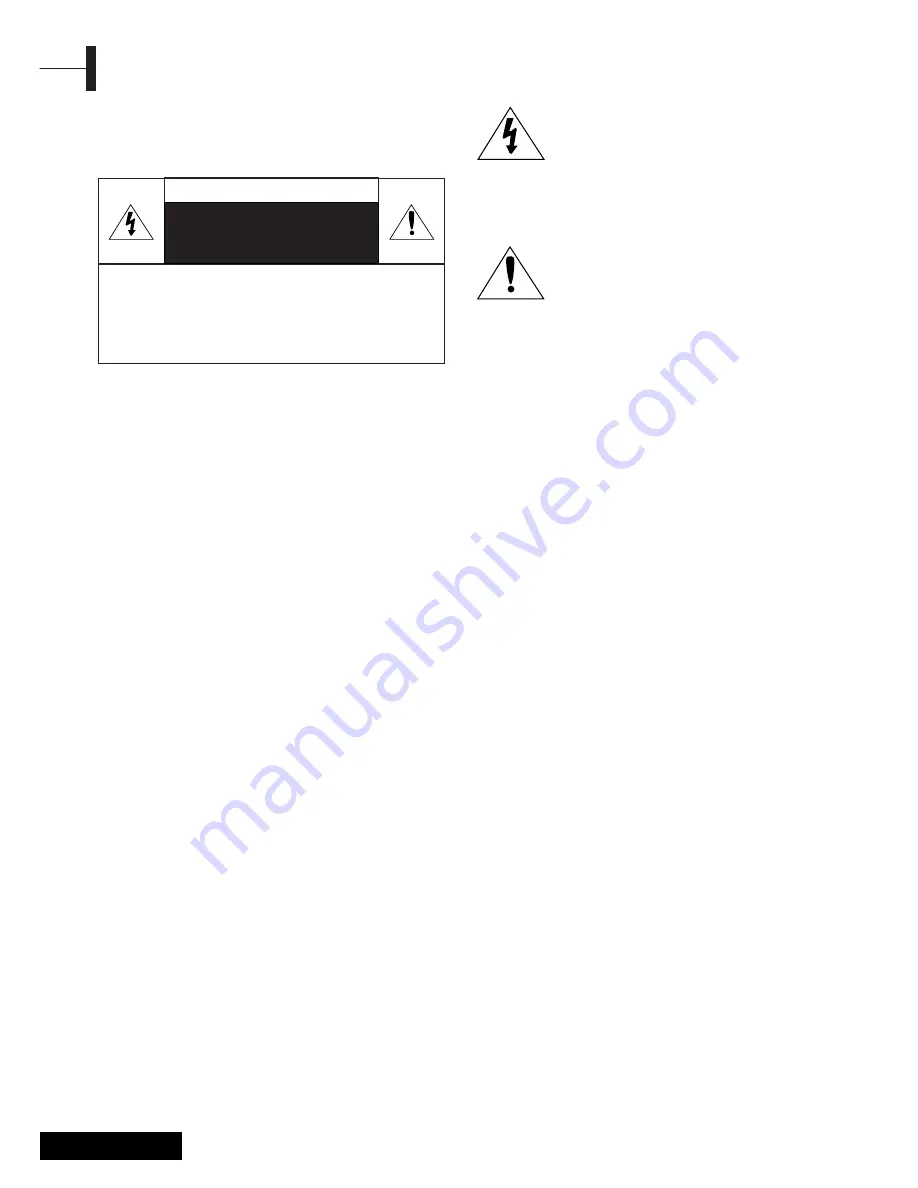
THIS SYMBOL IS INTENDED TO ALERT
THE USER TO THE PRESENCE OF
UNINSULATED. DANGEROUS
VOLTAGE. WITHIN THE PRODUCTS
ENCLOSURE THAT MAY BE OF
SUFFICIENT MAGNITUDE TO
CONSTITUTE A RISK OF ELECTRIC
SHOCK TO PERSONS.
THIS SYMBOL IS INTENDED TO ALERT
THE USER TO THE PRESENCE OF
IMPORTANT OPERATING AND
MAINTENANCE (SERVICING)
INSTRUCTIONS IN THE LITERATURE
ACCOMPANYING THE APPLIANCE.

This equipment has been designed and
manufactured to meet international safety
standards but, like any electrical equipment,
care must be taken if you are to obtain the best
results and safety is to be assured. So, please
read the points below for your own safety.
They are of a general nature, intended to help
you with all your electronic consumer products
and some points may not apply to the goods
you have just purchased.

• Read these instructions.
• Keep these instructions.
• Heed all warnings.
• Follow all instructions.
• Do not use this apparatus near water.
• Clean only with a dry cloth.
• Do not block any ventilation openings.

Install in accordance with the manufacturer’s
instructions.

• Do not install near any heat sources such as

radiators, heat registers, stoves, or other
apparatus (including amplifiers) that produce
heat.

• This TV is not completely disconnected from a

power supply line, as minute current is
consumed even when the POWER switch is
turned off.

• Do not place hot objects or naked flame

sources, such as lighted candles or nighlights
on, or close to the TV. High temperatures can
melt plastic and lead to fires.

• Do not set on top of the TV any object or

container that might spill liquids or small
objects into the TV.

• Protect the power cord from being walked on

or pinched, particularly at plugs, convenience
receptacles, and the point where it exits the
apparatus.

• Only use attachments/accessories specified by

the manufacturer.

• Use only with the cart, stand, tripod, bracket,

or table specified by the manufacturer, or sold
with the apparatus. When a cart is used, use
caution when moving the cart/apparatus
combination to avoid injury from tip-over.

• Unplug this apparatus during lightning storms

or when unused for long periods of time.

• Refer all servicing to qualified service

personnel. Servicing is required when the
apparatus has been damaged in any way, such
as power supply cord or plug is damaged,
liquid has been spilled or objects have fallen
into the apparatus, the apparatus has been
exposed to rain or moisture, does not operate
normally, or has been dropped.

• The apparatus shall not be exposed to dripping

or splashing and no objects filled with liquids,
such as vases, shall be placed on the apparatus.

CAUTION

: Danger of explosion if battery is incorrectly

replaced. Replace only with the same or equivalent
type.

Important Safety Instructions

Safety Instruction

CAUTION

CAUTION: TO REDUCE THE RISK OF ELECTRIC SHOCK,

DO NOT REMOVE COVER (OR BACK). 

NO USER-SERVICEABLE PARTS INSIDE. 

REFER SERVICING TO QUALIFIED SERVICE PERSONNEL.

RISK OF ELECTRIC SHOCK 

DO NOT OPEN 

NO USER-SERVICEABLE 

PARTS INSIDE

Содержание P7190

Страница 1: ...English Before using this product please read the security instructions first and bear them in mind when using the product OWNERS INSTRUCTIONS TFT LCD TV Built in DVD DivX Option Player 19 20 22 ...

Страница 2: ...place hot objects or naked flame sources such as lighted candles or nighlights on or close to the TV High temperatures can melt plastic and lead to fires Do not set on top of the TV any object or container that might spill liquids or small objects into the TV Protect the power cord from being walked on or pinched particularly at plugs convenience receptacles and the point where it exits the appara...

Страница 3: ...d of correctly you will help prevent potential negative consequences for the environment and human health which could otherwise be caused by inappropriate waste handling of this product The recycling of materials will help to conserve natural resources For more detailed information about recycling of this product please contact your local city office your household waste disposal service or the sh...

Страница 4: ...screws using a screwdriver Attach the arm to the fixed board first Do not use the handle screws for fixing the stand and the handle screws to fix the arms Use only the screws attached for the arms M4 x 10 screws with a diameter of 4 mm and a length of 10 mm If you use the stand screws to fix the arms the LCD TV may be fall and get damaged because the arms are not fixed completely To reattach the r...

Страница 5: ...on on a table Tilt the stand by about 45 degrees to the right and then put it together with the TV like the picture below When the stand is engaged with the TV set spin it counterclockwise to fix it on the TV Following the Picture 3 turn the screw in the bottom of the stand to hold it in place ...

Страница 6: ... procedures Install the arms following the procedures given below 1 Remove all cables connected to the LCD TV 2 Lay the LCD TV face down on a flat surface with a cushion or some type of soft material to protect the screen 3 Using a screwdriver remove the screws fixing the stand 4 Install the steel frame of the arms insert the attached screws into the screw holes of the LCD TV and then fasten the s...

Страница 7: ...oundtrack 17 Selecting the AVC mode 18 Changing the Screen Size 18 Setting the Clock 18 Setting the On Off Timer 19 Selecting the ON Timer Channel 19 Setting the Sleep Timer 19 TTX Function Teletext 20 Displaying the Teletext Information 20 Selecting a Page by Number 20 Using FLOF to Select a Page 21 PC Function Connecting to a PC 21 Adjusting the PC 22 DVD Function Depend on the model Playing DVD...

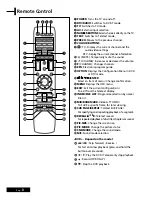
Страница 8: ...simultaneously PROG Changes channels or MOVE to items on the on screen menu ˆ VOL Increases or decreases the volume This is also used to select the MOVE PREV item on the on screen menu Ø POWER Turns the TV on and off DVD Depend on the model OPEN CLOSE OPEN CLOSE the DVD PLAY PAUSE Play the DVD or temporarily stop playback ...

Страница 9: ...DIO INPUT JACK POWER INPUT CONNECTOR ˆ HDMI INPUT DVI INPUT VIDEO AUDIO L R JACK Ø COMPONENT JACKS VIDEO Y Pb Pr AUDIO L R CI INPUT JACK VIDEO VIDEO AUDIO INPUT JACKS S VIDEO INPUT JACK HEADPHONE JACK Used for headphones that can be purchased additionally For more details on connections see page 9 11 ...

Страница 10: ...ENTER Select an item of menu Change confirmation ı MENU Displays the OSD menu EXIT Exit the current configuration To exit from the teletext display INDEX FILE LIST Programme selection by name File list MIX BOOKMARK Video TTX MIX To SAVE a specific frame for later viewing SUB PAGE REPEAT Teletext SUB PAGE For specifying and repeating playback of a segment REVEAL Aœ B Teletext reveal Forrepeatedplay...

Страница 11: ...tter video quality If your VCR does not support stereo sound connect the mono audio out jack to the AUDIO INPUT left jack Procedures for watching a video over a VCR Turn the TV on and select VIDEO using the AV button on the remote control If you have connected a S Video cable select S Video Connecting the Video or S Video Audio Jacks Connecting an Antenna or Cable without a Decoder box VHF UHF or ...

Страница 12: ...output jacks of your DTV Receiver with the audio cable 480p 60Hz 576p 50Hz 720p 50Hz 720p 60Hz 1080i 50Hz 1080i 60Hz ˇ VESA Standard Mode Resolution Vertical Fraequency refer to page 50 Audio Cable DVI Cable DVI to HDMI adapter DTV Receiver Connection Procedures Œ AV output is used for the equipment with an RGB output such as video game devices or video disc players This end can be fitted with A S...

Страница 13: ...cted properly Is the AC adapter connected properly When you connect the adapter to the unit turn the power switch on the front panel to off and then connect the adapter cable When not using the adapter for a long time period separate the AC adapter from both the main body and the power outlet on the wall ˇ Are the remote control batteries installed properly Install two AAA size batteries according...

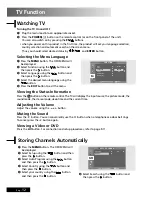
Страница 14: ...ings To cancel press the button again Muting the Sound Press the AV button For connection and setup procedures refer to page 9 11 Viewing a Video or DVD Œ Press the MENU button The OSD MENU will be displayed Select Function using the button and then press the button ˇ Select Language using the button and then press the button Select the desired menu language using the button ˆ Press the EXIT butto...

Страница 15: ...cy range until the first channel on the channel that you selected is received on your screen Select Store using the button and then press the button And press the button to select the OK Repeat Step 5 to 7 for each channel to be stored Manual Storing of Channels Œ Press the MENU button The OSD MENU will be displayed Select Setup using the button and then press the button ˇ Select Manual program us...

Страница 16: ...llowing programs are shifted up one position Delete a Program Œ Select a program to the copied with the buttons Press the BLUE button All the following programs are shifted down one position Copy a Program Œ Select a program to the moved with the buttons Press the GREEN button ˇ Move the program to the desired program number with the buttons Press the GREEN button again to release this function Mo...

Страница 17: ...your personal preferences Use fine tune to adjust a particular channel for better picture quality when noise interferes color quality is poor or the screen is unstable Œ Select the channel to tune using the numeric or P Press the MENU button The OSD MENU will be displayed ˇ Select Setup using the button and the press the button Select Manual program using the button and then press the button ˆ Sel...

Страница 18: ... this order Adjusting the Picture Settings PICTURE Status Contrast Brightness Sharpness Color Tint Color Temperature Standard Normal œ œ Selecting the Sound Mode MOVE ADJUST EXIT You can select a sound mode from among STANDARD MUSIC SPEECH or USER mode according to your personal preference Œ Press the MENU button The OSD MENU will be displayed Select Sound using the button and then press the butto...

Страница 19: ...he Sound Status is automatically changed to User mode ˆ Press the EXIT button to exit the menu SOUND Sound Mode Bass Treble Balance Stereo Dual AVC Standard MONO MAIN On œ œ œ œ Adjusting the BALANCE MOVE ADJUST EXIT Type of broadcast Standard broadcast Regular NICAM MONO NICAM STEREO NICAM DUAL Standard broadcast Bilingual or DUAL STEREO Quick Pressing the M S button Whenever you press this butto...

Страница 20: ...e to 16 9 wide mode default 4 3 Sets the picture to 4 3 normal mode This is a standard TV screen size ZOOM1 Magnifies the size of the picture on the screen ZOOM2 Magnifies the size of the picture on the screen leaving the subtitles visible Note You can select only WIDE 4 3 screen size in the PC HDMI Mode 1 2 Œ Press the MENU button The OSD MENU will be displayed Select Function using the button an...

Страница 21: ...n Ø Move to the Hours using the button and then set the Hour to AM 6 using the button Move to the Minute using the button and then set the Minutes to 10 using the button Press the button to finish the On time configuration Press the EXIT button to exit the menu For Off timer setting select Off time instead of On time Œ ˇ STEP1 STEP3 is the same as that of Setting the clock Select Program No using ...

Страница 22: ...vice using the P or P button Press the TEXT button to activate the teletext mode Result The contents page is displayed It can be redisplayed at any time by pressing the INDEX button ˇ If you wish to display the actual broadcast at the same time as the teletext page press the MIX button again Press the TEXT button to exit from the teletext display Displaying the Teletext Information You can enter t...

Страница 23: ...PUT mode ˇ Adjust the PC screen For adjustment procedures refer to page 22 PC Function The various topics included in the teletext pages are colorcoded and can be selected by pressing the colored buttons on the remote control Œ Display the teletext contents page by pressing the MIX button Press the coloured button corresponding to the topic that you wish to select the available topics are given on...

Страница 24: ...ct H POSITION using the button and adjust the horizontal position using the button Adjusting the Vertical Position Select V POSITION using the button and adjust the vertical position using the button Initializing Settings RESET Select RESET using the buttons and then select using the button This returns you to the factory default screen ˆ Press the EXIT button to exit the menu Auto Adjust You can ...

Страница 25: ... X1 16 X1 32 X1 64 NORMAL ˇ Press the button to resume normal playback Searching for a Specific Screen Song DVD Function Dependonthemodel Turn on the power of the TV and external audio system Ensure that the local code of the TV set is matched to that of the disc If not matched your disc cannot be played Œ Press the AV button Insert the DVD Ensure that the labeled surface is at the front when plac...

Страница 26: ... to change the audio soundtrack language to a different language from the one selected at the initial settings This operation works only with discs on which multiple audio soundtrack languages are recorded If the loaded disc supports multiple languages you can select the audio language Œ Press the OPTION button The DVD MENU will be displayed Select AUDIO using the button and then press the ENTER b...

Страница 27: ...nd then press the ENTER button ˇ Each press of the ENTER button changes the zoom mode in the following order X1 5 X2 X3 OFF If you press the button during the zoom mode the zoom point will shift To resume normal playback select the ZOOM and then press the ENTER button repeatedly until the repeat mode indicator disappears on screen This function is activated for only DVD playback Viewing from anoth...

Страница 28: ...tton Select Track press the track number using the numeric button C T GO TO 00 00 00 This function is used to go to the Chapter Track or Song of the disc you want Program play DIRECT Search GO TO for DVD Œ Press the OPTION button The DVD MENU will be displayed Select GOTO using the button and then press the ENTER button ˇ Select the item using the button and press the ENTER button Chapter Press th...

Страница 29: ...s select ISO9660 level 1 as the writing software format Playing MP3 Discs Playback of a CD CD RW disc that contain a DIVX files CAUTION This subtitle is selectable only when it s name is same with the title s To Play a DIVX File Œ Insert the DIVX disc Make sure that the disc s label is facing up Using the button to find the desired folder ˇ Using the button to select the desired a divx files Press...

Страница 30: ...he picture you want to see by pressing the button ˇ Press the ENTER button The selected item is displayed as a full size picture Changing the Size of the Screen Œ Press the OPTION button The DVD MENU will be displayed Select ZOOM using the button and then press the ENTER button Each press of the ENTER button changes the zoom mode in the following order 25 50 100 default 150 200 Image Rotation Œ Pr...

Страница 31: ... mode 11 It displays from horizontal blind mode RAND It displays at random NONE Starting MUSIC slide show Œ Press the OPTION button The DVD MENU will be displayed Select SUBTITLE using the button and then press the ENTER button at STOP mode SLIDE SHOW MODE1 SLIDE SHOW MODE2 SLIDE SHOW MODE3 SLIDE SHOW OFF will be selected repeatedly ˇ Starting slide show mode 1 After selecting SLIDE SHOW MODE 1 pr...

Страница 32: ...to display the DVD MENU b Press the button to select SETUP and then press the ENTER button FUNCTION Size Time Language Sleep DVD Setup DTV Setup Wide English Off œ œ œ MOVE ADJUST EXIT Video Setup For selecting TV screen ratio Press the button to move to Video Setup ˆ Press the button to move to desired item And press the ENTER button Ø Press the button to select desired item TV DISPLAY 4 3 PS Cho...

Страница 33: ...s applied If you use DVD option the JPG logo is not applied Parental Set a password and select rating level for DVD s unsuitable for children Dynamic For increasing the output of the audio only 4 4 3 4 2 4 1 4 OFF Selecting OFF returns to the default value Speaker Setup Press the button to move to Speaker Setup ˆ Press the button to move to desired item And press the ENTER button Ø Press the butto...

Страница 34: ...hz and must conform to the AVI file specification Note Our solution support a maximum constant 6Mbps bitrate Support all resolution up 720 X 480 30fps to maximum of 720 X 576 25fps Macroblocks per second 40500 Maximum average bitrate 4000 kbps Maximum peak bitrate 10000kbps during any 3 seconds of video Minimum VBV buffer size kbytes 384k bytes DivX option DivX Function Dependonthemodel Password C...

Страница 35: ...ou stop playback play a different video or trun off your player Do you want to use one of your X views now If you select YES button it will playback otherwise it will show you list of files Note If you tried to play back anything over X view If will show you following message This rental is expied and will not play back If you tried to play back expired rental disc it will show you following messa...

Страница 36: ...ound by an automatic scan In this instance the user may use the Main Menu to automatically scan again or perform a manual scan First Time Installation Welcome Choose your Country Continue installation Belgium A Main Menu is provided to enable the user to configure elements of the DVB T Œ Press the MENU button The OSD MENU will be displayed Select Function using the button and then press the button...

Страница 37: ...will be displayed Select LIST using the button and then press the ENTER button to display the CHANNEL LIST see below for an example This shows a TV channel selected When a radio channel is selected the picture frame will be blank The Channel List presents a list of all channels found during the channel search described earlier The list comprises radio and TV channels They have been allocated a cha...

Страница 38: ... f 3 G H I 3 g h i 4 J K L 4 j k l 5 M N O 5 m n o 6 P Q R 6 p q r 7 S T U 7 s t u 8 V W X 8 v w x 9 Y Z 9 y z 0 SP 0 Use the number buttons 0 9 to modify this character using the table below Channel List 1024 Eurosport ABCD Sport 1024 Eurosport 1025 Hamburg 1 1026 NEUN LIVE Televidion 1027 TERRA NOVA Select Delete Edit Name Lock Move Cancel Enter Name Update More To Delete a Channel Use to step a...

Страница 39: ...will be displayed briefly When a valid number is entered the channel will be played Initial password is 0000 X X X X To Move a channel key on function button and reach to Move button Press ENTER key enter moving Use key to change the position of the selected channel When key to choose destination position of the moved channel User Press give warning information to tell if user want to cancel movin...

Страница 40: ...services selected as favourites and all EPGs will only show the services in the current favourite list It is still possible to select a service using the service s number even if it is not a member of the currently selected favourites list The Favourites dialog cannot be accessed if there are no services available Changing Channel You can change channels by using any of the following methods Chann...

Страница 41: ... brackets and a synopsis of the programme content A user may select a service by highlighting a program in the now list and pressing the ENTER key The Now Next Electronic Program Guide cannot be accessed if there are no services available Now Next EPG Wed 26 1 19 24 Navigate Schedule Watch Event Channels Current Event Next Event 1024 Eurosport Elskunstlauf Eurosport Spezial 1025 Hamburg 1 No Inorm...

Страница 42: ...il for the programme playing now or the programme highlighted in the schedule list using the yellow and blue keys respectively The A full screen dialog with schedule list presents the user with two lists and an information panel The leftmost list displays all available services the current selected service is displayed in the title bar of this list The rightmost list displays two hours of schedule...

Страница 43: ...l The configuration settings are now as they were set at the time you pressed the EXIT button Configuration 1024 Eurosport Time Zone DST Subtitle Banner Favourite Mode Channel List Parental Settings HW5376 257_SW2 0 208 GMT 2 sec Off Off Off Show all Subtitle On Off More To Display the Configuration Press the OPTION button The DTV MENU will be displayed Select OPT using the button and then press t...

Страница 44: ...e set from the Current Service Banner When multiple language options are available for either subtitles or audio on the current event the icon I II will be displayed on the Current Service Banner The user can then press the Left key to display a dialog and set the current audio or subtitle language for that service The dialog will not be displayed if there are no current language options available...

Страница 45: ...Automatic tuning may be cancelled by the user in such cases the previous list of services is used if already stored When an automatic tune is complete the application will attempt to select the service with the lowest number from the service list and return to normal viewing operation Note that after automatic tuning has been completed successfully all user preferences that are related to services...

Страница 46: ...hoose to scan the selected channel for services a separate dialog is displayed showing the services found whilst scanning is taking place Newly discovered services are merged with the current list of services Manual tuning may be cancelled by the user in such cases any newly discovered services are disregarded When a manual tune is complete the application will attempt to select the previously sel...

Страница 47: ...nformation Smart card information Language Software Download Top Up Tv CI Message Common Interface module inserted Press the OPTION button The DTV MENU will be displayed Select SETUP using the button and then press the ENTER button The DTV OSD MENU will be displayed Select Common Interface using the button and then press the ENTER button to display the Common Interface see below for an example Con...

Страница 48: ...ecification TV out CVBS YUV Audio analogue out Digital Audio out via S PDIF RF input Connector IEC60169 2 female Termination 75 Ω Return Loss min 6dB 75 Ω Loop Through of RF signals Internal connection for 1KX modem protocol for software update service Mode functionality DVB Terrestrial TV and Radio reception Easy to use graphical user interface Multi language support Automatic and manual channel ...

Страница 49: ... The fluorescent tube is out of order Discordance between the external device jack and the input switch button location This is caused by an inherent property of LCD panels Depending on the number of valid pixels there may be black or bright pixels These will be less than 0 005 of the sum of all pixels This is not a problem Possible Solution Check the power cable connectivity to the power connecto...

Страница 50: ... Do not place objects near the wall outlet so that you can unplug the power cable if necessary Duplicated pictures on the screen Blurred or snowy picture This may be caused by reflected broadcasting signals when there is are mountains buildings or trees near your house The direction of the antenna is not optimal The antenna cable is disconnected Check if there are any tall objects such as skys cra...

Страница 51: ... PC Synchronization Dimension mm HDMI Audio Out Power Supply Power Consumption Power Consumption When Power Saving Mode Color Quality Maximum Resolution Separation Signal Display Color Interface Receiver Channels Antenna Interface Video Signal Video Type Applicable disc Do not insert 8Cm 3inch disc MPEG4 ASP Video option Aspect Ration Language Others Screen Size Type Display Color Horizontal F Ver...

Страница 52: ...712 Vertical Frequency Hz 70 086 59 940 70 087 66 667 74 551 75 062 75 000 72 809 56 250 60 317 75 000 72 188 60 004 70 069 75 029 59 992 60 015 Clock Frequency MHz 25 175 25 175 28 322 30 240 57 284 100 000 31 500 31 500 36 000 40 000 49 500 50 000 65 000 75 000 78 750 80 125 85 800 Polarity H V Resolution VESA 1152 X 864 VESA 1280 X 960 VESA 1280 X 1024 VESA 1280 X 1024 VESA 1440 X 900 VESA 1440...

Страница 53: ...51 Eng English Note ...

Отзывы: