


EN-7
EN
No. Name
Function
21
Mark on the
map
You can set the mark by taping on the map. You can save this
mark as a waypoint, add it
to the route or see object’s characteristics the mark was set on.
22
Track record
Track record. Red dot means that the track is recording, grey
dot means that the record stopped.
23
Traffic Jams* Shows the current traffic jams on a 10-point scale.
24
Navitel.SMS*
This button is intended to read/send SMS-messages. Near the
icon you can see the number of unread messages.
25
Software
update*
Shows available updates.
26
«Go!»
Marks the current position on the map as the end of the route
27
«Route through»
Mark becomes the start point on the route. You should turn off
your GPS/GLONASS receiver.
28
«Set start»
Mark becomes the middle point of the route.
29
«Set finish»
Mark on the map becomes the end of the route. And previous
end of the route becomes the middle point.
30
Map
Back to map.
* - This function is available only on some devices with GSM or Bluetooth with
DUN support. Please, refer to your supplier for more information.
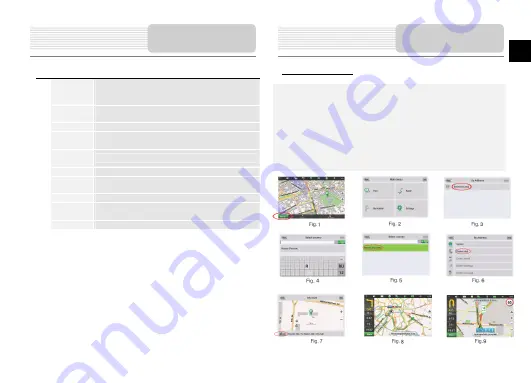
Route to the objects.
To create a route to the object with known address, press the «Menu» button at the lower
left corner of the screen [1]. Then select «Find», «By address» [2]. Press the «Select
country» button and enter its name [4]. To minimize the keyboard, press the icon at the
right top of the screen. Select the required country[5]. Menus «Select city», «Select
street» and «Select building» will become active [6]. After choosing the required
information press «Go!» to create a route. The route will be shown on the map [8]. You
can follow this route or start simulation by pressing the «Demo route» button.
Autorouting
Program interface


