Attach anchors
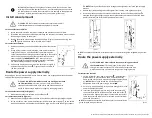
1. Place an anchor on top of an arm frame and secure it using two screws
(Figure 14).
2. Attach the second anchor to the other arm.
Figure 14
Install EFX moving arms
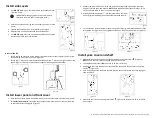
1. Insert the shaft of the moving arm to the center mount
(Figure 15) and align pre-installed set screws to the shaft
(Figure 16).
2. Insert one screw
next to it and fully tighten all screws,
including preinstalled ones to 100 in-lb (11.29 N-m) of
torque.
Figure 15
3. Cut the zip ties holding the link arms together.
4. Place the inner cover between the link pairs and attach the
link to the moving arm using a 9/16-inch socket wrench on
the pre-installed bolts and tighten to 300 in-lb (33.89 N-m)
of torque.
Figure 16
5. Attach the outer link covers (shipped in hardware kit) using
two Plastite® screws
and tighten them to 20 in-lb (2.25
N-m) of torque.
Figure 17
Install fixed arms (800 EFX only)
1. Install the console. For instructions, refer to the console
guide included in the console box.
2. Install two screws
into the upper display (Figure 18).
3. Insert the shaft of the arm to the center mount using two
set screws
. Partially tighten mounting fasteners.
4. Rotate arm assembly up and attach clamp using two flat-
head screws
.
5. Tighten the
fasteners to 100 in-lb (11.29 N-m) of torque
and the
fasteners to 20 in-lb (2.25 N-m).
Figure 18
Attach cup holder
1. Position the cup holder on top of the lower shelf, making sure to catch the
bottom latch in the shelf component.
2. Position your hands on the arrows and press down at the top of the panel.
Figure 19
Complete assembly
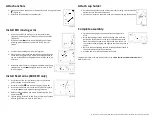
1. Position the badge plate on the front cover and press into
place.
2. Wrap the rubber gasket on top of the badge plate from the
back of the display mount so the split is pointed toward the
front. Press down to snap in two tabs at the back, then walk
your hands around, wiggling and aligning the remaining tabs as
you go.
3. Refer to the corresponding Console Installation Guide (found in
the console box) to attach your console.
4. Plug the power cord into an appropriate outlet.
Figure 20
To properly maintain the equipment, refer to the
Cardio Equipment Maintenance Guide
at
www.precor.com
.
©2020 Precor Incorporated
|
800/600 Line EFX Assembly Guide P/N 305292-101C, ENU
|
Oct 2020
|
4


