4.
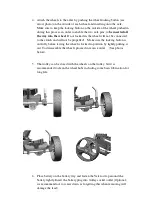
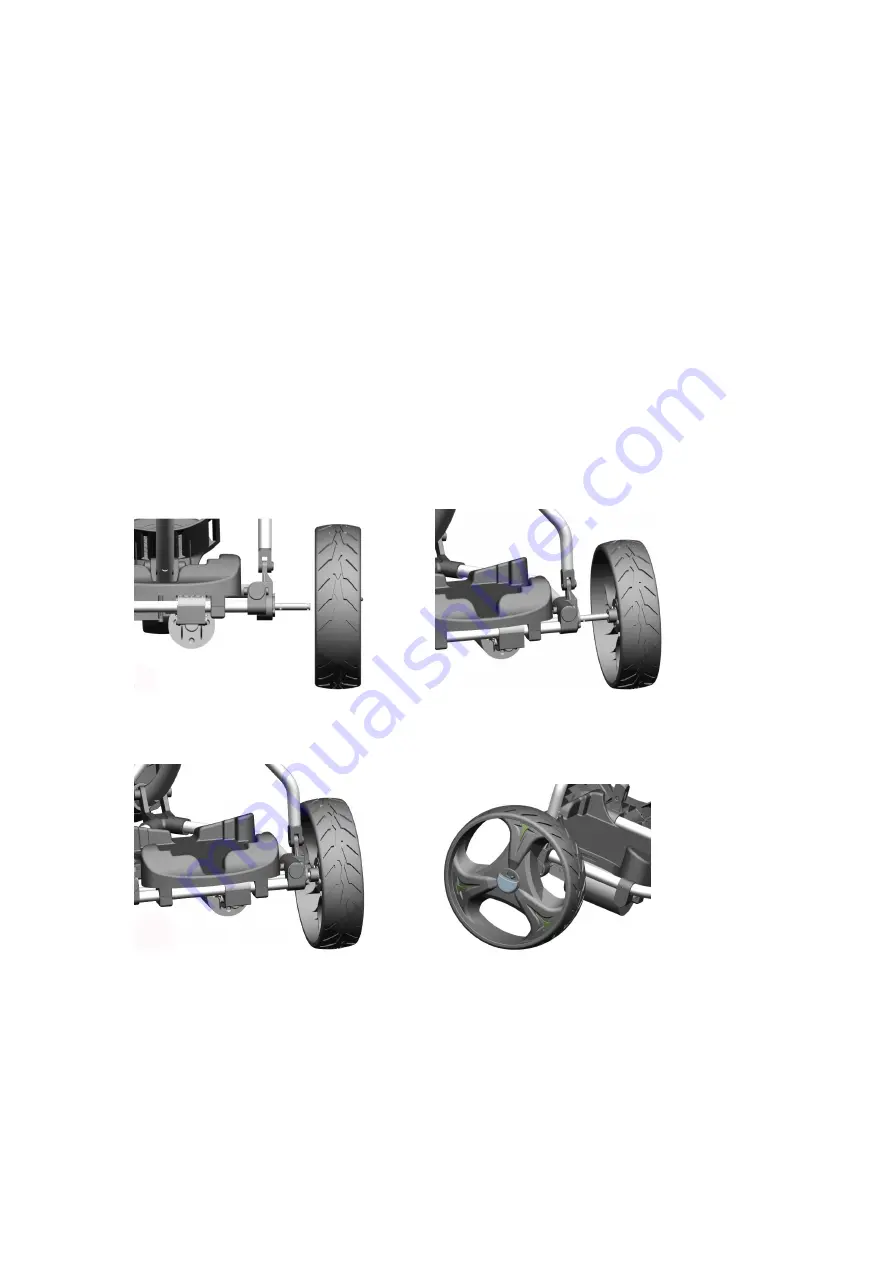
Attach the wheels to the axles by pushing the wheel locking button (see
arrow photo) on the outside of each wheel and inserting onto the axle.
Make sure to keep the locking button on the outside of the wheel pushed in
during this process, in order to enable the two axle pins, to
be inserted all
the way into the wheel
. If not locked in, the wheel will not be connected
to the clutch and will not be propelled! Make sure the locking button is
out fully before testing the wheel is locked in position by lightly pulling it
out. To disassemble the wheels proceed in reverse order. (See photos
below).
5.
The trolley can be stored with the wheels on the trolley, but it is
recommended to clean the wheel hubs including some basic lubrication for
long life.
6.
Place battery on the battery tray and fasten the Velcro strap around the
battery tightly. Insert the battery plug into trolley socket outlet (Optional;
we recommend not to screw down as forgetting this when removing will
damage the lead).

