background image

PowerView

®

 Gen 3 Automation

REMOTE CONTROL GUIDE

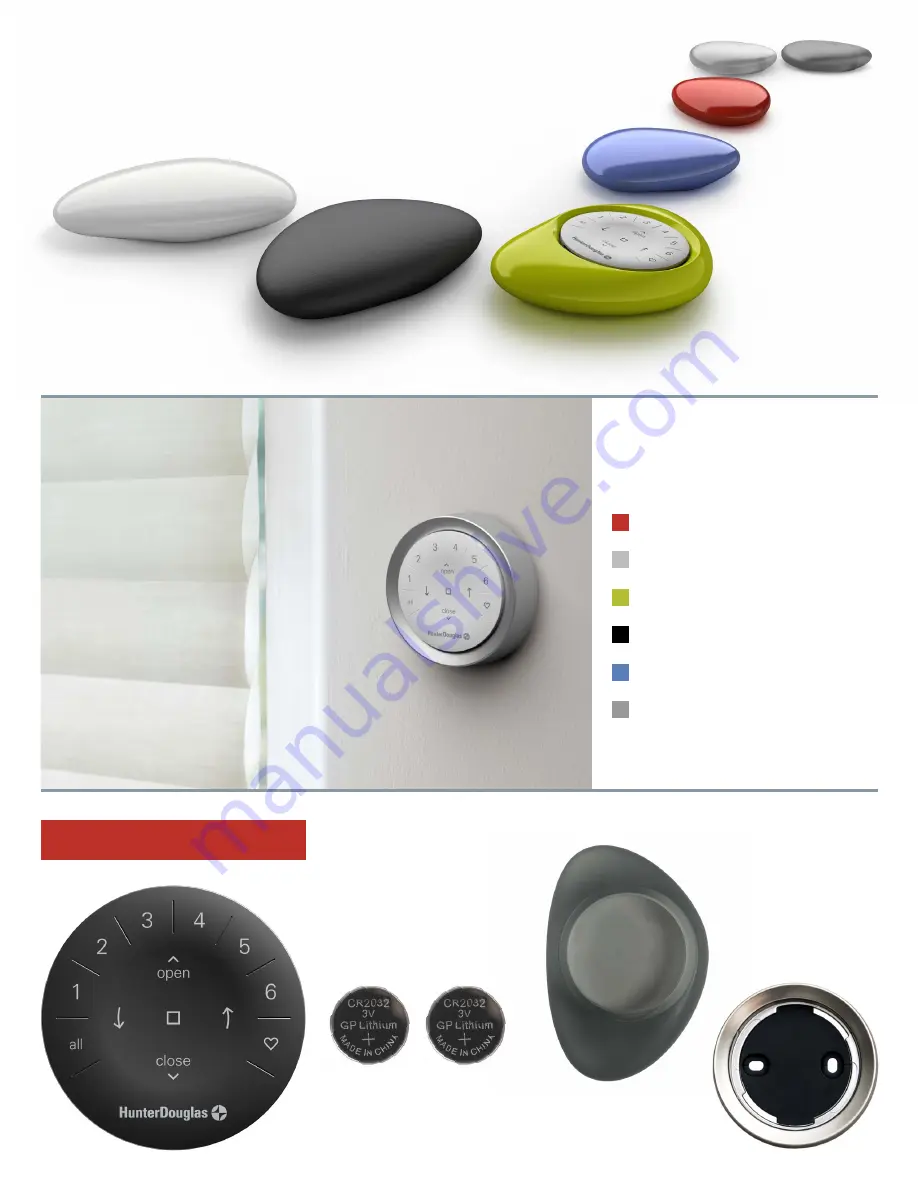
The PowerView

®

 Gen 3 Remote  

has been redesigned with a  
modern look while maintaining its  
compatibility with the PowerView 
Pebble

®

 and Surface. Precisely  

control your Gen 3 window coverings  
throughout your home with the 
touch of a button. The following  
pages provide all the details on  
how to set up and operate both 
remote styles.

Table of Contents

 Key Components. . . . . . . . . . . . . . . . 

1

 Getting Started. . . . . . . . . . . . . . . . . .

2

 Programming. . . . . . . . . . . . . . . . . . . 

3

 Basic Operation. . . . . . . . . . . . . . . . . 

4

 Battery Replacement. . . . . . . . . . . . 

5

 Troubleshooting. . . . . . . . . . . . . . . . .

6

Key Components

GEN 3 REMOTE MODULE

INCLUDED

1

OR

Содержание Gen 3 Automation

Страница 1: ...le and Surface Precisely control your Gen 3 window coverings throughout your home with the touch of a button The following pages provide all the details on how to set up and operate both remote styles Table of Contents Key Components 1 Getting Started 2 Programming 3 Basic Operation 4 Battery Replacement 5 Troubleshooting 6 Key Components GEN 3 REMOTE MODULE INCLUDED 1 OR ...

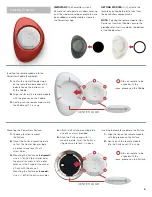
Страница 2: ...ntil it is snug Ribs on remote to be aligned with the grooves on the Pebble CENTER LOGO Mounting the PowerView Surface 1 Choose a location to mount the Surface 2 Orient the Surface mounting plate so that the Hunter Douglas logo is horizontal and level Mark screw holes 3 Mounting the Surface onto drywall Use a 7 32 drill bit to drill pilot holes Tap drywall anchors into the pilot holes until the fl...

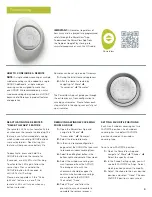
Страница 3: ...RING FROM A GROUP 1 Open the PowerView App and navigate to More Accessories Remotes 2 Select the desired remote 3 In the virtual remote configuration page select the GROUP that you want to remove a window covering from 4 Select the editing tool button in the bottom right hand corner of the screen 5 Select the window covering you want removed from the GROUP The orange circle with the checkmark shou...

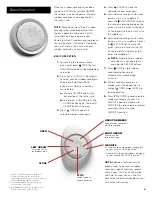
Страница 4: ...iddle rail press the LEFT ARROW to close the vanes rotate the vanes to the left tilt the louvers slats down or fully lower the middle rail a NOTE Single function window coverings will not operate by pressing the ARROW buttons 7 Press STOP to stop window covering vane louver slat movement anywhere along its travel 8 While a window covering is in motion press the opposite of its motion OPEN or CLOSE...

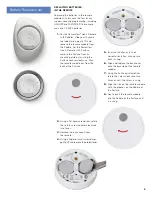
Страница 5: ...er clockwise Push the remote module out from the back of the Surface 2 Using a flat head screwdriver rotate the safety screw counter clockwise two times 3 Remove the back cover from the remote 4 Using a finger or small screwdriver gently lift and remove the old batteries 5 Insert new batteries in their correct orientation making sure each is snug 6 Align and replace the back cover onto the backsid...

Страница 6: ... interference that may cause undesired operation NMB 003 Cet appareil numérique de la classe B est conforme à la norme NMB 003 du Canada L utilisation de ce dispositif est autorisée seulement aux conditions suivantes 1 il ne doit pas produire de brouillage et 2 l utilisateur du dispositif doit être prêt à accepter tout brouillage radioélectrique reçu même si ce brouillage est susceptible de compro...

Отзывы: