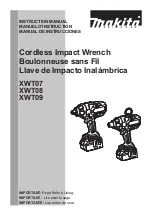
background image

 9 

ASSEMBLY INSTRUCTION


WARNING:  

Do not use this product if any parts on the packing list are already assembled to your product 

when you unpack it. Parts on this list are not assembled to the product by the manufacturer   

and require customer installation. Use of a product that may have been improperly assembled 

could result in serious personal injury. 

WARNING:  

If any parts are damaged or missing do not operate this product until the parts are replaced. 

Use of this product with damaged or missing parts could result in serious personal injury. 

WARNING:  

Do not attempt to modify this product or create accessories not recommended for use with this 

product. Any such alteration or modification is misuse and could result in a hazardous 

condition leading to possible serious personal injury. 

WARNING:  

Do not connect to power supply until assembly is complete. Failure to comply could result in 

accidental starting and possible serious personal injury. 


INSTALLING OR REMOVING DRIVER BIT/ SOCKET BIT 


To install the driver bit, pull the sleeve in the direction of the arrow 

and insert the driver bit into the sleeve as far as it will go (see fig.3). 

Then release the sleeve to secure the driver bit. 


To remove the driver bit, pull the sleeve in the direction  of the 

arrow and pull the driver bit out. 


WARNING: 

After inserting the driver bit, make sure that it is firmly secured. If it comes out, 

do not use it. Pull the sleeve forward, push the insert tool to the stop into the tool holder and 

release the sleeve to lock the insert tool. 


INSTALLING AND REMOVE THE BELT HOOK 


WARNING:

  Always be sure that the tool is switched off and the battery cartridge is 

removed before carrying out any work on the tool. 


Align the belt hook with the mounting hole of the base and tighten the screw. The belt hook can be 

installed from the other side according to the operation habit.


CONNECTING AND REMOVING BATTERY 

IMPORTANT!   

The battery pack is not charged when it is purchased. Before using the power tool for the first time, place 

the battery pack in the battery charger and charge. Make sure to read all safety precautions, and follow the 

instructions in the battery charger section. 


To install the battery pack 

To install the battery pack into the bottom of the handle, align the rails of the battery pack with the rails in 

the handle and push the battery into the handle. To connect the battery, slide the battery pack fully 

forward. Until the latch locks into place. 


Fig.3 

Содержание PS76425

Страница 1: ...1 4 in Impact Driver Model PS76425 Have product questions or need technical support Please feel free to contact us Website www Amerisuninc com www powersmartusa com Toll free 1 800 791 9458 M F 9 5 ES...

Страница 2: ...2...

Страница 3: ...ssembly instruction 9 Operating instruction 10 Maintenance 12 Trouble shooting 12 Exploded view 13 Parts list 14 Warranty 15 TECHNICAL DATA 20 V Cordless 1 4 in Impact Driver Model PS76425 Rated Volta...

Страница 4: ...t encounter SAFETY INFORMATION Before operating this power tool read and observe all warnings cautions and instructions on the power tool and in this Owner s Manual NOTE The following safety informati...

Страница 5: ...power tool Keep cord away from heat oil sharp edges or moving parts Damaged or entangled cords increase the risk of electric shock When operating a power tool outdoors use an extension cord suitable...

Страница 6: ...and the work to be performed Use of the power tool for operations different from those intended could result in a hazardous situation BATTERY TOOL USE AND CARE Recharge only with the charger specifie...

Страница 7: ...insertion pull on bit to ensure it is locked Do not use dull or damaged bits and accessories Dull or damaged bits have a greater tendency to bind in the workpiece Do not touch the bit or the workpiec...

Страница 8: ...n openings 2 Control switch 6 Handle 3 Switch trigger 7 Battery pack 4 Lamp 8 Belt hook 9 Screw Unpacking Unpack the power tool and all its parts and compare against the list below Do not discard the...

Страница 9: ...will go see fig 3 Then release the sleeve to secure the driver bit To remove the driver bit pull the sleeve in the direction of the arrow and pull the driver bit out WARNING After inserting the driver...

Страница 10: ...ight position CONTROL SWITCH ACTION This tool has a control switch to change the direction of rotation see fig 4 Depress the control switch lever to the far left for clockwise rotation Depress the con...

Страница 11: ...crews nuts Type of backing washer disc spring seal Strength properties of the material being screwed bolted together Lubrication conditions at the screw bolt connection IMPORTANT CHARGING NOTES WARNIN...

Страница 12: ...al solvents and may be damaged by their use Use clean clothes to remove dirt oil grease etc Ensure that no water can seep into the device The ingress of water into an electric tool increases the risk...

Страница 13: ...13 EXPLODED VIEW...

Страница 14: ...04 4 outer ring 1 19 PS76425 19 1 Cable 2 4 5 PS76425 04 5 Spring 1 PS76425 19 2 Cable 2 4 6 PS76425 04 6 Output shaft 1 20 PS76425 20 Heat shrink tubing 4 5 PS76425 05 Heavy hammer assembly 1 21 PS7...

Страница 15: ...riginal receipt which lists the date of purchase month and year and the name of the company purchased from THIS LIMITED WARRANTY DOES NOT APPLY TO ANY ACCESSORY ITEMS INCLUDED WITH THE TOOL SUCH AS CI...

Отзывы: