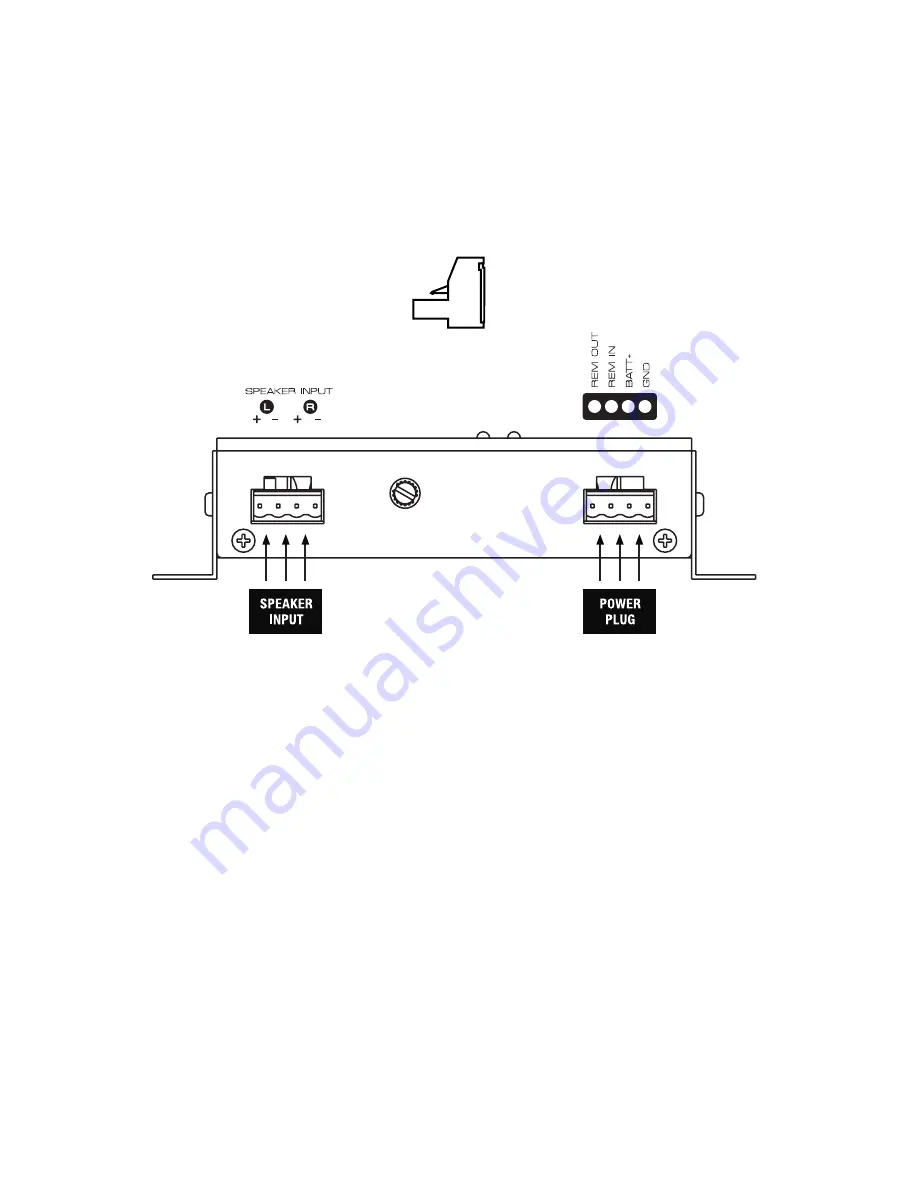
POWER WIRING AND SIGNAL CONNECTIONS
Use the supplied 4-pin wiring plugs to wire up the Power and Speaker connections on the side panels of the
Line Output Converter. Carefully follow the markings on the top of the ACL-2 for proper wire location. The silver
set screws on the top of the 4-pole wiring plug should face up. Fig. 3
REM OUT (Remote Out)
The ALC-2 is equipped with a signal sensing circuit that can detect a signal on its input to provide a +12 volt
output signal to turn on an aftermarket amplifier. Prepare the remote-out turn on wire for attachment to the
power plug the same way you did for the power and ground. We recommend using a 18-gauge wire (prefer-
ably with a blue jacket). Insert one end into the REM OUT location on the power plug and the other end to the
remote terminal on the amplifier.
REM IN (Remote In)
The Remote-In on the ALC-2 can be activated one of two ways, by traditional hard wiring or using the built in
auto sensing circuitry. The auto sensing circuitry is triggered by the voltage from the High or Low inputs. A
6mV offset (RCA input) and 3V offset (Speaker input) will be detected when your source unit has been turned
on and eliminates the need to run a dedicated wire to the source unit. For hardwiring, prepare a Remote In
turn on wire for attachment to the power plug in the same way you did for the power and ground.
We recommend using an 18-gauge wire (preferably with a blue jacket). Insert one end into the REM IN location
on the power plug and connect the other end to the remote lead from the car radio (source unit). This remote
lead from the source unit will trigger a +12 volt output only when the car radio is turned on. If the source unit
does not provide a remote turn on, this method will turn on and off the ALC-2 with the key when the source
unit is on or off.
Fig. 4
7
Fig. 3 Wiring Plug (Silver
screws on top)


