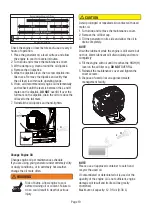


Long Term Storage (over one year)
For long term storage, the gasoline tank and
carburetor must be drained of gasoline.
1 - After engine cools down, remove all gasoline
from the fuel tank using non-conductive siphon.
2 - To remove the remaining gasoline in fuel system:
a-Keep the fuel valve open and run the engine
until it stops from lack of fuel.
Or
b-Keep the fuel valve open and drain carburetor
float bowl.
3 - Change the engine oil.
4 - Remove the spark plug.
5 - Pour tablespoon( 5-10cc) of clean engine oil into
cylinder.
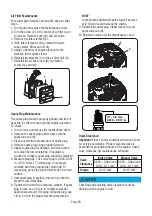
STORAGE
It is recommended to start and run the generator for
30 minutes, every 30 days. If this is not possible,
refer to below short term and long term storage.
Short Term Storage
Fill the tank with fresh gasoline and add gasoline
stabilizer. Drain the carburetor float bowl.
1 - Add a properly formulated FUEL STABILIZER to
the tank if it is not already added.
2 - Run the engine for 10-15 minutes to circulate
stabilizer throughout fuel system.
3 - Allow the generator to cool a minimum of 30
minutes and then drain the carburetor float bowl.
4 - Clean the generator and store in a cool, dry and
well ventilated area out of direct sunlight.
Page 21
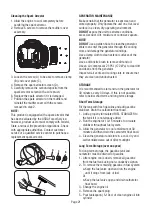
GENERATOR MAINTENANCE
Make certain that the generator is kept clean and
stored properly. Only operate the unit on a flat, level
surface in a clean, dry operating environment.
DO NOT
expose the unit to extreme conditions,
excessive dust, dirt, moisture or corrosive vapours.
NOTE:
DO NOT
use a garden hose to clean the generator.
Water can enter the generator through the cooling
slots and damage the generator windings.
Use a damp cloth to clean exterior surfaces of the
generator.
Use a soft bristle brush to remove dirt and oil.
Use an air compressor 25 PSI (172 kPa) to clear dirt
and debris from the generator.
Inspect all air vents and cooling slots to ensure that
they are clean and unobstructed.
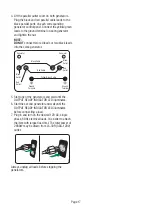
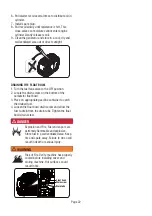
Cleaning the Spark Arrestor
1. Allow the engine to cool completely before
servicing the spark arrestor.
2. Remove 6 screws to remove the muffler cover
assembly.
3. Loosen the screw (A) to be able to remove clamp
(B) and cover plate (C).
4. Remove the spark arrestor screen (D).
5. Carefully remove the carbon deposits from the
spark arrestor screen with a wire brush.
6. Replace the spark arrestor if it is damaged.
7. Position the spark arrestor on the muffler and
reinstall the muffler cover with the screws
removed in step 2.
NOTE:
This product is equipped with a spark arrestor that
has been evaluated by the USDA Forest Service;
however, product users must comply with Federal,
State, and local fire prevention regulations. Check
with appropriate authorities. Contact customer
service or a qualified service center to purchase a
replacement spark arrestor.
A
B
C
D
Содержание SUA2000i
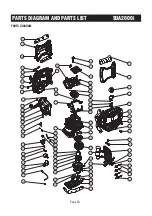
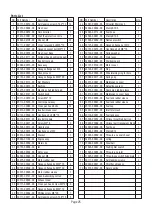
Страница 26: ...Page 24 PARTS DIAGRAM PARTS DIAGRAM AND PARTS LIST SUA2000i ...
Страница 31: ......
Страница 32: ......
Страница 33: ......
Страница 34: ...Fontana CA 92337 USA Phone 1 855 888 3598 support a ipower com www a ipower com ...
Страница 36: ...Fontana CA 92337 USA Phone 1 855 888 3598 support a ipower com www a ipower com ...
Страница 64: ...Página 26 DIAGRAMA DE PIEZAS DIAGRAMA DE PIEZAS Y LISTA DE PIEZAS SUA2000i ...
Страница 69: ......
Страница 70: ...Fontana CA 92337 EE UU Teléfono 1 855 888 3598 support a ipower com www a ipower com ...
Страница 72: ...Fontana CA 92337 EE UU Teléfono 1 855 888 3598 support a ipower com www a ipower com ...
Страница 99: ...Page 25 SCHÉMA DES PIÈCES SCHÉMA DES PIÈCES ET LISTE DES PIÈCES SUA2000i ...
Страница 104: ......
Страница 105: ......
Страница 106: ...Fontana CA 92337 USA Téléphone 1 855 888 3598 support a ipower com www a ipower com ...
Страница 108: ...Fontana CA 92337 USA Téléphone 1 855 888 3598 support a ipower com www a ipower com ...