12
7. REPLACEMENT PARTS
For replacement parts (batteries, nozzles, etc.), contact Vector customer service:
(954) 584-4446 or toll-free (866) 584-5504.
7.1 Battery Replacement
It is recommended that the unit be returned to Vector customer service for battery
replacement: Contact (954) 584-4446 or toll-free (866) 584-5504.
WARNING:
• Do not dispose of the battery in fire as this may result in an explosion
• Before disposing of the battery, protect exposed terminals with heavy-duty electrical
tape to prevent shorting (shorting can result in injury or fire)
• Do not expose battery to fire or intense heat as it may explode
7.2 Battery disposal:
This unit contains a maintenance-free, non-spillable, sealed, lead-acid battery.
This battery is fully recyclable and should be accepted at any location that
accepts common automotive starter batteries. Examples of places that accept
these batteries are: County or municipal recycling drop-off centers, scrap metal
dealers and retailers who sell automotive replacement lead acid starter batteries.
For more information on recycling this battery, call toll-free (877) 288-7722.
8. SPECIFICATIONS
Model . . . . . . . . . . . . . . . . . . . . . . . . . . . . . . . . . . . . . . . . VEC012POB
Boost Ampere . . . . . . . . . . . . . . . . . . . 450 Instantaneous Cranking Amps
Continuous Cranking . . . . . . . . . . . . . . . . . . . . . . . . . . . . . . . 250 Amps
Battery Type . . . . . . . . . . . . Sealed, high energy density, AGM, lead-acid,
rechargeable, maintenance-free, 12 volt DC,
19 Amp-hour
Area Light . . . . . . . . . . . . . . . . . . . . . . . . Long life, ultra bright Twin LEDs
Booster Cables . . . . . . . . . . . . . . . . . . . . . Heavy duty welding cable with
450 Amp copper clamps
Accessory Outlet . . . . . . . . . . . . . . . . . . . . Self-Resetting Breaker 5 Amps
Air Compressor . . . . . . . . . . . . . . . . . . . . . . . . . . . . . . . . . . . . . 260 PSI
Gauge . . . . . . . . . . . . . . . . . . . . . . . . . . . . . . . . . . . . . . Lighted Analog
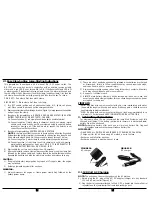
DC Charging Adapter . . . . . . . . . . . . . . . . . . . . . . . . . . . . . . 12 volt DC
AC Charging Adapter . . . . . . . . 120 volt AC (700mA, 12 volt DC Output)
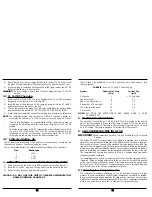
6.2 Tire Inflation or Products with a Valve Stem
1) Place connector (chuck) on valve stem.
2) Push connector toward valve stem and close thumb latch.
3) Make sure connector is pushed onto valve stem as far as possible before closing
thumb latch.
4) Check pressure with the pressure gauge.
5) When desired pressure is reached, turn Off compressor power switch.
6) Open thumb latch and remove connector from valve stem.
7) Store compressor hose and tire fitting in storage compartment.
IMPORTANT:
Always leave the thumb latch in the open position when
storing unit.
6.3 Inflating Other Articles (without valve stem)
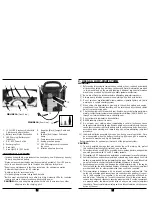
Inflation of other items requires use of one of the adapters (nozzles).
1) Open the hatch and remove the nozzles noting their storage positions.
2) Insert appropriate adapter (e.g. needle) into connector (chuck) and close
thumb latch.
3) Refer to Table III, Typical Inflation Times, for approximate filling pressure and
time. Small items such as volleyballs, footballs, etc. inflate very rapidly.
4) Insert adapter (e.g. needle) into item to inflate to appropriate pressure.
5) Turn on compressor switch - inflate to desired pressure or fullness (refer to
paragraph 6.4).
6) Turn off compressor switch.
7) Remove adapter from item.
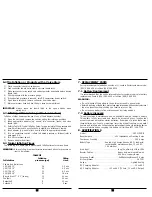
6.4 Typical Inflation Times
The following are approximate pressure and inflation times for various items.
WARNING:
Always follow tire manufacturers recommendations for pressure on
item to be inflated.
TABLE III
Inflation
Filling
Inflatables
pressure (psi)
time
Vehicle and trailer tires
155/80R 13”
26
2.5 min
185/70R 14”
30
4.5 min
235/75R 15”
30
6.5 min
235/85R 16”
50
16 min
Bicycle tires 27” X 1” (racing)
10
40 sec.
Football 13
24
sec.
Basketball 9
20
sec.
Volleyball 5
6
sec.
11


