12
FORWARD/REVERSE SWITCH
The cordless screwdriver is equipped with a
convenient switch that functions as both an
ON/OFF switch and FORWARD/REVERSE
switch.
1.
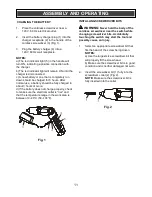
To drive screws, press the right hand side
of the switch (1) (Fig. 3). To turn the switch
OFF, release the switch.
2.
To remove screws, press the left hand side
of the switch (2).
PIVOTING HANDLE
The handle of the cordless screwdriver is
designed to pivot to various angles. This feature
allows you to configure the tool for easier
access in hard to reach locations. It also makes
it easier to apply extra torque in manual mode.
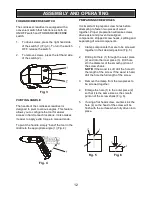
To pivot the handle, simply “bend” the tool in the
middle to the appropriate angle (1) (Fig. 4)
PREPARING SCREW HOLES
It is important to prepare screw holes before
attempting to fasten two pieces of wood
together. Proper preparation will make screws
drive easier and prevent misaligned
components, stripped screw heads, splitting and
separating of wood components.
1.
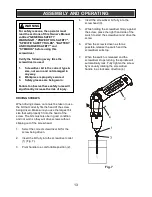
Clamp components that are to be screwed
together in their desired position (Fig. 5).
2.
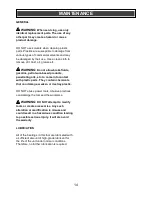
Drill a pilot hole (1) through the outer piece
(2) and into the inner piece (3). Drill hole
2/3 the diameter of the smooth portion of
the screw shank.
NOTE:
If the wood is soft, drill the hole 2/3
the length of the screw. If the wood is hard,
drill the hole the full length of the screw.
3.
Remove the clamp from the two pieces to
be screwed together.
4.
Enlarge the hole (1) in the outer piece (2)
so that it is the same size as the smooth
portion of the screw shank (Fig. 6).
5.
If using a flat head screw, counter-sink the
hole (4) so the head of the screw will be
flush with the surface when fully driven into
place.
ASSEMBLY AND OPERATING
ASSEMBLY AND OPERATING
Fig. 3
Fig. 4
Fig. 5
Fig. 6
Содержание JD500203
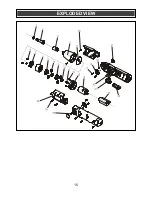
Страница 15: ...15 EXPLODED VIEW ...


