

SS3L / SS3R Series
www.powergenex.com
52
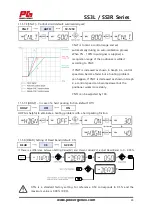
12.4
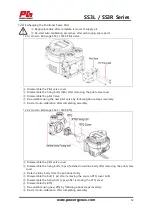
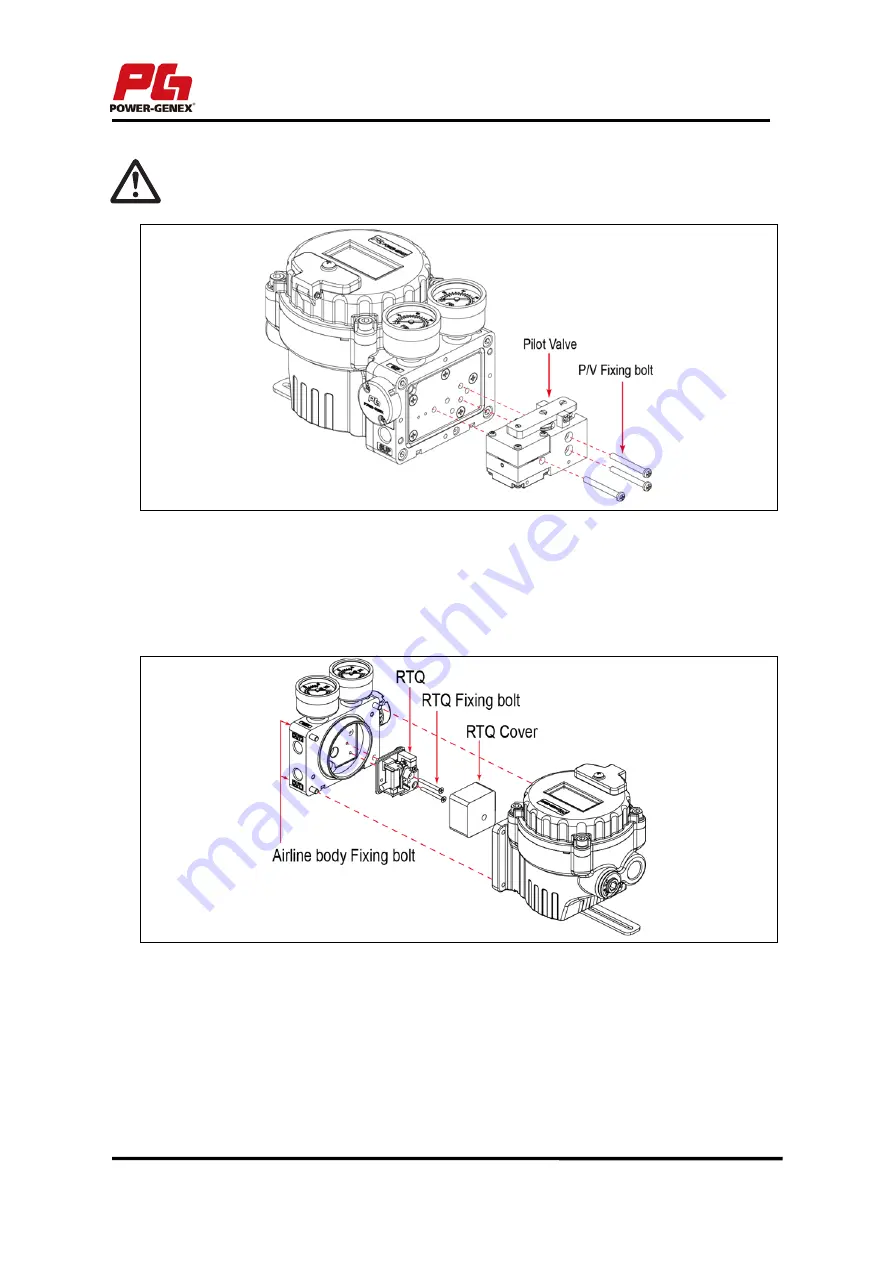
Exchanging the Positioner Spare Parts
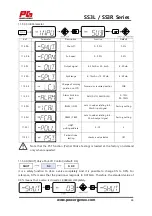
12.4.1 How to Exchange SS3L / SS3R Pilot Valve
① Disassemble the Pilot valve cover.
② Disassemble the fixing bolts (3EA) after removing the pilot valve cover
③ Disassemble the pilot Valve
④ Re-assemble using the new pilot valve by following above steps reversely.
⑤ Re-start auto-calibration after completing assembly
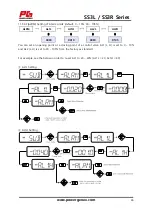
12.4.2 How to Exchange SS3L / SS3R RTQ
① Disassemble the pilot valve cover
② Disassemble the fixing bolts (4 pcs) fastened on airline body after removing the pilot valve
cover
③ Detach airline body from the positioner body
④ Disassemble the bolt (1 pc) after removing the seal on RTQ cover bolts
⑤ Disassemble the fixing bolt (2 pcs) after removing the RTQ cover
⑥ Disassemble the RTQ
⑦ Re-assemble using new RTQ by following above steps reversely.
⑧ Re-start auto-calibration after completing assembly
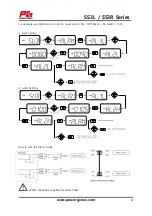
① Begin procedure after complete removal of supply air.
② Re-start auto-calibration procedure after exchanging spare parts