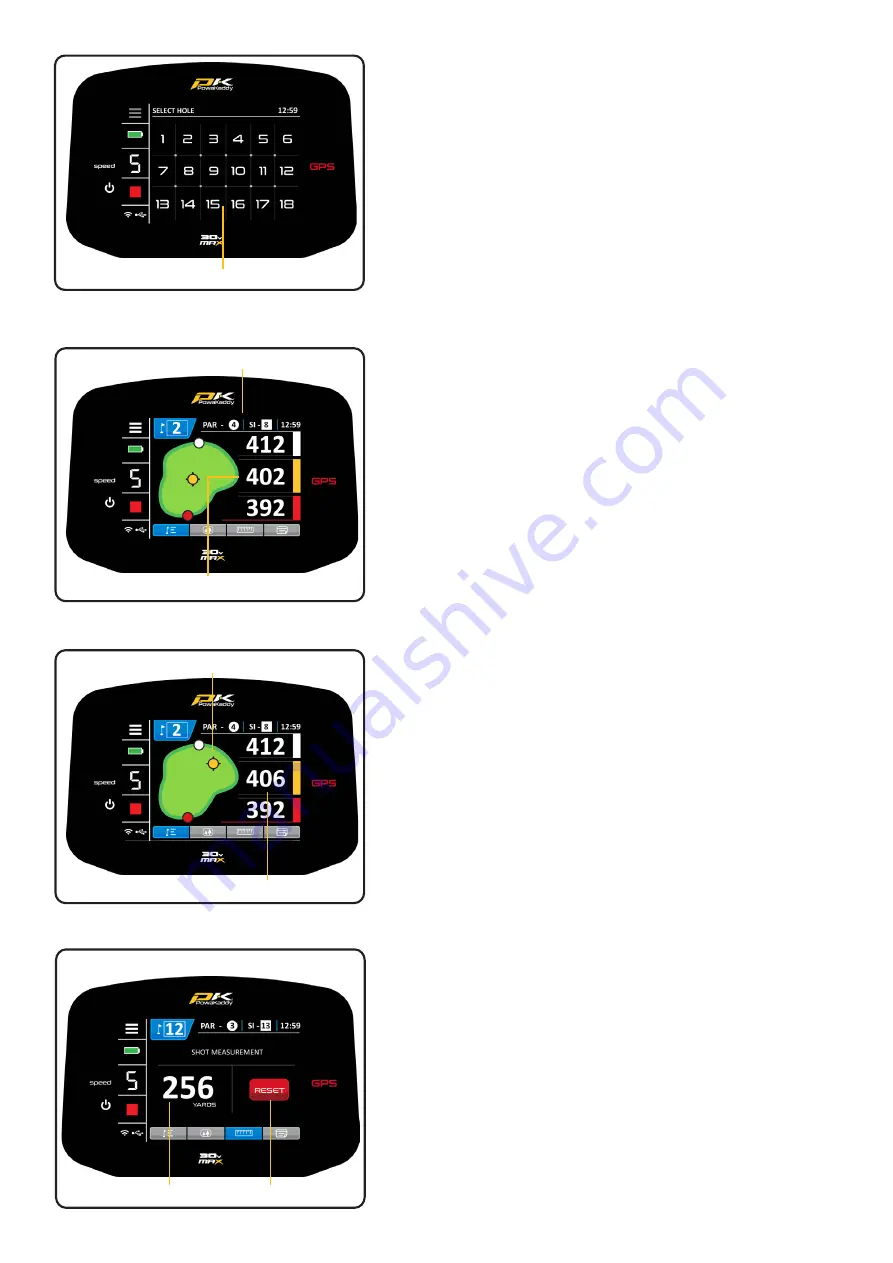
Select Hole from Grid
Par and Stroke Index:
The Par & Stroke Index information is displayed at the top of the
screen. It will update with every hole. Change between Mens &
Womens Par information in the settings menu.
Note: this will not affect the auto-advance function. See Section
11 for more details.
Clock:
The clock, located in the top right corner of the screen displays
the current time using GPS data. Adjust for daylight saving hours
in the Settings Menu. See Section 11 for more details.
Navigate the GPS functions:
•
Swipe across the screen from right to left to navigate
between the Active Green View, Hazard display, Shot
Measure function and the Enter Score screen.
•
Swipe a fourth time to loop back to the Active Green View
screen.
•
Swipe left to right to toggle back through the previous
displays.
Active Green View:
The outline of the green for the selected hole is displayed in the
centre of the screen. Distances to the Front, Centre and Back of
the green are shown on the right hand side of the display.
Drop pin:
To move the Pin (represented by the yellow dot), touch a new
position within the outline of the green. Upon release, the pin
position and distance will update.
Note: The distance units can be changed from Yards to Metres
and vice versa in the Settings menu at any time. See Section 11
for more details.
Shot Measure:
To measure a shot:
•
At your starting point press the red ‘RESET’ button. This will
drop a GPS ‘pin’ and reset the distance to ‘0’. As you start
walking towards you target the display will count up.
•
Repeat the above to start a new measurement.
•
The distance units can be changed from Yards to Metres and
vice versa in the Settings menu at any time. See Section 11
for more details.
Note: the measurement will be ‘as the crow flies’, direct from
your start point to your finish point.
Par & Stroke Index
Distances to the Green
Distance Measured
Reset Button
Shot Measure
Updated Pin Position
New Distance to Pin


