
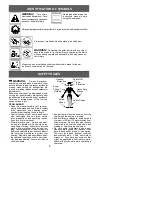


11
S
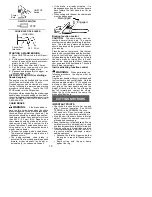
Keep the engine at full speed the entire
time you are cutting.
S
Allow the chain to cut for you. Exert only
light downward pressure. If you force
the cut, damage to the bar, chain, or en-
gine can result.
S
Release the throttle trigger as soon as
the cut is completed, allowing the en-
gine to idle. If you run the saw at full
throttle without a cutting load, unneces-
sary wear can occur to the chain, bar,
and engine. It is recommended that
the engine not be operated for lon-
ger than 30 seconds at full throttle.
S
To avoid losing control when cut is com-
plete, do not put pressure on saw at end
of cut.
S
Stop the engine before setting the saw
down after cutting.
TREE FELLING TECHNIQUES
WARNING:
Check for broken or
dead branches which can fall while cutting
causing serious injury. Do not cut near build-
ings or electrical wires if you do not know the
direction of tree fall, nor cut at night since you
will not be able to see well, nor during bad
weather such as rain, snow, or strong winds,
etc.
S
Carefully plan your sawing operation in ad-
vance.
S
Clear the work area. You need a clear area
all around the tree so you can have secure
footing.
S
Study the natural conditions that can cause
the tree to fall in a particular direction.
Natural conditions that can cause a tree to
fall in a particular direction include:
S
The wind direction and speed.
S
The lean of the tree. The lean of a tree
might not be apparent due to uneven or
sloping terrain. Use a plumb or level to de-
termine the direction of tree lean.
S
Weight and branches on one side.
S
Surrounding trees and obstacles.
Look for decay and rot. If the trunk is rotted, it
can snap and fall toward the operator. Check
for broken or dead branches which can fall on
you while cutting.
Make sure there is enough room for the tree to
fall. Maintain a distance of
2-1/2
tree lengths
from the nearest person or other objects. En-
gine noise can drown out a warning call.
Remove dirt, stones, loose bark, nails, staples,
and wire from the tree where cuts are to be
made.
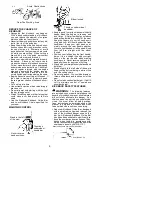
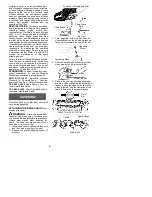
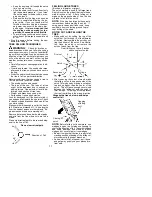
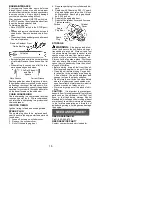
Plan a clear retreat path to the rear and diag-
onal to the line of fall.
Direction of Fall
45
_
Plan a clear retreat path
FELLING LARGE TREES
(6 inches in diameter or larger)
The notch method is used to fell large trees.
A notch is cut on the side of the tree in the de-
sired direction of fall. After a felling cut is
made on the opposite side of tree, the tree
will tend to fall into the notch.
NOTE:
If the tree has large buttress roots,
remove them before making the notch. If
using saw to remove buttress roots, keep
saw chain from contacting ground to pre-
vent dulling of the chain.
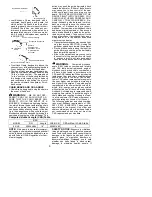
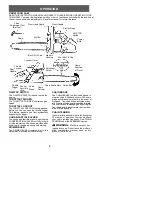
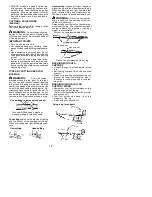
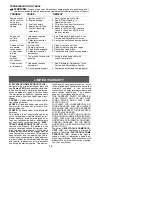
NOTCH CUT AND FELLING THE
TREE
S
Make notch cut by cutting the top of the
notch first. Cut through
1/3
of the diameter
of the tree. Next complete the notch by cut-
ting the bottom of the notch. See illustra-
tion. Once the notch is cut remove the
notch of wood from the tree.
Notch
First cut
Second cut
Final (felling) cut here. 2 inches
above center of notch.
Hinge
S
After removing the cutout of wood, make
the felling cut on the opposite side of the
notch. This is done by making a cut about
two inches higher than the center of the
notch. This will leave enough uncut wood
between the felling cut and the notch to
form a hinge. This hinge will help prevent
the tree from falling in the wrong direction.
Opening
of felling
cut
Closing of
notch
Hinge holds tree on stump and helps
control fall
NOTE:
Before felling cut is complete, use
wedges to open the cut when necessary to
control the direction of fall. To avoid kickback
and chain damage, use wood or plastic
wedges, but never steel or iron wedges.
S
Be alert to signs that the tree is ready to fall:
cracking sounds, widening of the felling cut,
or movement in the upper branches.
S
As tree starts to fall, stop saw, put it down,
and get away quickly on your planned re-
treat path.


