background image


10 

7. 

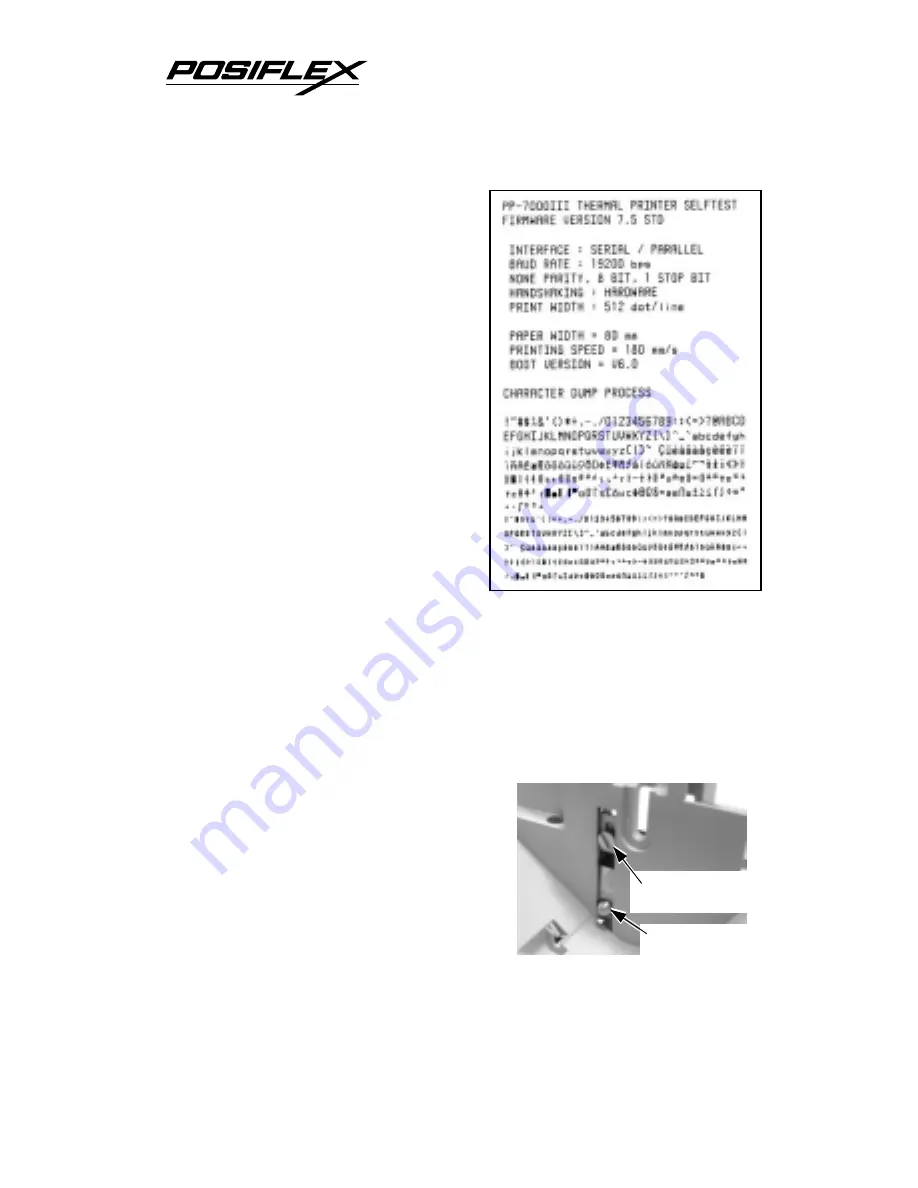
Self test 

Press and hold down the 

feed button while turning the on / 
off switch on. The printer will 
then perform a self-test. A sample 
slip of self-test result is printed as 
in below sample. Please note that 
both serial and parallel interfaces 
are indicated. That means the 
printer is working on an auto-
sensing and auto-select algorithm. 

The header is printed in text 

mode and the rest part of this slip 
is printed in page mode. If FEED 
button is pressed at this moment, a 
font table will be printed in text 
mode again. To exit the test printing, please turn the printer off 
and on again. 

C. 

SPECIAL ADJUSTMENTS 

1. 

Paper near end sensor 

The near end sensor for paper 

roll in the printer is able to have the 
printer work with paper rolls of 
several bobbin sizes. Please refer to 
the picture at right from inside the 
paper roll compartment that there are 
a fixing screw and a sensor head in 
the wall. Slightly release the fixing 
screw to adjust the position of sensor head. The acceptable paper 
roll bobbin outer diameter is between 18 and 22mm. This 

Fixing Screw 

Sensor Head 

Содержание Aura PP-7000-III

Страница 1: ... PP 7000 III PP 7000U III Thermal Printer IMPORTANT Please read carefully before using this printer Before opening the Top Hood make sure there is no paper jam or cutter jam trouble Read page 16 and Warranty Limit in the user s Manual ...

Страница 2: ...an the authorized technicians The user should consult his her dealer for the problem happened Warranty voids if the user does not follow the instructions in application of this merchandise The manufacturer is by no means responsible for any damage or hazard caused by improper application About This Manual This manual is aimed to assist the user to utilize the Aura PP 7000 series which is a series ...

Страница 3: ... 7000 III PP 7000U III series printer uses thermal sensitive paper in form of a roll at a width of 80 mm standard or 58 mm option The Aura PP 7000 III PP 7000U III series printer serves the stand alone desktop application as well as the application within a Posiflex integrated POS system equally perfect The Aura PP 7000 III series support two types of interface input through different sub codes to...

Страница 4: ...inting speed This series make beeping sound as response to Paper End or Paper Near End signals C UNPACKING Followings are items you may find when you carefully unpack the carton that delivers Aura series printer If there is any discrepancy or problem contact your dealer immediately Be sure to save the packing materials in case the printer needs to be shipped at some point in the future c The print...

Страница 5: ... integrated application in Posiflex POS system g One of the power sources a Power adaptor power cord depend on country type ordered b Power supply cable when no power adaptor ordered for serial or parallel interface model This printer power supply cable is used to supply power to the printer from the Posiflex POS system PB or PST series c None if Powered USB cable used h This User s Manual D OPTIO...

Страница 6: ...ARTS ON THE EXTERIOR Bottom Cover Power LED Error LED Paper Out LED FEED Switch Top Hood Top Cover Hood Release Power Switch Cutter Cover Power Switch Screws Window Plate Screw Setup Window Front View Bottom View ...

Страница 7: ...RS Power LED green Error LED red Paper Out LED red Power Connector USB Connector Frame Ground Peripheral Connector Parallel Connector Serial Connector Frame Ground Rear View of PP 7000 III Rear View of PP 7000U III ...

Страница 8: ... the paper roll coming out of the opening between the hood and the top cover Tear off excessive paper 2 When to replace paper Whenever the printer gives paper out signal or a red line appears on the thermal paper it is the proper timing for replacing the paper Do not wait till the print engine is dragging the paper roll at the very end Remove the leftover and replace a new paper roll as illustrate...

Страница 9: ... rest unchanged as factory default setting 2 Parallel connection The parallel connector is a 25 PIN D sub Male connector at the leftmost location in the connector area for PP 7000 III Apply the female end of the parallel cable at this port for parallel application Please note that when parallel connection is used there must be no cable connection at the serial port on the printer Please also note ...

Страница 10: ...h the powered USB plug to the USB port in PP 7000U III with the type B normal USB plug and the 3 PIN power plug to the 3 PIN power jack in PP 7000U III as in picture at right The power adaptor can be deleted in this powered USB application Please always press the locking strap first before disconnecting the Powered USB cable Please visit our web site http www posiflex com or http www posiflex com ...

Страница 11: ...ex supplied power adaptor or a printer power cable from a Posiflex POS system can be connected to this connector to supply power for this printer During insertion of the power plug be sure to hear the click to obtain a firm contact CAUTION Before doing the insertion or extraction of the power plug be sure to pull the outer sleeve of the plug backward to release the internal latch Failure to do thi...

Страница 12: ... FEED button is pressed at this moment a font table will be printed in text mode again To exit the test printing please turn the printer off and on again C SPECIAL ADJUSTMENTS 1 Paper near end sensor The near end sensor for paper roll in the printer is able to have the printer work with paper rolls of several bobbin sizes Please refer to the picture at right from inside the paper roll compartment ...

Страница 13: ...e paper roll to go off position when paper feeding with low remaining paper In this case the paper near end sensor may function abnormally and it would be a good solution to set in the setup window to have the printer to send busy only when input buffer is full and not based on every off line signal 3 Spacer plate If the paper roll is of width less than the standard 80 58 mm it may run away from t...

Страница 14: ...int the logo and necessary paper feeding to make 12 mm paper advance right after each cut to prevent curling up and jamming of paper front edge inside the paper exit slot 5 Wall mount application In wall mount application the paper near end sensor will not have proper operation and it is suggested to set in the setup window to have the printer to send busy only when input buffer is full and not ba...

Страница 15: ...se use soft hairbrush or compressed air to clear away any dust or paper scraps accumulation inside the printer Check also the area of the auto cutter regularly C PRINT HEAD CLEANING The print head is located underneath the roll paper passage at the exit as in the picture below You can clean the thermal elements of the print head and paper sensor gently using a cotton swab moistened with isopropyl ...

Страница 16: ... a period of time and the print head temperature become too high After few minutes under normal ventilation the print head should be able to cool down and the Error LED will stop flashing Printing will resume after cooled down If this is not the case contact a qualified service person Nothing can be printed with ERROR LED ON Check the Paper Out LED If it is ON most probably either the paper roll i...

Страница 17: ...communication settings against the computer The printer settings can be found easily on the self test print out If the problem remains or the self test fails contact your dealer or a qualified service person Poor printing quality Contaminants like paper scraps and dusts on the thermal print head can lower the print quality drastically Clean the print head as described in previous section Printer t...

Страница 18: ...to deal with the paper jam Never force open the print hood Please also clear away any contaminants accumulated in the cutter track above the thermal elements 4 Auto Cutter Problems In case any foreign materials like a staple or paper clip or excessive paper scraps fall into the auto cutter mechanism the auto cutter may lock up and so does the print hood In such case please pull the cutter cover fo...

Страница 19: ...at data is received by the printer This can be useful in finding software problems To start the dump mode Turn off printer Open print hood Hold down FEED button while turning printer on Close the hood To stop the dump mode Press the FEED button to print out the last line Turn off the printer During dump mode All commands except DLE EOT and DLE ENQ are disabled Turn the wheel downward till a hole i...

Страница 20: ...ethod Drop and use Auto cutter capability Partial cut 1 point at center left Manual cutter Saw tooth blade Dot Pitch 0 125 x 0 125 mm Input power type DC Input voltage 24 V 5 Dimension mm 148 W x 199 D x 144 H Weight 1 35 Kg net B PAPER Paper type Thermal roll paper Paper roll formation External side is heat sensitive side Paper width 80 or 58 0 1 mm Paper roll outer diameter 83 mm max Paper roll ...

Страница 21: ...IREMENT INPUT VOLTAGE 100 V AC 240 V AC INPUT FREQUENCY 50 60 HZ INPUT CURRENT 1 8 A MAX 115 V AC OUTPUT VOLTAGE 24 V DC OUTPUT POWER 60 W STATIC LOAD 0 A 2 5 A OUTPUT REGULATION 5 MTBF 30 000 HRS EMI STANDARDS VDE A FCC A VCCI A ...

Страница 22: ...t sunlight or near a heater Ideal room temperature is from 5ºC to 40ºC Ideal humidity is from 20 to 85 RH no condensation Do not set any liquid or drinks such as coffee on the printer case Do not touch any metal part to avoid possible electrostatic damage Do not touch the areas around the print head and motor during or right after printing It can be very hot Do not allow the cut receipt to slide b...

Страница 23: ...olyvinyl paste or CMC paste when gluing thermal paper If thermal paper touches anything containing phthalic acid ester plasticizer for a long time the image formation ability may be reduced or the printed image may fade Use of volatile organic solvents such as alcohol ester and ketone or some adhesive tapes on thermal paper can cause discoloration Thermal paper must not be stored with the printed ...

Отзывы: