


8
2.Enter
Used to confirm a setting or function
3.Forward
Used to navigate forwards.
4.Up
Used to navigate upwards.
5.Down
Used to navigate downwards.
6.Backward
Used to navigate backwards.
7.CF Card Slot
Slot for CF card.
8.5 in 1 Card Slot
Slot for SD/MMC/XD/MS/SM
9.DC in Socket
Power Connection to the adaptor.
10.Stand
Placing the Digital Photo Frame on a desk..
11.Infrared Sensor
Used with remote control
12.AV Out
Connect an AV cable for viewing a TV, earphone &
amplifier.
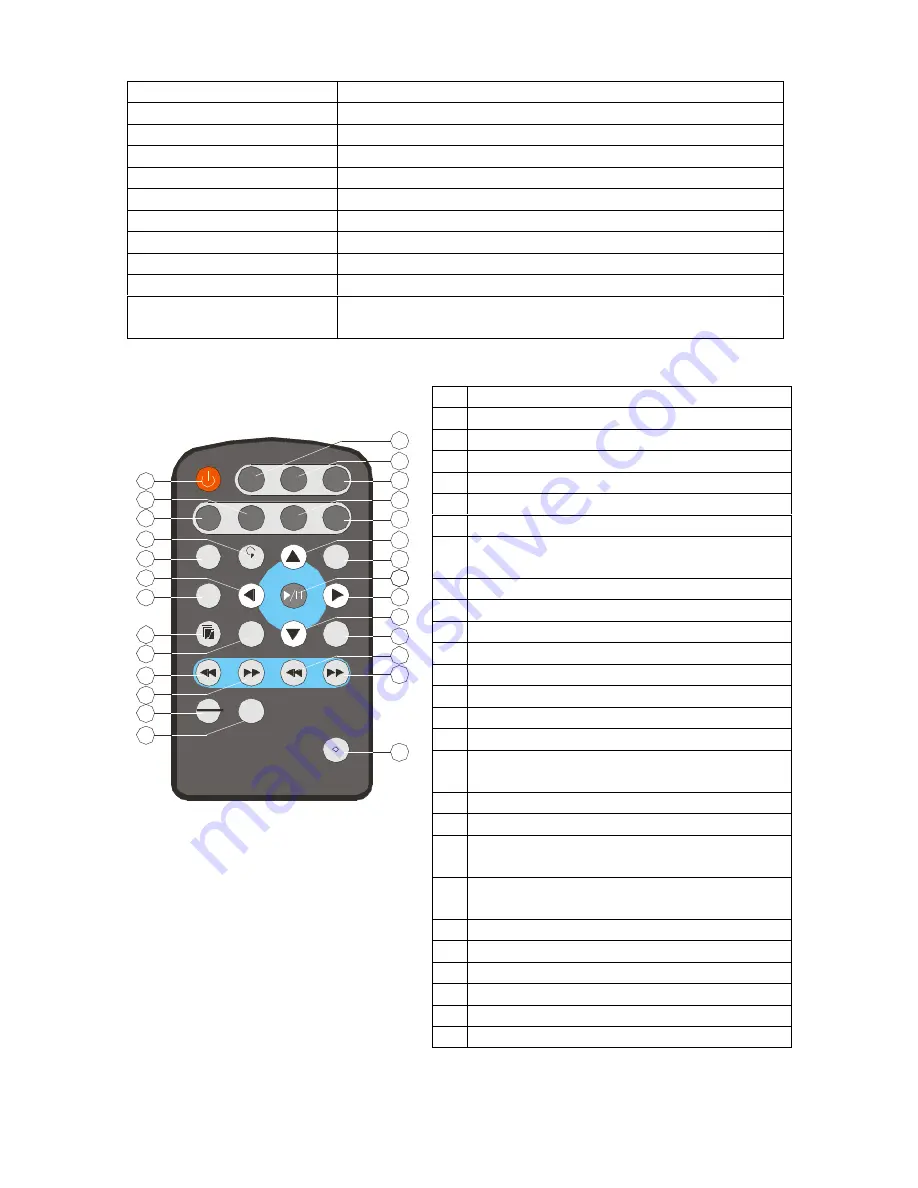
RCU Keys
Vol -
Vol +
Mute
Photo
Video
Config
Files
Zoom
Menu
Rotate
File
Detail
Cancel
Enter
TV/LCD
EQ Set
M_SLIDESHOW
1
2
3
4
5
6
7
8
9
10
11
12
13
14
15
16
17
18
19
20
21
22
23
24
25
26
27
1
Turn the power on and off
2
Video mode
3
Photo mode
4
Rotate the image in photo mode
5
Zoom the image
6
Used to navigate backwards
7
Show the file detail in photo mode
8
Play MP3 as background during
slideshow
9
Equalizer setting
10 Skip to previous chapter or track
11 Fast forward
12 Repeat slideshow & video playback
13 Set video output in TV or LCD
14 LED
15 Skip to next chapter or track
16 Fast reverse
17 Stop the functionality currently running
and return to Main Menu
18 Used to navigate downwards
19 Used to navigate forwards
20 Play, Pause & Display menu or to confirm
a setting or function
21 Stop the functionality currently running
and return to Main Menu
22 Used to navigate upwards
23 Files mode
24 Set-up mode
25 Mute the audio output
26 Increase volume
27 Reduce volume