8
1
2
3
4
5
6
7
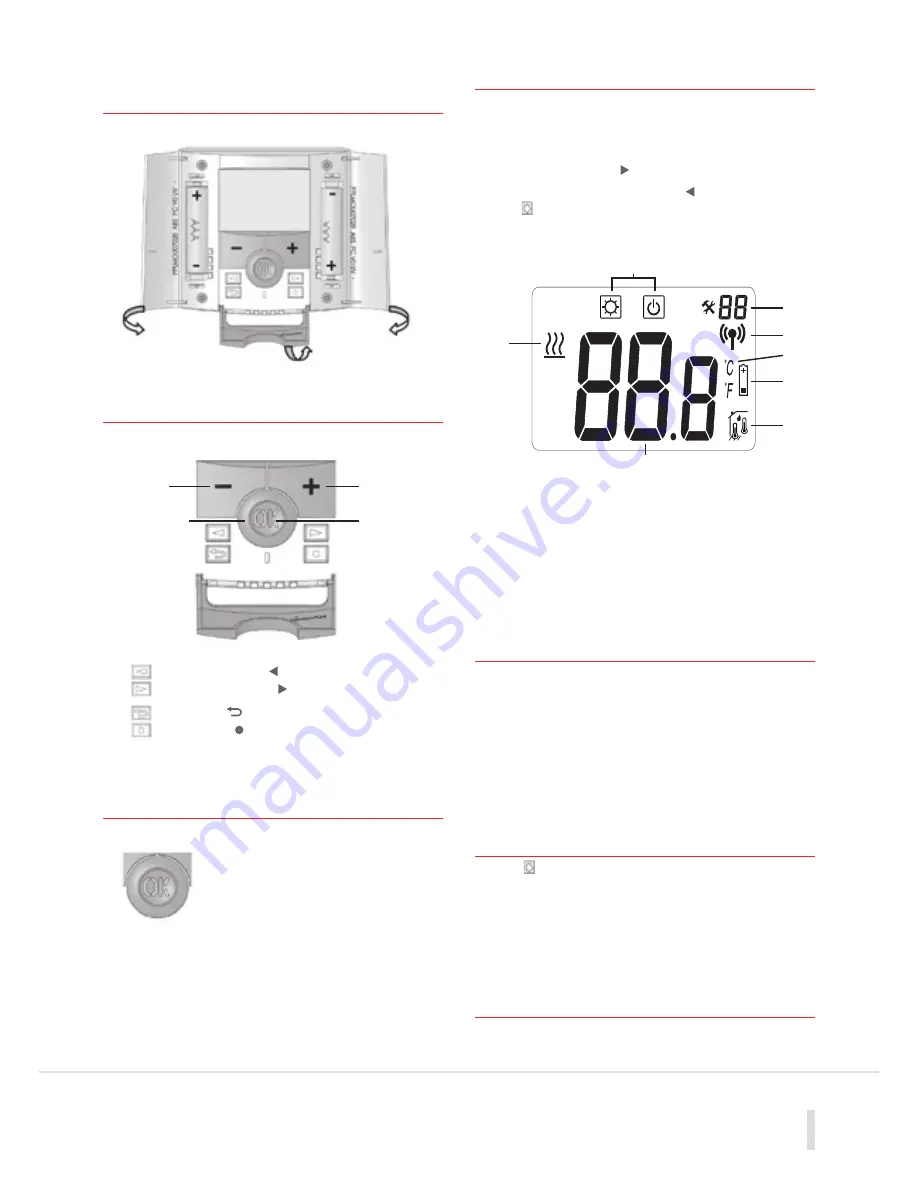
1 Battery Access
& User Controls
1.1 Keyboard
1.2 Display & LED
2 First Time Installation
Open the two side covers and Insert the 2 AAA Alkaline supplied
batteries (or remove the small protection tab if the batteries are
already installed in the compartment). The unit will display the main
icon screen and software version number. Press and hold the right
navigational arrow button
(
)
to display the opening screen.
Then using the left navigational button
(
)
move the cursor
over the and press
(OK)
to display the pre-set required room
temperature. After few seconds the display will revert to showing
the actual room temperature that is currently being measured.
1. Operating menu (active mode is framed)
2. Installer menu program number or parameter
3. RF Communication
4. °C or °F indicator
5. Low batteries indicator
6. Type of sensor used and temperature displayed
7. Temperature indication
8. Heating demand indication
2.1 RF Initiation
On RF installations the unit must first be paired to the
corresponding RF Receiver. To do this set the receiver to pairing
mode (see receiver installation guide). Access the hidden User
Menu by following the steps as shown in the Hidden Menu
section of this guide. The display should now show menu 00 and
the code rf INI. Wait until the receiver acknowledges the signal.
The transmitter and receiver are now paired.
3 Setting The Room
Temperature
With the symbol being displayed press the Plus Key
(+)
to
show the current pre-set room temperature. With this display
flashing press and hold the
(+)
or
(-)
buttons until the required
room temperature is displayed.
Then press the
(OK)
button to save this value in the internal memory.
3.1 Overriding The Room
Temperature
At any time the current temperature setting can be increased
or decreased by simply pressing either the
(+)
or
(-)
buttons.
Navigation key left
(
)
Navigation key right
(
)
Escape key
(
)
Program key
(
•
)
Minus
key
(-)
Plus
key
(+)
Validation
key
(OK)
Status
LED
Red on: Heating demand
Green flash: Attention
Red flash: Error (batteries, sensor...)
04


