background image

System Setup

22

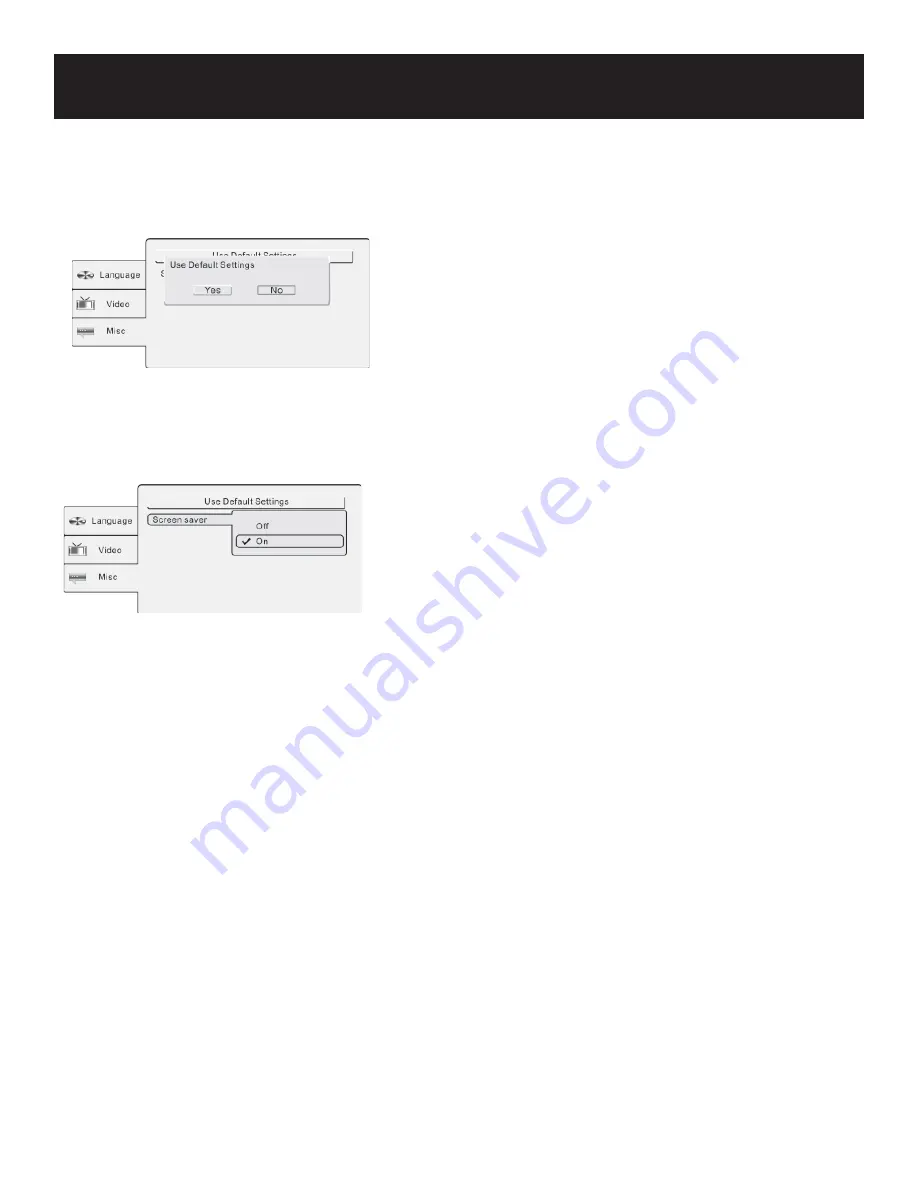
Misc Setup

DEFAULTS

This item is used to reset the unit.
Press the 

 buttons to highlight this item.

Press the   button to access.  
Press the ENT/ENTER button to reset.  All settings to your unit 
are now set back to its original state.
Press the   button to exit.


SCREEN SAVER

This item is used to turn on and off the screen saver.
Press the 

 buttons to highlight this item.

Press the   button to access.  
The default setting of this unit is on.
Press the 

 buttons to choose on or off.

Press the ENT/ENTER button to confi rm your selection.
Press the   button to exit.


Содержание PDU-2728

Страница 1: ...User s Manual 20060719 7 Dual Screen Car DVD Player PDU 2728...

Страница 2: ...icing instructions in the literature accompanying the appliance WARNING TO REDUCE THE RISK OF FIRE OR ELECTRIC SHOCK DO NOT EXPOSE THIS APPLIANCE TO RAIN OR MOISTURE Caution Laser radiation when open...

Страница 3: ...ade or the third prong is provided for your safety If the provided plug does not fit in your outlet consult an electrician for replacement of the obsolete outlet Protect the power cord from being walk...

Страница 4: ...LASER PRODUCTS CLASS 1 LASER PRODUCT DANGER Visible laster radiation when open and interlock failed or defected Avoid direct exposure to beam CAUTION Do not open the top cover There are no user servic...

Страница 5: ...ench Spanish etc for the on screen display language Particular Performance Multi speed fast forward fast backward slow playback and repeated playback Search by Time Search for a certain track of a dis...

Страница 6: ...trol with battery 1 Power Supply Cord with AC Adaptor 1 Power Supply Cord 1 DC Adapter Car Adapter 1 Audio Video Cables 3 Headphone 2 Straps 4 Bag 1 Operation Manual 1 Note Accessories and their parts...

Страница 7: ...Front Panel 8 View of Side Panels 9 Remote Control 10 System Connections 12 Power Supply 13 Notes on Discs 14 Playback Operation 15 DVD Playback 16 CD Playback 17 JPEG Playback 18 System Setup 20 Str...

Страница 8: ...fast press to select different options or to search backward fast press to select different options or to skip to the next list track or chapter SETUP button press to access or exit the system setup...

Страница 9: ...mplifier or audio source Video Input Output Jack For connecting to an external monitor or video source DC 9 5 Input Jack Used to connect the DC 9 5 12V adaptor OPEN Switch Push to open the disc tray c...

Страница 10: ...int A press again to select the end point B During A B repeat playback press this button to stop the repeat ZOOM button press to realize different zoom functions REP button press to repeat a chapter t...

Страница 11: ...he remote control to the remote sensor on the unit within a 5 meter range and 60 degree angles without obstacles between the remote control and remote sensor Notes Improper use of the battery may caus...

Страница 12: ...to a TV Follow the drawing below to connect the DVD player to the TV s audio video input with the audio video cables Connecting to an Amplifier Refer to your audio equipment s manual before connecting...

Страница 13: ...using the adapter the LCD screen will be brighter than using the rechargeable battery Using the Car Adapter The player is supplied withe a car adapter for powering the unit and charging the battery i...

Страница 14: ...Please follow the instructions of the disc Care of Discs Holding Discs When loading or removing discs try not to touch their play surfaces Cleaning Discs Fingerprints or stain on the disc may affect t...

Страница 15: ...n the disc tray cover Put a disc in the disc tray with printed side up Close the disc cover The player will search the disc and play it automatically Adjust the volume with the VOLUME control on the r...

Страница 16: ...n also press the 0 9 and 10 buttons to select the item you prefer remote only ZOOM button Press the ZOOM button repeatedly to shift among 1x 2x 3x 4x zooming effect and normal playback buttons Press t...

Страница 17: ...yback Press the PLAY button to resume normal playback STOP button During playback press the STOP button once to stop and then press the PLAY button to resume normal playback from the place where the S...

Страница 18: ...USE button Press the PAUSE button to pause during playback Press the PLAY button to resume normal playback MENU button Press the STOP button to return to the previous folder Press the direction button...

Страница 19: ...back continued Rotating Pictures While viewing a picture use the direction buttons to rotate the picture Press the button to rotate the current picture clockwise Press the button to rotate the current...

Страница 20: ...OSD on screen display language Press the buttons to highlight this item Press the button to access There are several languages for you to choose Press the buttons to choose the desired language Press...

Страница 21: ...t ratio Press the buttons to highlight this item Press the button to access Press the buttons to choose 4 3 or 16 9 Press the ENT ENTER button to confirm your selection Press the button to exit Note S...

Страница 22: ...l settings to your unit are now set back to its original state Press the button to exit SCREEN SAVER This item is used to turn on and off the screen saver Press the buttons to highlight this item Pres...

Страница 23: ...g 1 Make sure the inside of the strap faces up Thread the strap into the buckle fig 2 and 3 After threading make sure the outside of the buckle faces up Repeat these steps for the other strap Adjust t...

Страница 24: ...e DVD player case is intended for viewing only from the rear seats No not install or use this product in the front seat of a vehicle In case of collision or a sudden stop to reduce the chance of injur...

Страница 25: ...gs on the lower part of the case C Tighten up the straps until secure To suspend the DVD player case between two bucket seats figure 3 Unzip the main compartment that holds the player locate the set o...

Страница 26: ...into some large sections titles and some small sections chapters Each section is num bered as chapter or title numbers Title 1 Title 2 Chapter 1 Chapter 1 Chapter 2 Track CD CDs are divided into some...

Страница 27: ...Connect the system correctly Turn on the speakers Setup the sound of the DVD correctly Clean or change the disc There is no picture The LCD may not be in correct video mode The system connectivity ma...

Страница 28: ...n visit www polaroid com Polaroid and Polaroid and Pixel are trademarks of Polaroid Corporation Waltham MA USA 28 TFT Screen Size 7 inches 16 9 Laser Wavelength 780 650nm Video System PAL Frequency Re...

Отзывы: