


P4000 Quick Install Guide
Page 5
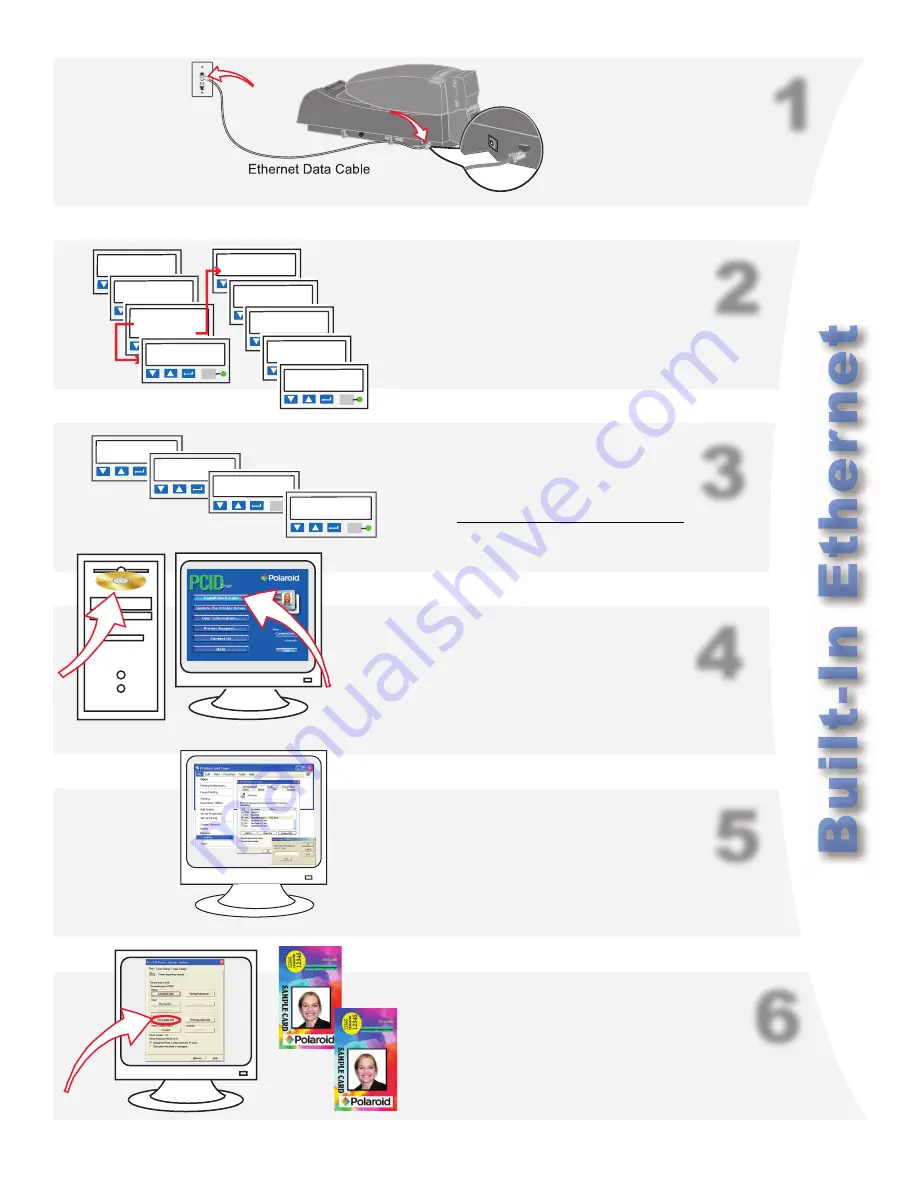
1
2
3
4
5
6
a
Main Menu
> Status
Status
> Network
Network
> IP Address
IP Address
192.168.1.155
IP Addresses
> IP Address
Main Menu
>Configuration
Configuration
>DHCP/Static IP
DHCP/Static IP
> DHCP OR
> Static IP
IP Address
192.168.1.155
DHCP/Static IP
>Apply/Restart
Subnet Mask
255.0.0.0
Gateway Addr
192.168.1.1
IP Addresses
>Apply/Restart
b
Connect the printer to the network
using an Ethernet cable.
Use the printer LCD panel to set the IP address
mode—DHCP or Static IP. Set the IP address if
needed. The printer restarts if you changed settings.
Retrieve the IP address and record it.
IP Address:
a
Insert the PCID Driver CD-ROM.
b
Click “Install the Printer” after the
window opens. Choose “Direct
Network” during installation.
Set the printer IP address in the driver’s
Properties>Ports>Configure dialog box.
Open the Printer Toolbox when Printing Preferences opens.
Click “Print Sample Card” on the Printer Toolbox.
Your card should look like the factory card.
Congratulations,
you have installed the printer! Complete the printer
warranty/registration card and install your ID software now.


