background image

43

OPERATION

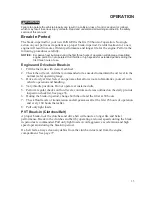
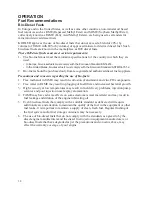
Starting the Engine

NOTICE:

NEVER use an engine starting aid such as ether. Engine 
damage will result.

Before operating this vehicle in cold weather, review the cold 

weather operation information beginning on page 40. 

Always wait for the glow plug indicator light to turn off 

before cranking the engine.
1. Always start the engine outdoors or in a well-ventilated 

area.

2. Sit in the driver's seat and fasten the seat belt. Secure the 

cab nets (or doors).

3. Place the transmission in PARK.
4. Apply the brakes. Do not press the throttle pedal while starting the engine.
5. Turn the ignition switch to the ON position and wait for the glow plug indicator light to 

turn off.

6. Turn the ignition key past the ON/RUN position to START. Engage the starter for a 

maximum of five seconds. Release the key when the engine starts.

7. If the engine does not start within five seconds, release the ignition switch and wait five 

seconds. Repeat steps 6 and 7 until the engine starts.

NOTICE:

Operating the vehicle immediately after starting could cause engine damage. Allow the 
engine to warm up for several minutes before operating the vehicle.

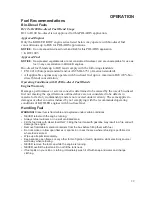
Stopping the Engine

For maximum engine life, allow the engine to idle, without load, for 5 minutes. This will 

allow the engine components that operate at high temperatures, such as the exhaust system, 

to cool slightly before the engine is shut down.
1. Release the throttle pedal completely and brake to a complete stop.
2. Place the transmission in PARK.
3. Turn the engine off and remove the key to prevent unauthorized use.
4. Slowly release the brake pedal and make sure the transmission is in PARK before exiting 

the vehicle.

WARNING!

A rolling vehicle can cause serious injury. Always place the transmission in PARK when 

stopping the engine. 

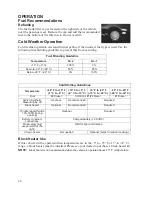
Braking

1. Release the throttle pedal completely.

Tip:

When the throttle pedal is released completely and the engine speed drops near an idle, the 
vehicle has no engine braking.

2. Press on the brake pedal evenly and firmly.

Tip:

If the throttle pedal and brake pedal are applied simultaneously, engine power may be limited.

3. Practice starting and stopping (using the brakes) until you're familiar with the controls.

START 

HELP

Содержание Sportsman XP Touring 1000

Страница 1: ...2018 OWNER S MANUAL RANGER 1000 Diesel RANGER 1000 Diesel EPS RANGER CREW 1000 Diesel...

Страница 2: ...e safety precautions could result in serious injury or death WARNING The engine exhaust from this product contains chemicals known to the State of California to cause cancer birth defects or other rep...

Страница 3: ...icle be sure to follow the instructions and recommendations in this owner s manual Your manual contains instructions for minor maintenance but information about major repairs is outlined in the POLARI...

Страница 4: ...n the actual vehicle and the information presented in this publication Depictions and or procedures in this publication are intended for reference use only No liability can be accepted for omissions o...

Страница 5: ...ntroduction 4 Safety 8 Features and Controls 21 Operation 35 Winch Guide 56 Emission Control Systems 64 Maintenance 65 Specifications 100 POLARIS Products 104 Troubleshooting 105 Warranty 108 Maintena...

Страница 6: ...ential personal injury hazard DANGER A DANGER indicates a hazardous situation that if not avoided will result in death or serious injury WARNING A WARNING indicates a hazardous situation that if not a...

Страница 7: ...fety DVD and take the free online Recreational Off Highway Vehicle Association ROHVA training course at www rohva org This vehicle is an ADULT VEHICLE ONLY You MUST be at least age 16 and have a valid...

Страница 8: ...one of your existing keys The ignition switch must be replaced if all keys are lost Vehicle Model Number ________________________________________________________________________ Frame VIN ____________...

Страница 9: ...condition The environment was controlled as indicated by the test procedure s The uncertainty of vibration exposure measurement is dependent on many factors including Instrument and calibration uncert...

Страница 10: ...a helmet that meets or exceeds established safety standards Approved helmets in the USA and Canada bear a U S Department of Transportation DOT label Approved helmets in Europe Asia and Oceania bear th...

Страница 11: ...and protection Never ride a POLARIS vehicle with bare feet or sandals Clothing Wear long sleeves and long pants to protect arms and legs Rider Comfort Under certain operating conditions heat generated...

Страница 12: ...less driving Make sure operators are 16 or older with a valid driver s license Do not let people drive or ride after using alcohol or drugs Do not allow operation on public roads unless designated for...

Страница 13: ...letely inside the vehicle Drive Responsibly Avoid loss of control and rollovers Avoid abrupt maneuvers sideways sliding skidding or fishtailing and never do donuts Slow down before entering a turn Avo...

Страница 14: ...gh or hilly terrain reduce speed and cargo 7185781 Clutch Cover Warning WARNING Improper service or maintenance of this PVT system can result in vehicle damage SEVERE INJURY or DEATH Always look for a...

Страница 15: ...over the ankle boots and seat belt at all times Always use the cab nets or doors while riding in this vehicle Always keep hands and feet inside the vehicle at all times Always keep both hands on the s...

Страница 16: ...s manual for traveling downhill and for braking on hills See page 47 Check the terrain carefully before descending a hill Never travel downhill at high speed Avoid going downhill at an angle which wou...

Страница 17: ...e the ignition key when the vehicle is not in use to prevent unauthorized use by someone under the age of 16 or without a driver s license and proper training or accidental starting FOR MORE INFORMATI...

Страница 18: ...on different types of terrain All operators must read and understand the Owner s Manual and all warning and instruction labels before operating the vehicle All operators should review the safety DVD p...

Страница 19: ...Vehicle The weight of both cargo and passengers impacts vehicle operation For your safety and the safety of others carefully consider how your vehicle is loaded and how to safely operate the vehicle...

Страница 20: ...lways keep combustible materials away from the exhaust system Use caution when traveling through tall grass especially dry grass to avoid debris build up around the exhaust system Improper Tire Mainte...

Страница 21: ...ng hills as described in this owner s manual See page 47 Descending Hills Improperly Improperly descending a hill could cause loss of control or rollover Always follow proper procedures for traveling...

Страница 22: ...nspect the entire machine for possible damage including but not limited to seat belts rollover protection devices brakes throttle and steering systems Operating at Excessive Speeds Operating this vehi...

Страница 23: ...imes Any illustrations without cab nets are only to allow component identification Always use the cab nets or doors Not all models come with all features Refer to the specifications section on page 10...

Страница 24: ...engine is idling move the lever to the desired gear NOTICE Shifting gears with the engine speed above idle or while the vehicle is moving could cause transmission damage Always shift when the vehicle...

Страница 25: ...ferential Lock Switch The AWD Differential Switch has three positions All Wheel Drive AWD Differential Lock 2WD Differential Unlock Press the top of the rocker switch to engage All Wheel Drive AWD See...

Страница 26: ...heel can be tilted upward or downward for rider preference Lift and hold the adjustment lever toward you while moving the steering wheel upward or downward Release the lever when the steering wheel is...

Страница 27: ...seat upward to release the latch pins from the grommets Roll the seat forward to access the under seat area To completely remove a seat roll the seat forward and lift the seat tabs from the seat base...

Страница 28: ...icle near the driver s seat Use only the recommended diesel fuel See page 37 Hood Latches Remove the hood to access the coolant overflow bottle the radiator cap and the headlight adjustment screws To...

Страница 29: ...ssure occupant protection in the event of a rollover Always follow all safe operating practices outlined in this manual to avoid vehicle rollover WARNING Vehicle rollover could cause severe injury or...

Страница 30: ...ps Promptly replace worn or damaged cab nets and latches with new cab nets and latches Please see your authorized POLARIS dealer Securing a Net 1 After entering the vehicle insert the lower net rod in...

Страница 31: ...it clicks 3 Release the strap it will self tighten 4 To release the seat belt press the square red button in the buckle s center Seat Belt Inspection Inspect all seat belts for proper operation befor...

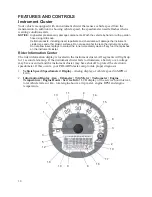
Страница 32: ...ff any fuel that splashes on the instrument cluster Rider Information Center The rider information display is located in the instrument cluster All segments will light up for 1 second at start up If t...

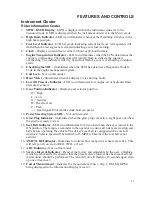
Страница 33: ...il or hydraulic fluid pressure is sensed 12 Gear Position Indicator Displays gear selector position H High L Low N Neutral R Reverse Gear P Park Gear Signal Error shifter stuck between gears 13 Power...

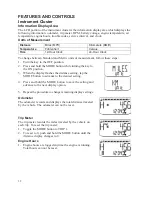
Страница 34: ...nce setting tap the MODE button to advance to the desired setting 4 Press and hold the MODE button to save the setting and advance to the next display option 5 Repeat the procedure to change remaining...

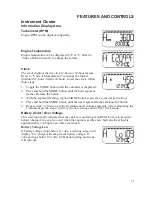
Страница 35: ...nt flashing tap the MODE button to advance to the desired setting 4 Press and hold the MODE button until the next segment flashes Release the button 5 Repeat steps 3 4 twice to set the 10 minute and 1...

Страница 36: ...wing procedure to display diagnostic trouble codes that were activated during current ignition cycle causing the MIL to illuminate Diagnostic trouble codes will remain stored in the gauge even if MIL...

Страница 37: ...the recommended oil as needed to maintain the oil level in the normal safe operating range 3 Drive slowly at first Select an open area that allows room to familiarize yourself with vehicle operation...

Страница 38: ...free operation 87 Tires Inspect condition and pressure 89 Wheels fasteners Inspect ensure fastener tightness 89 Frame nuts bolts fasteners Inspect ensure tightness Fuel and oil Ensure proper levels 3...

Страница 39: ...should be used Bio Diesel fuels see pages 38 39 NEVER mix kerosene used engine oil or residual fuels with diesel fuel Water and sediment in the fuel should not exceed 0 05 by volume Keep the fuel tan...

Страница 40: ...suppliers Precautions and concerns regarding the use of bio fuels 1 Free methanol in FAME may result in corrosion of aluminum and zinc FIE components 2 Free water in FAME may result in plugging of fu...

Страница 41: ...meeting the specifications outlined above are not considered to be defects in material or factory workmanship and are not covered under warranty The same applies to damages or other concerns induced b...

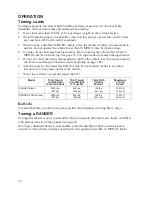
Страница 42: ...aler to purchase a block heater kit NOTE Block heater is not recommended when the vehicle is operated above 25 F temperature Fuel Blending Guideline Temperature No 2 No 1 15 F 9 C 100 0 Down to 20 F 2...

Страница 43: ...ing bio diesel blended fuels containing more than 20 bio diesel can affect engine life and cause deterioration of hoses tubes injectors injector pump and seals Use the following guidelines if bio dies...

Страница 44: ...VER operate the engine in a floodplain unless proper precautions are taken to avoid being subject to a flood NEVER expose the engine to the rain The standard range of ambient temperatures for the norm...

Страница 45: ...hicle immediately after starting could cause engine damage Allow the engine to warm up for several minutes before operating the vehicle Stopping the Engine For maximum engine life allow the engine to...

Страница 46: ...on in PARK 6 Start the engine and allow it to warm up 7 Apply the service brakes and shift the transmission into gear 8 Check your surroundings and determine your path of travel 9 Keeping both hands o...

Страница 47: ...and operating conditions Avoid unexpected or aggressive maneuvers that could cause discomfort or injury to a passenger 9 Vehicle handling may change with a passenger and or cargo on board Allow more...

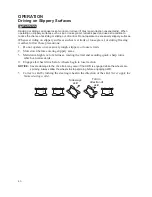
Страница 48: ...weather follow these precautions 1 Do not operate on excessively rough slippery or loose terrain 2 Slow down before entering slippery areas 3 Maintain a high level of alertness reading the trail and...

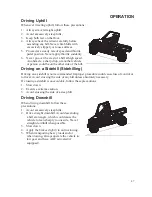
Страница 49: ...Sidehilling Driving on a sidehill is not recommended Improper procedure could cause loss of control or rollover Avoid crossing the side of any hill unless absolutely necessary If crossing a sidehill i...

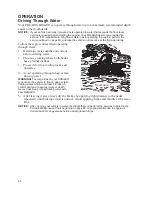
Страница 50: ...a crossing where both banks have gradual inclines 3 Proceed slowly avoiding rocks and obstacles 4 Avoid operating through deep or fast flowing water WARNING The large tires on your RANGER may cause t...

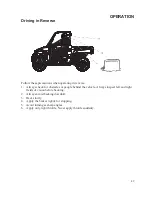
Страница 51: ...ys check for obstacles or people behind the vehicle Always inspect left and right fields of vision before backing 2 Always avoid backing downhill 3 Back slowly 4 Apply the brakes lightly for stopping...

Страница 52: ...n PARK 4 Turn the engine off 5 Slowly release the brake pedal and make sure the transmission is in PARK before exiting the vehicle 6 Remove the ignition switch key to prevent unauthorized use Parking...

Страница 53: ...in loss of control of the vehicle OPERATE ONLY WITH STABLE AND SAFELY ARRANGED LOADS When handling off centered loads that cannot be centered securely fasten the load and operate with extra caution Al...

Страница 54: ...g capacity chart below and the specifications charts beginning on page 100 6 Attach a trailer to the trailer hitch bracket only Do not attach a trailer to any other location or you may lose control of...

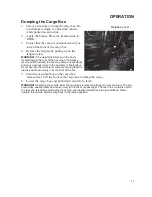
Страница 55: ...y and cause serious injury to the operator or bystanders Never operate the dump lever without ensuring that the load is positioned evenly or at the front of the box 5 Stand clear and pull up on the ca...

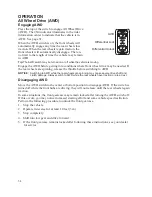
Страница 56: ...g to AWD NOTICE Switching to AWD while the rear wheels are spinning may cause severe drive shaft and clutch damage Always switch to AWD while the rear wheels have traction or are at rest Disengaging A...

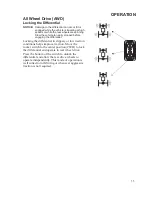
Страница 57: ...ore engaging the differential Locking the differential in slippery or low traction conditions helps improve traction Move the rocker switch to the center position 2WD to lock the differential and oper...

Страница 58: ...e winch winch cable and load clear of people especially children and distractions while operating the winch 8 Always turn the vehicle ignition power OFF when it and the winch are not being used 9 Alwa...

Страница 59: ...n through your hands even if wearing heavy gloves 18 Never release the clutch on the winch when the winch cable is under load 19 Never use the winch for lifting or transporting people 20 Never use the...

Страница 60: ...strategy if it is not working Always remember that your winch is very powerful There are simply some situations that you and your winch will not be able to deal with Do not be afraid to ask others to...

Страница 61: ...rts available at your authorized POLARIS dealer C If possible keep the winch cable aligned with the centerline of the winching vehicle This will help the spooling of the winch cable and reduce the loa...

Страница 62: ...VER be in motion to shock load the winch cable in an attempt to move a second stuck vehicle See the Shock Loading section on page 62 For your safety always follow these guidelines when winching a vehi...

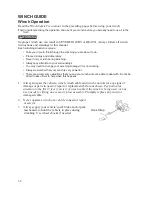
Страница 63: ...horized POLARIS dealer WARNING Use of worn or damaged cable could lead to sudden failure and SEVERE INJURY 1 Always inspect your winch before each use Inspect for worn or loose parts including mountin...

Страница 64: ...ng This puts extra load on the winch winch cable and generates excessive heat from the motor This is a form of shock loading 3 Never tow a vehicle or other object with your winch Towing an object with...

Страница 65: ...tivation of the winch 4 For your safety always replace POLARIS winch parts including the cable with genuine POLARIS replacement parts available at your authorized POLARIS dealer 5 Some winch models us...

Страница 66: ...d online at www gpoaccess gov ecfr Exhaust Emission Control System Exhaust emissions are controlled by engine design A fuel injection system controls fuel delivery The engine and fuel injection compon...

Страница 67: ...aintenance Log beginning on page 113 Tip Service and adjustments are important for proper vehicle operation If you re not familiar with safe service and adjustment procedures a qualified dealer can pe...

Страница 68: ...Headlamp tail lamp Daily Verify proper operation D Brake pad wear 10 H Monthly 100 160 Inspect periodically Battery 25 H Monthly 200 320 Check terminals clean test Air filter 25 H Monthly 200 320 Insp...

Страница 69: ...uel pump replace lines every two years Radiator if applicable 100 H 12 M 1000 1600 Inspect clean external surfaces Cooling Hoses if applicable 100 H 12 M 1000 1600 Inspect for leaks Engine mounts 100...

Страница 70: ...l for this vehicle Always use the correct viscosity grade based on the ambient temperature expected during operation See the chart below NOTICE Mixing brands or using a non recommended oil may cause s...

Страница 71: ...ehicle on a level surface 3 Place the transmission in PARK 4 Stop the engine 5 Stand clear and pull up on the cargo box release lever Lift the front of the cargo box 6 Remove the dipstick Wipe it dry...

Страница 72: ...lear and pull up on the cargo box release lever Lift the front of the cargo box 5 Locate the crankcase drain plug access hole in the skid plate 6 Clean the area around the crankcase drain plug CAUTION...

Страница 73: ...the engine and wait 15 seconds before removing the dipstick 16 Remove the dipstick Wipe it dry with a clean cloth 17 Reinstall the dipstick completely Remove the dipstick and check the oil level 18 Re...

Страница 74: ...d the recommended oil as needed 5 Reinstall the fill plug Torque to specification Oil Change The drain plug is located near the bottom of the gearcase 1 Remove the level check fill plug 2 Place a drai...

Страница 75: ...ocated on the right side of the front gearcase 1 Position the vehicle on a level surface 2 Place the transmission in PARK 3 Remove the fill plug Check the oil level 4 Add the recommended oil as needed...

Страница 76: ...This antifreeze is already premixed and ready to use Do not dilute with water See page 104 for the part numbers of POLARIS products To ensure that the coolant maintains its ability to protect the engi...

Страница 77: ...ystem Your POLARIS dealer can inspect the cooling system Radiator Coolant Level Changing Procedure 1 Remove the hood See page 26 CAUTION Escaping steam can cause burns Never remove the pressure cap wh...

Страница 78: ...itional loads on components The PVT system rotates at high speeds creating large amounts of force on clutch components As the owner you have the following responsibilities for your own safety and the...

Страница 79: ...revent vehicle movement Place the transmission in neutral 2 Lift the cargo box 3 Remove the clutch cover screws using an 8mm socket with ratcheting wrench and extension 4 Push the cover upward and the...

Страница 80: ...and engine If any seals appear to be damaged your vehicle requires prompt service Your POLARIS dealer can assist Tip Belt slip is responsible for creating excessive heat that destroys belts wears clut...

Страница 81: ...fore operating 1 Position the vehicle on a level surface Place the transmission in PARK Stop the engine 2 Remove the clutch cover drain plug Allow the water to drain completely Reinstall the drain plu...

Страница 82: ...e very least to water below the floorboard 2 Inspect the air box for water NOTICE Do not attempt to start the engine if water is present in the air box Engine damage will result Take the vehicle in fo...

Страница 83: ...and lower the bottom to expose the air filter 3 Remove the air filter 4 Inspect the air box for oil or water deposits Wipe away any deposits with a clean cloth 5 Install a new filter if needed Do not...

Страница 84: ...rge accumulated carbon from the exhaust pipe 1 Remove the arrester clean out plug located on the bottom of the muffler 2 Place the transmission in Park Start the engine 3 Press the brake pedal and the...

Страница 85: ...3 1 Raise the cargo box 2 The belt tension is correct with 5 16 1 2 in 7 10 mm of belt deflection at the mid span of the belt when 20 lbf 89 N is applied to the belt 3 If the belt tension is not corre...

Страница 86: ...drain to catch fluids water and fuel 3 Slightly loosen the bleed screw to relieve fuel pressure in the filter Do not tighten the screw at this time 4 Reach under the fuel filter and slightly loosen t...

Страница 87: ...eginning on page 65 Adjust the freeplay if necessary Throttle Freeplay Inspection 1 Apply the brakes Engage the park brake Shift the transmission to neutral 2 Start the engine Allow it to warm up thor...

Страница 88: ...he air The moisture causes the boiling temperature of the brake fluid to drop which can lead to early brake fade and the possibility of accident or severe injury Change the brake fluid every two years...

Страница 89: ...friction between the brake pad and caliper 5 Inspect the brake disc spline and pad wear surface for excessive wear Change pads when worn to 0 030 0 762 mm Steering Wheel Inspection Check the steering...

Страница 90: ...osition the shocks to the outside mounting holes 3 Reinstall the shock mounting bolts Torque to 40 ft lbs 54 2 Nm Spring Adjustment Adjust the front and rear shock absorber springs by rotating the adj...

Страница 91: ...size and type of tires for this vehicle when replacing tires Tire Tread Depth Always replace tires when tread depth is worn to 1 8 3 mm or less Axle and Wheel Nut Torque Specifications Inspect the fo...

Страница 92: ...n the tire point toward forward rotation WARNING Improperly installed wheels can adversely affect tire wear and vehicle handling which can result in serious injury or death Always ensure that all nuts...

Страница 93: ...mp Headlight Lamp Replacement Access a headlamp wiring harness through the front wheel well CAUTION Hot components can cause burns to skin Allow lamps to cool before servicing 1 Unplug the headlamp fr...

Страница 94: ...4 Apply the brakes Start the engine Turn on the headlights 5 Observe the headlight aim The most intense part of the headlight beam should be aimed 8 20 cm below the mark placed on the wall Include th...

Страница 95: ...cess the fuses Spare fuses are provided in the fuse box The power steering fuse if equipped is located on the power steering wiring harness near the fuse box If you suspect that a fuse or relay may no...

Страница 96: ...rter life It can also hinder vehicle performance Follow the battery charging instructions on page 95 before installing the battery 1 Ensure that the battery is fully charged 2 Place the fully charged...

Страница 97: ...a refresh charge follow all instructions carefully 1 Check the battery voltage with a voltmeter or multimeter A fully charged battery will register 12 8 V or higher 2 If the voltage is less than 12 8...

Страница 98: ...arsh cleaners which can scratch the finish Do not use a power washer to clean the vehicle Do not use medium to heavy duty compounds on the finish Always use clean cloths and pads for cleaning and poli...

Страница 99: ...nd pads for cleaning and polishing Old or reused cloths and pads may contain dirt particles that will scratch the finish Storage Tips NOTICE Starting the engine during the storage period will disturb...

Страница 100: ...evels Add or change fluids as recommended in the Periodic Maintenance Chart beginning on page 65 Front gearcase fluid Transmission fluid Brake fluid change every two years and any time the fluid looks...

Страница 101: ...porting the vehicle 1 Place the transmission in PARK 2 Stop the engine 3 Slowly release the brake pedal and make sure the transmission is in PARK before exiting the vehicle 4 Secure the fuel cap hood...

Страница 102: ...116 in 295 cm Overall Width box 60 in 152 4 cm Overall Width tires 58 in 147 3 cm Overall Height 76 in 193 cm Wheelbase 81 in 205 7 cm Cargo Box Dimensions Inside 36 5 x 54 x 11 5 in 93 x 137 x 29 cm...

Страница 103: ...ission Gear Ratio Low Front 7 62 1 Rear 22 79 1 Transmission Gear Ratio Reverse Front 6 83 1 Rear 20 41 1 Front Drive Ratio 3 818 1 Tire Size Front 25 x 10 12 26 x 9 12 for select models Tire Size Rea...

Страница 104: ...th 148 in 376 cm Overall Width box 60 in 152 4 cm Overall Width tires 58 in 147 3 cm Overall Height 76 in 193 cm Wheelbase 113 in 287 cm Cargo Box Dimensions Inside 36 5 x 54 x 11 5 in 93 x 137 x 29 c...

Страница 105: ...Front 3 10 1 Rear 9 26 1 Transmission Gear Ratio Low Front 7 62 1 Rear 22 79 1 Transmission Gear Ratio Reverse Front 6 83 1 Rear 20 41 1 Front Drive Ratio 3 818 1 Tire Size Front 26 x 9 12 Tire Size R...

Страница 106: ...8 l Jug Coolant 2880514 Antifreeze 50 50 Premix qt 95 l 2880513 Antifreeze 50 50 Premix gal 3 8 l Grease Specialized Lubricants 2871312 Grease Gun Kit All Season Grease 2871322 All Season Grease 3 oz...

Страница 107: ...ast aggressive throttle application to engage clutch WARNING Excessive throttle may cause loss of control and vehicle rollover Climbing over large objects from a stopped position Shift the transmissio...

Страница 108: ...Clogged air filter Replace Water is present in fuel Drain the fuel system and refuel replace fuel filter water separator Old or non recommended fuel Replace with fresh recommended fuel Water or fuel...

Страница 109: ...ce Other mechanical failure Your POLARIS dealer can assist Possible Cause Solution Poor fuel quality or incorrect fuel Replace with recommended fuel Clogged fuel filter Replace Clogged air filter Repl...

Страница 110: ...sions Limitations Of Warranties And Remedies This POLARIS limited warranty excludes any failures that are not caused by a defect in material or workmanship THIS WARRANTY DOES NOT COVER CLAIMS OF DEFEC...

Страница 111: ...CLAIMS ALL EXPRESS WARRANTIES NOT STATED IN THIS WARRANTY SOME STATES DO NOT PERMIT THE EXCLUSION OR LIMITATION OF INCIDENTAL OR CONSEQUENTIAL DAMAGES OR ALLOW LIMITATIONS ON THE DURATION OF IMPLIED W...

Страница 112: ...r vehicle If you purchase from a private party If you purchase a POLARIS product from a private party to be kept and used outside of the country in which the product was originally purchased all warra...

Страница 113: ...cost to you including diagnosis parts and labor MANUFACTURER S WARRANTY COVERAGE The MY 2014 2016 heavy duty off road engines are warranted for the periods listed below If any emission related part on...

Страница 114: ...unit ECU if equipped Sensors associated with ECU operation Emission control information labels Turbocharger if equipped Fuel limiting device Parts components that are scheduled to be replaced as part...

Страница 115: ...113 MAINTENANCE LOG Use the following chart to record periodic maintenance DATE MILES KM OR HOURS TECHNICIAN SERVICE PERFORMED COMMENTS...

Страница 116: ...114 MAINTENANCE LOG DATE MILES KM OR HOURS TECHNICIAN SERVICE PERFORMED COMMENTS...

Страница 117: ...75 Coolant Adding or Changing 74 Cooling Fan 74 Cooling System 74 75 D Differential Lock Switch 23 Differential Locking 55 Disengaging AWD 54 Display Information 32 34 Drive Belt Wear 105 Drivetrain...

Страница 118: ...ine 70 71 Front Gearcase 73 Main Gearcase 72 Transmission 72 Oil Level Engine 69 Front Gearcase 73 Main Gearcase 72 Transmission 72 Oil Recommendation Engine 68 Operation on Public Lands 64 Operator S...

Страница 119: ...reeplay 85 Throttle Freeplay Adjustment 85 Throttle Freeplay Inspection 85 Throttle Pedal 24 Throttle System 85 Tilt Steering 24 Tire Tread Depth 89 Tires 89 90 Torque Axle Nuts 89 Torque Wheel Nut 89...

Страница 120: ......

Страница 121: ...For your nearest Polaris dealer call 1 800 POLARIS 765 2747 or visit www polaris com Polaris Industries Inc 2100 Highway 55 Medina MN 55340 Part No 9928298 Rev 01 Printed in USA...

Отзывы: