background image

62

OPERATION

Track Warm-Up

WARNING!

A loose track or flying debris could cause serious injury or death. 

Stand clear of the front of the snowmobile and the moving track. Never hold the 

snowmobile up or stand behind it while warming up the track. Do not use 

excessive throttle during warm-up or when the track is free-hanging. Use a 

stable rear support.

WARNING!

Use of traction products such as studs, ice growsers, etc. will 

increase the possibility of track damage and/or failure. This could cause loss of 

control, resulting in serious injury or death. Always inspect for track damage 

before operating the snowmobile.

Follow these steps to ensure proper warm-up of the engine, drive train 

and track.
1. Use an appropriate stand to securely support the rear of the snow-

mobile at the rear bumper. The track should be about 4

I

 (10 cm) off 

the ground.

2. Start the engine and allow it to warm up two to three minutes.
3. Depress the throttle abruptly and allow the track to rotate several 

revolutions.

TIP:

It will take longer to warm up the track sufficiently during colder outdoor 

temperatures.

4. Release the throttle, apply the brakes, shut off the engine and lower 

the snowmobile to the ground.

5. Grasp the skis by their front loops and move them from side to side 

to loosen snow and ice.

Slide Rail and Track Cooling

NOTICE:

Inadequate cooling and lubrication will lead to overheating of the slide 

rail and track, resulting in premature wear and failure. Reduce speeds 

and frequently drive into fresh snow to allow adequate cooling and 

polishing of the slide rail and track surfaces. Avoid operating on ice, 

hard-packed surfaces or roads.

Содержание 600 RUSH PRO-R

Страница 1: ...Pantone 425C TM...

Страница 2: ...ns in this manual and on all product labels Failure to follow the safety precautions could result in serious injury or death WARNING The engine exhaust from this product contains chemicals known to th...

Страница 3: ...The text is printed on 100 recycled with 40 post consumer waste PCW...

Страница 4: ...r your nearest Polaris dealer call 1 800 POLARIS or visit www polarisindustries com Polaris Sales Inc 2100 Hwy 55 Medina MN 55340 Phone 1 888 704 5290 Part No 9922276 Rev 02 Printed in USA Pantone 425...

Страница 5: ...velopment of your Polaris vehicle making it the finest machine we ve ever produced For safe and enjoyable operation of your vehicle be sure to follow the instructions and recommendations in this owner...

Страница 6: ...n and quality of production components some minor discrep ancies may result between the actual vehicle and the information presented in this publi cation Depictions and or procedures in this publicati...

Страница 7: ...ontrols and features The Perfect Fit 38 This section includes a Suspension Quick Set Up Guide and explains how to make additional suspension adjustments for the perfect riding experience Pre Ride Insp...

Страница 8: ...4...

Страница 9: ...are inspected by your dealer at specific mileage intervals You and your dealer must complete the registration form included with your snowmobile and forward it to us This completed form is necessary t...

Страница 10: ...hat snowmobiles conform to prescribed sound levels Polaris snowmobiles are engineered to conform to these SAE standards Our muffler systems are designed to reduce noise levels and must not be altered...

Страница 11: ...mating a Polaris key blank with one of your existing keys so if both keys are lost the ignition switch must be replaced Vehicle Model Number ___________________________________________________ Tunnel...

Страница 12: ...eir meanings before reading the manual The safety alert symbol indicates a potential personal injury hazard WARNING A WARNING indicates a hazardous situation which if not avoided may result in death o...

Страница 13: ...in excellent operating condition at all times Always check major and vital safety components before every ride All Polaris snowmobiles are designed and tested to provide safe operation when used as di...

Страница 14: ...off the igni tion open the side panels or hood make the adjustment secure shields and guards secure the side panels and hood and then restart the engine to check its operation WARNING Serious injury c...

Страница 15: ...will also be displayed on the label Eye Protection Do not depend on eyeglasses or sunglasses for eye protection When ever riding a Polaris vehicle always wear shatterproof goggles or use a shatterpro...

Страница 16: ...f it isn t possible to ride with others and you must travel into remote areas always carry survival equipment that s appropriate to the condi tions you may encounter Such equipment may include but is...

Страница 17: ...and speed limits Always be alert and pay attention to the trail ahead If your speed is 40 MPH 64 km h your snowmobile is traveling about 60 feet 18 m per second If you look back for only two seconds y...

Страница 18: ...drown out the sound of approaching vehicles Look ahead behind and to both sides before turning or crossing railroad tracks or highways Steep embankments may also hide your view Always leave yourself a...

Страница 19: ...ow is connected You may be riding on a flat slope or snow covered road but if the snowpack above is unstable enough you can trigger an avalanche on a steeper slope above you Always be aware of snow co...

Страница 20: ...rating on slippery surfaces Inadequate Snow Conditions Since snow provides the only lubrication for the power slide suspension and on liquid cooled models cooling for the engine adequate snow cover is...

Страница 21: ...causing serious injury or death Use caution and good judgement when driving in hilly terrain Use extra caution when operating in hilly terrain If climbing a hill is unavoidable keep your weight low an...

Страница 22: ...mplex mechanism that rotates at high speeds Each clutch is dynami cally balanced before installation Any tampering may disrupt this preci sion balancing and create an unstable condition Cold Weather D...

Страница 23: ...ell as yours make sure they take a snowmobile safety course Everyone can benefit from the course Don t jump your snowmobile over large drifts or similar terrain Jumping may injure your back because of...

Страница 24: ...93 50 26 19 12 4 3 10 17 24 31 38 45 52 60 67 74 81 88 95 55 25 18 11 4 3 11 18 25 32 39 46 54 61 68 75 82 89 97 60 25 17 10 3 4 11 19 26 33 40 48 55 62 69 76 84 91 98 Frostbite in 30 min 10 min 5 min...

Страница 25: ...rchase a replacement Replacement safety labels are provided by Polaris at no charge The part number is printed on the label Clutch Warning This warning label is found on the oil bottle WARNING Do not...

Страница 26: ...Warning The reverse warning label is located on the console either beside the steering post or below the windshield WARNING Reverse operation even at low speeds can cause loss of control resulting in...

Страница 27: ...protection and adequate clothing while operating this vehicle This vehicle is designed for adult use only Check local laws for age requirements When operating with a passenger on approved models only...

Страница 28: ...11 2 1 3 4 10 9 1 Nosepan 2 Skis 3 Front Bumper 4 Hood 5 Headlight 6 Windshield accessory 7 Handlebar 8 Operator Seat 9 Taillight 10 Rear Bumper 11 Snow Flap 12 Suspension 13 Track 14 Side Panel 15 S...

Страница 29: ...4 Ignition Switch 5 Engine Stop Switch 6 Throttle Control 7 Recoil Starter Handle 8 Parking Brake Lock 9 Handlebar Grip Warmer Switch 10 Thumbwarmer Switch 11 Electronic Reverse Button 12 Mode Switch...

Страница 30: ...ht side of the bag can be used to stow other items Adjustable Headlights Move the headlight adjuster to the left to adjust the headlight beam upward Move the adjuster to the right to adjust the beam d...

Страница 31: ...The engine will enter a limp home mode and RPM will be limited to 6500 RPM The engine will remain in this mode until it is shut down and restarted The most likely causes of severe detonation are outli...

Страница 32: ...SET switch on the left handlebar NOTICE Certain products will damage the lens and other plastic sur faces Do not use alcohol to clean the instrument cluster Immediately clean off any gasoline that spl...

Страница 33: ...o cool the engine See page 86 If the indicator flashes continued operation could result in serious engine damage Stop the engine immediately Low Oil Indicator This indicator appears when engine oil is...

Страница 34: ...nd diagnostic display mode Setting changes can be made with the engine running or with the engine off If the engine is off make sure the stop switch is pressed down and turn the ignition key to the ST...

Страница 35: ...When the last segment clears a low fuel warning is activated All segments including the fuel icon will flash Refuel immediately Tip If the fuel icon fails to display an open or short circuit has occur...

Страница 36: ...plays first make sure the information dis play area is set to display either engine speed or vehicle speed 2 Press and hold the mode button on the instrument cluster or the mode switch on the left han...

Страница 37: ...To reset a trip meter press and hold the SELECT button or the SET switch until the meter resets to zero Playback Function The playback function allows the rider to record and play back engine speed v...

Страница 38: ...are changed The new settings will remain until changed by the operator Change Method 1 1 Press and release the MODE button or MODE switch until engine temperature displays 2 Press and hold the MODE b...

Страница 39: ...o view active codes 1 Do not stop the engine 2 Press and release the SELECT button or SET switch to toggle to the diagnostic display mode When a code is active the diagnostic dis play mode will appear...

Страница 40: ...e Position Sensor Voltage Too High 51 3 Voltage Too Low 4 Abnormal Rate of Change 10 Engine Temperature Sensor Voltage Too High 110 3 Voltage Too Low 4 Temperature Too High 16 Engine Overheat Shutdown...

Страница 41: ...DI TPS TMAP PWR Voltage Too High 3509 3 Voltage Too Low 4 Voltage Above Critical Level 0 Voltage Below Critical Level 1 Sensor Supply Voltage 2 DC SDI Ground Speed Sensor PWR Voltage Too High 3510 3 V...

Страница 42: ...r the standard spring as well as for accessory springs that are available for heavier or lighter riders Step 1 Set up rear shock spring preload for rider weight Before riding for the first time use th...

Страница 43: ...iffer ride and less bottoming Turning a clicker counter clockwise decreases damping for a softer ride Test ride the snowmobile and continue making spring and clicker adjustments until you achieve the...

Страница 44: ...Spring Accessory 120 Spring Accessory 260 Spring See your Polaris dealer to order an accessory spring and the gauge calibrated for that spring Rider Weight Dimension Rider Weight Dimension Rider Weigh...

Страница 45: ...t IFS Shock Spring Preload 3 3 4 9 5 cm from body end to retainer Front Track Shock Clicker 2 clicks clockwise from full soft Front Track Shock Spring Preload 1 1 4 3 2 cm from body end to retainer St...

Страница 46: ...n rider weight vehicle speed riding style and trail conditions We recommend starting with factory settings and then customizing each adjustment individually to suit rider preference The snowmobile sho...

Страница 47: ...ring preload grasp the spring retainer and rotate it Increasing the spring preload too much may adversely affect the handling of the snowmobile and the performance of the suspension Never exceed one i...

Страница 48: ...icker counter clockwise for a softer ride When adjusting we recommend that you turn the clicker only one or two clicks then test ride Always adjust both shocks equally Shock Valving Some shocks can be...

Страница 49: ...adjust ments to one area at a time so you can evaluate the change For further assistance see your dealer Suspension Performance Tips Rider weight usually determines the position at which the spring pr...

Страница 50: ...asing spring preload will decrease ski to ground pressure Decreasing spring preload will increase ski to ground pressure The initial preload setting is 1 1 4 inches 3 2 cm from body end to retainer To...

Страница 51: ...e snowmobile and the performance of the suspension When decreasing preload make sure at least two turns of preload are holding the spring between the retainer on the top of the shock and the threaded...

Страница 52: ...the handlebar forward or rearward to the desired position 3 Tighten the bolts Handlebar Angle 1 Loosen the four bolts on the top of the adjuster block If necessary pry the blocks apart with a screwdr...

Страница 53: ...nowmobile Use of unapproved parts and accessories may result in Non compliance with government industry requirements Voiding of warranty Injury to self or others This applies but is not limited to the...

Страница 54: ...nger than the recommended length on snowmobiles equipped with center coolers will result in center cooler damage or damage to the tunnel Track studding will enhance braking control on hard packed snow...

Страница 55: ...proper vehicle control Maintain a proper balance between the number of studs and the length of carbide on the skags the more studs you use the longer the carbide on the skags should be See your dealer...

Страница 56: ...Steering System 57 Recoil Rope 57 Coolant Level 85 Chaincase Oil Level 78 Injection Oil Level 65 Parking Brake Lock Brake Lever Brake System 55 56 90 Auxiliary Shut Off Switch Engine Stop Switch 58 Ig...

Страница 57: ...s Check the follow ing items on a weekly basis or before any long trip Item See Page Check suspension mounting bolts for tightness Check rear idler wheel bolts for tightness 101 Check rear idler adjus...

Страница 58: ...Read the Owner s Manual completely and refer to it often The manual is your guide to safe and enjoyable snowmobiling experience n Throttle Lever The throttle and brake are the primary controls of your...

Страница 59: ...tes low brake fluid level or air in the hydraulic system Refer to the brake bleeding infor mation on page 92 or see your dealer for service Lever Feel If the brake lever feels spongy when squeezed che...

Страница 60: ...to place Do not force the lock or it may break The parking brake light will illuminate if the parking brake lever lock is set while the engine is running It will also illuminate when the service brake...

Страница 61: ...Use of traction products such as studs increases the possibility of track damage and or failure Driving at high speeds for extended periods of time in marginal lubrication could severely damage track...

Страница 62: ...ch down to stop the engine Pull it up to allow restarting n Ignition Switch Make sure the engine stops when the ignition switch is turned to OFF n Tether Switch if equipped If your snowmobile has a te...

Страница 63: ...le no more than 1 4I open while cranking the engine When the engine starts immediately release the throttle CAUTION To avoid injury and or engine damage do not operate the electric starter or pull rop...

Страница 64: ...ree hours of operation will damage close fitted engine parts Do not operate at full throttle or high speeds for extended periods during the first three hours of use Vary the throttle openings and vehi...

Страница 65: ...el and oil injection systems Polaris recommends using Polaris Semi Synthetic Oil for premixing the first tank of fuel at 40 1 one pint of oil per 5 gallons of fuel and for the first fill of the oil ta...

Страница 66: ...ate stand to securely support the rear of the snow mobile at the rear bumper The track should be about 4I 10 cm off the ground 2 Start the engine and allow it to warm up two to three minutes 3 Depress...

Страница 67: ...and can cause loss of consciousness or death in a short time The engine exhaust from this product contains chemicals known to cause can cer birth defects or other reproductive harm Operate this vehicl...

Страница 68: ...e damage may occur if ethanol fuel is used while the non etha nol fuel resistor is installed The check engine light may also display in this condition as this could cause detonation If you re unsure o...

Страница 69: ...indicator light comes on 2 Open the left side panel 3 View the oil level in the oil bottle 4 Add oil as needed before operating NOTICE Operating the snowmobile without adequate engine lubrication can...

Страница 70: ...e safety switch can result in serious injury or death in the event of an accident If the throttle safety switch does not shut off the engine during a carburetor throttle system malfunction immediately...

Страница 71: ...the throttle lever operates properly turn the ignition switch on and go through normal starting procedures 5 If the engine doesn t start take the snowmobile to an authorized Polaris dealer for service...

Страница 72: ...See page 66 for more information about the engine stop switch and throttle safety switch SYSTEM WHAT IT DOES Ignition Switch Interrupts ignition circuit Brake Slows jackshaft Engine Stop Switch Inter...

Страница 73: ...dle speed Shift to or from reverse only when the snowmobile is stopped and when engine speed is at idle Look behind the vehicle before and while backing Avoid sharp turns Apply throttle slowly Electro...

Страница 74: ...ansmission is in reverse The maximum engine RPM will be 6000 when in reverse TIP If the engine stops running the snowmobile will be in forward gear when it s restarted Disengaging Reverse 1 Stop the s...

Страница 75: ...w hitch on the snowmobile should be used If passengers are to be towed on a toboggan or sled make sure the pole is at least four feet 1 2 meters long to prevent any possibility of contact between the...

Страница 76: ...is intended solely for your use in making a purchasing decision Emission Control Maintenance Requirements Your snowmobile is certified to operate on gasoline with a minimum octane level of 87 R M 2 If...

Страница 77: ...rvals All necessary replacement parts and labor incurred with the exception of authorized warranty repairs become the responsibility of the regis tered owner If during the course of the warranty perio...

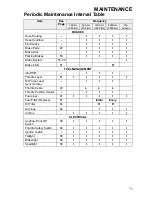
Страница 78: ...ubricate Item See Page Frequency 150 mi 240 km 500 mi 800 km 1000 mi 1600 km 2000 mi 3200 km Pre Season CLUTCH Clutch Alignment Offset without belt 94 I I I Drive Belt Condition 95 I I I I Clutches 94...

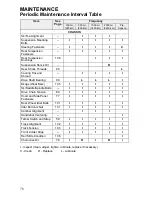
Страница 79: ...Brake System 55 90 I Brake Fluid 91 R FUEL MANAGEMENT Idle RPM I I I Throttle Lever 67 I I I I I Oil Pump Lever synchronize I I I Throttle Cable 80 L L L Throttle Position Sensor I I I Fuel Lines 81...

Страница 80: ...Suspension Bushings 106 I I I Suspension Shock Oil R Rear Shock Threads 80 L Cooling Fins and Shroud I I I I Drive Shaft Bearing 80 L L L I Skags Wear Bars 105 I I I I I Ski Saddle Spindle Bolts I I...

Страница 81: ...lace before starting the engine To open a side panel rotate the two 1 4 turn fasteners at the upper edges of the side panel Release the side panel strap at the lower edge of the panel To remove an ope...

Страница 82: ...ill plug hole Polaris recommends the use of Polaris Synthetic Chaincase Lube See page 110 for the part numbers of Polaris products Oil Level 1 Position the vehicle on a level surface 2 Remove the fill...

Страница 83: ...r on the drain plug TIP The sealing surfaces on the drain plug and the oil tank should be clean and free of burrs nicks or scratches 4 Reinstall the drain plug Torque to 6 10 ft lbs 8 13 Nm 5 Remove t...

Страница 84: ...ne lubricants will not perform as well See page 110 for the part numbers of Polaris products Driveshaft Bearing Inject grease into the fitting on the speedometer sensor housing until grease purges fro...

Страница 85: ...olaris dealer for replacement of the fuel filter Have the filter replaced initially at 1000 miles 1600 km then every 2000 miles 3200 km thereafter Inspect the fuel lines regularly for signs of deterio...

Страница 86: ...ange the spark plugs every 2000 2500 miles 3200 4000 km Use recommended spark plugs with the proper gap Use only resistor type spark plugs Torque spark plugs to 18 22 ft lbs 24 30 Nm Always carry spar...

Страница 87: ...Reverse the procedure for spark plug installation Torque to specifi cation 5 Reinstall the spark plug cap Spark Plug Condition Normal Plug The normal insulator tip is gray tan or light brown There wil...

Страница 88: ...0 miles 1600 km Oil Filter The oil filter is located at the side of the oil tank Have your dealer change the oil filter and bleed the system annually or every 1000 miles 1600 km TIP The direction of t...

Страница 89: ...See page 110 for Polaris products Never add tap water to the cooling system Minerals cause deposits and may react adversely with the metals in the engine and cooling system n Coolant Level The engine...

Страница 90: ...ine frequently to allow it to cool down Flashing Indicator If the indicator flashes continued operation could result in serious engine damage The system will automatically reduce engine power and crea...

Страница 91: ...w from the water outlet manifold and or the thermostat housing Allow the coolant to bleed through the system until it runs out the bleed holes Reinstall the bleed screw into the manifold 6 Add coolant...

Страница 92: ...cting CAUTION Hot exhaust system parts can cause burns Allow adequate time for the exhaust system to cool Never perform this procedure with the engine running 1 Open the side panels and remove the hoo...

Страница 93: ...the tensioner side Lock the brake lever lock or have an assistant hold the brake lever firmly 3 Loosen the adjuster bolt jam nut 4 Finger tighten the adjuster bolt until it can no longer be adjusted b...

Страница 94: ...death Properly functioning brakes are vital to your safety Be sure the brake pads do not drag on the disc and that brake lever travel is not excessive Always replace brake pads when the brake pad mate...

Страница 95: ...ke fluid always discard any unused portion Never store or use a partial bottle Brake fluid is hygroscopic meaning it rapidly absorbs moisture from the air The moisture causes the boiling temperature o...

Страница 96: ...2 Fill the master cylinder reservoir to between the MIN and MAX marks or 1 4 5 16I 6 8 cm below the lip of the reservoir open ing Reinstall the gasket and cover 3 Slip a rubber tube over the ball of...

Страница 97: ...the headlight assembly 2 Remove the wire harness connector from the back of the headlight 3 Grasp the bulb housing and turn it counter clockwise to remove the bulb 4 Apply dielectric grease to the so...

Страница 98: ...an authorized Polaris dealer Any unauthorized modifications to clutches such as add ing or removing weights will void the warranty NOTICE The bushings in the weights and rollers of Polaris clutches a...

Страница 99: ...cracks and excessive looseness Replace the belt if any of these conditions exist See Drive Belt Troubleshooting on page 115 Always carry a spare drive belt Store the spare belt in the belt clip locat...

Страница 100: ...and apply downward pressure while measuring at point 2 This measurement should be 1 1 4 inches 3 2 cm Drive Belt Adjustment 1 Loosen the 7 16 inch jam nut on the belt width adjuster 2 Using a 1 8 inch...

Страница 101: ...o come to a complete stop 3 Lock the parking brake 4 Remove the left side panel 5 Remove the clutch guard retaining pin and open the clutch guard 6 Rotate the driven clutch counter clockwise 1 4 turn...

Страница 102: ...separate the sheaves as outlined in the belt removal procedures 3 Turn the driven clutch moveable sheave clockwise while pushing inward and forcing the belt down between the sheaves 4 Hold the belt d...

Страница 103: ...l needs snow for lubrication Excessive wear indicates insufficient lubrication A new rail slide can cause faster heat build up in limited lubrication resulting in excessive wear WARNING Operating with...

Страница 104: ...nsion and alignment TIP Tension adjustments should be made only after the track is warmed up and limber 1 Turn the engine off 2 Lift the rear of the snowmobile and safely support it off the ground 3 P...

Страница 105: ...e equal adjust ment on both sides of the track 9 Repeat the measurement on the other side of the track TIP Check more frequently when the snowmobile is new 10 Start the engine and slowly rotate the tr...

Страница 106: ...ns Stop the engine and let the track come to a stop do not apply brakes 3 Inspect track alignment by looking through the track window to make sure the rails are evenly spaced on each side If the track...

Страница 107: ...103 MAINTENANCE Steering System Steering Inspection Each week or before a long ride check all steering system fasteners and tighten if necessary...

Страница 108: ...dealer With the handlebars in a straight ahead position and with vehicle weight compressing the suspension measure from the straight edge of the skis at the center of the ski mounting bolt The measure...

Страница 109: ...snow or ice Check skags before each use of the snowmobile to ensure positive steer ing characteristics Skags must be replaced when worn to half their orig inal diameter TIP Carbide skags must be repl...

Страница 110: ...limit indicator groove Do not operate the snowmobile if slide thickness measures less than 7 16I 1 1 cm Rear Suspension Inspect the rear suspension bushings at the intervals outlined in the Peri odic...

Страница 111: ...ts will buff the matte surface of the finish result ing in a glossy finish It is not recommended that you clean matte fin ishes with a pressure washer as this will further imbed contaminants into the...

Страница 112: ...f more than 60 days the engine must be fogged with fogging oil Follow the engine fogging instructions provided on the container Always add Premium Carbon Clean or a fuel conditioner stabilizer to the...

Страница 113: ...he Snowmobile Whenever the snowmobile is transported 1 Be sure the fuel cap and oil cap are installed correctly 2 Tie the snowmobile to the transporting unit securely using suitable straps 3 Remove th...

Страница 114: ...S Gold Plus Synthetic 2 Cycle Engine Oil 4 ltr Chaincase Lubricants 2873105 Synthetic Chaincase Lubricant qt 2872951 Synthetic Chaincase Lubricant 12 oz Grease Specialized Lubricants 2871312 Grease Gu...

Страница 115: ...drive belt Excessive belt sheave clearance SEE YOUR DEALER Drive belt turns over Wrong belt for appli cation Replace the drive belt Clutch alignment out of spec SEE YOUR DEALER Engine mount bro ken or...

Страница 116: ...OUR DEALER Poor low RPM performance Worn drive belt Inspect and replace as needed Excessive belt sheave clearance SEE YOUR DEALER Sticky clutch SEE YOUR DEALER Poor fuel quality Use 87 91 octane fuel...

Страница 117: ...a major engine prob lem that must be repaired before operating SEE YOUR DEALER Engine lacks power Fouled or defective spark plug s Replace the plug s Fuel filter loss of high RPM power SEE YOUR DEALE...

Страница 118: ...s 39 and 47 Adjust torsion spring blocks or install optional torsion springs to achieve correct sag Machine darts from side to side Check ski alignment see page 104 Make sure spindles and all steering...

Страница 119: ...oid riding in high ambient temperatures Check for snow ingestion Ice and snow build up between track and tunnel Warm the engine at least five minutes Take the drive belt off the snowmobile in extremel...

Страница 120: ...n tained in this manual Your dealer is also familiar with Polaris policies and pro cedures and will be happy to assist you When contacting us about parts service or warranty always provide the fol low...

Страница 121: ...owner reports theft A In addition to notifying the proper law enforcement officials the owner must call Polaris Customer Service B Owners must provide their name address telephone number and the mode...

Страница 122: ...not caused by a defect in material or workmanship The warranty does not cover accidental damage normal wear and tear abuse or improper handling The warranty also does not cover any snowmobile that has...

Страница 123: ...t present your copy of the Warranty Registration form to the dealer The cost of transportation to and from the dealer is YOUR responsibility Polaris recommends that you use your original selling deale...

Страница 124: ...verage in the event of a warranty claim This warranty also excludes failures resulting from improper lubrication improper engine timing improper fuel surface imperfections caused by external stress he...

Страница 125: ...overage is automatic with no addi tional paperwork required The free Second Year Engine Service Contract is subject to a 50 deductible per visit Regular documented service maintenance visits are requi...

Страница 126: ...ake your vehicle to an authorized Polaris dealer You must show the dealer photo identification from the country of the selling dealer s authorized location as proof of residence Upon residence verific...

Страница 127: ...omponents of systems whose only purpose is to control emissions Repairing or replacing other components not covered by this war ranty is the responsibility of the vehicle owner This emissions limited...

Страница 128: ...ue to accidents abuse or improper handling maintenance or use This limited warranty also does not cover any engine that has been structurally altered or when the vehicle has been used in racing compet...

Страница 129: ...r each time your snow mobile is serviced This will provide you and future owners with an accurate log of maintenance and services performed on the snowmobile DATE MILES KM TECHNICIAN SERVICE PERFORMED...

Страница 130: ...126 MAINTENANCE LOG DATE MILES KM TECHNICIAN SERVICE PERFORMED COMMENTS...

Страница 131: ...127 MAINTENANCE LOG DATE MILES KM TECHNICIAN SERVICE PERFORMED COMMENTS...

Страница 132: ...Cooling System Flushing 86 Customer Service 116 D DET 27 Detonation Elimination Technology 27 Diagnostic Display Codes 36 37 Diagnostic Display Mode 35 Disabled Operators 12 Display Standard Metric 3...
Страница 133: ...nterval Table 74 76 Maintenance Program 73 Maintenance Recommendations 9 Maneuverability 18 Matte Finish Cleaning 107 Metric Standard Display 34 N O Noise 6 Odometer Engine Hour Display 33 Oil Change...

Страница 134: ...at 26 Storage Procedures Seasonal Extended 107 108 Storage Daily 71 Storage Tools 26 Studs 50 Survival Preparation 12 S Suspension Adjustments Front 42 44 Suspension Adjustments Rear 45 47 Suspension...

Отзывы: