Fast Manual Instructions
Outdoor IP camera PNI IP10MP 720p
This operation manual is only for a brief
description of the product, for more
product information please open the
CDROM.
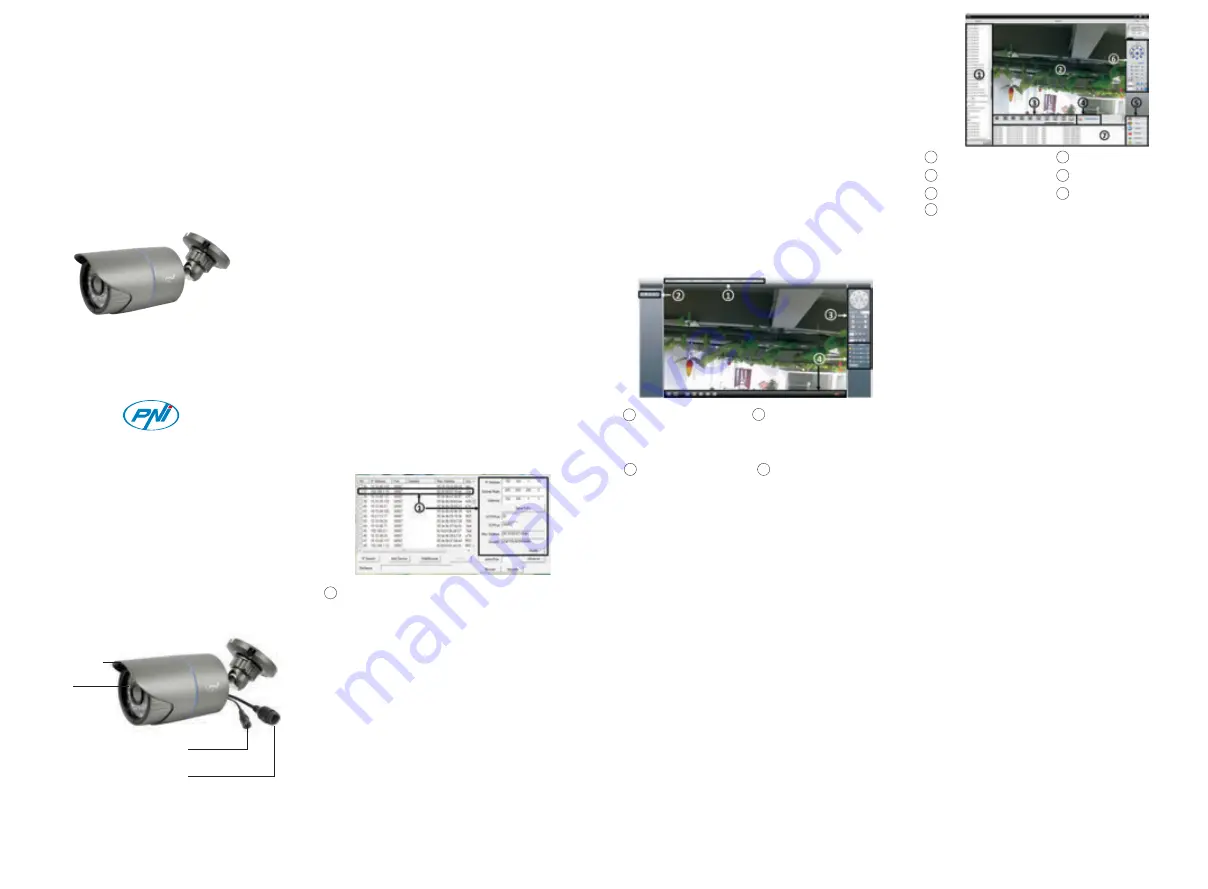
Choose IP address to config. IP address
and port are displayed on the right, you
can modify the IP parameters and click
"Modify" to save.
Note: IP address of the speed dome
must share the same network segment
with the router and conform to the
router's IP, and make sure the IP is not
conflicted in the network of LAN. Go
to[conform to local PC] to automatically
match subnet mask and default
gateway with local computer.
Note: Plug-ins need to be installed if you
login via IE browser. IE is default to
intercept plug-in.
Please set IE security level. Go to
<internet options>--<security>--<
Customized level>-<ActiveX >, enable
them all. Or go to our official website to
d o w n l o a d a n d i n s t a l l p l u g - i n s
(http:flwww.xmeye.net); Or get it from
t h e C D a n d i n s t a l l I E p l u g - i n
_V1.1.0.78.exe.
4.2 Client access
1. Open the CD, double-click Setup.exe,
go to [English] > [Software]> [CMS]to
install centralized network video
management software.CMS shortcut
icon will be displayed when installed
successfully.
2.Double-click CMS shortcut icon, input
user name and password( user name:
super, no password) to login.
-Manual add: Input the device name, IP
address, domain name or serial number
of the speed dome, click "ok" to finish
the adding.
Note: Domain name, clouds and ARSP
are under public network to add the
device and that need Speed dome
connected to Public network.
4. Double-click speed dome name in
<channel display area>, right-click the
channel name to choose main stream or
sub-stream.
4.3 Mobile Access
Network environment: WIFI, 3G
Mobile system: Android, Apple
Software Name: VmEyeCloud
Software Download: Google Market,
App store. Note: if the speed dome can
be visited on public network, it also can
be achieved via VmEyeSuper on public
network.
3.Go to [Main Menu] > [System] >
[Device Manager J to add speed dome
to client, you can add camera via IP
address, domain name, cloud or ARSP.
Added cameras will be displayed in
channel display area. Adding visa IP
supports both search adding and
manual adding, adding by others
methods support manual adding only.
- Search add: click [IP search] ,all online
IP address will be displayed, select one,
click OK to finish. Note: Search function
only support adding via IP address.
3.1 Boot up
Please use the formal 12V DC power
adapter; otherwise the camera will work
abnormal or even damage.
Please use the positive power of about
50 seconds of network cameras start
complete, the network camera through
a cable connected to the LAN.
3.2 IP config
[IP address]:default is 192.168.1.10
[Subnet Mask]:default is 255.255.255.0
[Gateway]:default is 192.168.1.1.
Open the CD, double-click Setup.exe,
go to [English]> [Software]> [Upgrade
management] to install upgrade
management tools. Then click [IP
search],all online IP address of the
monitoring devices within the LAN will
be searched and displayed.
4.1 IE Access
Open web browser, enter IP address,
take 192.168.1.1 O as an example,
input http: //192.168.1.10 to connect.
Enter user name and password
(default user name is admin, no
password). Change the administrator
password timely after login.
After successful login, go to [stream
menu] to connect main stream or
substream.
1. Introduction:
2. Product description:
3. Boot up & IP configuration:
4. LANAccess:
Waterproof metalic case
IR LED
DC 12V input
Network interface
1
1
2
3
4
Choose one IP address
Main menu
1 Channel display
Stream selection
2 Preview
PTZ control
3 Screen-split
Shortcut menu
4 Volume
5 Main menu
6 PTZ control
7 Log display
1.
3.
5.
7.
2.
4.
6.
8.


