background image

User manual

14

En

gli

sh

Technical specifications

Channels

40 AM/FM

Frequency range

26.965 – 27.405 MHz

Power supply

12V/24V

Dimensions/weight

115 x 150 x 38 mm/0.8 kg

Operating temperature

-26° - +60°C

Reception

Sensitivity

> 1

µ

V

Frequency error

300Hz

Current consumption

200 mA in stand-by

Emission

Maximum output power

4W FM at 12V/24V

Modulation

70% to 90% (AM)

1.9KHz (FM)

Antenna impedance

50 Ohm

Current consumption

max. 2 A

Содержание ESCORT HP 9700

Страница 1: ... CB Statie radio CB EN User manual 3 DE Benutzerhandbuch 15 ES Manual de usuario 27 FR Manuel utilisateur 39 HU Használati utasítás 91 IT Manuale utente 63 PL Instrukcja obsługi 75 RO Manual de utilizare 87 PNI ESCORT HP 9700 ...

Страница 2: ......

Страница 3: ...er than 26 C and higher than 60 C the temperature on board a vehicle can sometimes exceed 80 C which can cause irreparable damage to the radio in case of prolonged exposure Do not expose the radio to sunlight for a long time Do not coverthe redio it will prevent it from cooling Check that the vehicle battery is sufficiently charged to avoid rapid discharge It is important to turn off the radio bef...

Страница 4: ...dio in your car choose the most suitable location so that when using it it does not disturb you while driving To install the radio use the bracket and accessories in the package The screws must be tightened well to avoid vibration of the radio while driving The mounting bracket can be positioned above or below the radio and it can be tilted depending on the installation method WARNING Make sure th...

Страница 5: ...le to the antenna plug on the back of the radio Testing the radio Once the radio is installed and powered test its correct operation Check that the radio is powered correctly Check the antenna connection to the radio Connect the microphone to the jack on the front panel of the radio Turn on the radio by turning the volume knob clockwise and adjusting the volume to the desired level Selectthedesire...

Страница 6: ...ivare scan function 3 RFG MENU Activate RF Gain fucntion Access the menu 4 ASQ SQ Enter SQ ASQ level setting mode use UP DOWN keys on microphone Switch between SQ and ASQ 5 EMG Lock Automatically go to emergency channels 9 19 Key lock except PTT button on the microphone 6 LCD screen 7 USB 5V 1 7Aport 8 Turn on off the radio or adjust the volume ...

Страница 7: ...ly press UP and DOWN keys on the microphoneto change the channel Press and hold to scroll the channels faster Functions SQ ASQ Enable manual squelch SQ and level setting 1 Long press the key ASQ SQ 4 The SQ icon and the current squelch level will flash on the screen 2 Shortly press UP and DOWN keys on the microphone to change the level 28 levels are available from level 00 squelch open to maximum ...

Страница 8: ...he microphone to change the level 5 levels are available from level 01 to level 05 only the strongest signals can be heard 3 Briefly press the ASQ SQ key to return to normal operation AM FM modulation 1 Shortly press AF SC 2 to switch between AM and FM Note If you have the radio set to a norm that does not support AM pressing the A F key will have no effect The FM icon will also be displayed on th...

Страница 9: ...deactivate the scan function the radio will return to normal operation and the SQ icon will disappear from the screen RF Gain Shortly press RFG MENU 3 key to enable disable the RF Gain function RF Gain level setting 1 Long press the RFG MENU key to access the menu 2 Briefly press the RFG MENU key until you reach the RF GAIN menu The current RF Gain level will flash on the screen 3 Briefly press th...

Страница 10: ... to switch to channel 19 4 Briefly press the EMG Lock key again to return to normal operation The EMG icon will disappear from the screen Key Lock 1 Long press the EMG Lock key 5 to activate the Lock function 2 A padlock icon will appear on the screen 3 All keys are now locked except the PTT key 4 Long press the EMG Lock key to deactivate the Lock function The function icon will disappear from the...

Страница 11: ...tions 1 RFGAIN The current RF Gain level will flash on the screen Briefly press the UP and DOWN keys on the microphone to change the level 9 levels are available 2 BRIGHT screen brightness The current brightness level will flash on the screen Briefly press the UP and DOWN keys on the microphone to change the level 5 levels are available from 1 darkest to 5 brightest ...

Страница 12: ...e microphone to change the level 6 levels are available from 1 brightest to 6 darkest 4 ANC Automatic Noise Cancelling The active option will flash on the screen Options ON OFF Briefly press the UP and DOWN keys on the microphone to switch between the two options If this function is active the NC icon will appear on the screen ...

Страница 13: ...ilable standards Standard Channel Frequenc range EU Europe 40FM 40AM 26 965 27 405MHZ CE CEPT 40 FM 26 965 27 405MHZ UK UK 40 FM 27 60125 27 99125MHZ PL Poland 40FM 40AM 26 960 27 400MHZ E Spain 40FM 40AM 27 4150 27 855 I2 Italy 34FM 34AM 26 965 26 865MHZ D Germany 40FM 40AM FM 26 965 27 405 26 565 26 955 AM 27 005 27 135 D2 Germany 40FM 40AM FM 26 965 27 405 AM 27 005 27 135 DE Germany 40FM 40AM ...

Страница 14: ...supply 12V 24V Dimensions weight 115 x 150 x 38 mm 0 8 kg Operating temperature 26 60 C Reception Sensitivity 1µV Frequency error 300Hz Current consumption 200 mA in stand by Emission Maximum output power 4W FM at 12V 24V Modulation 70 to 90 AM 1 9KHz FM Antenna impedance 50 Ohm Current consumption max 2 A ...

Страница 15: ...n BringenSiekeineMetallgegenständeindieNähedesinternenelektrischen Teils der Radio Stromschlaggefahr Vermeiden Sie es die Radio Temperaturen unter 26 C und über 60 C auszusetzen Die Temperatur an Bord eines Fahrzeugs kann manchmal 80 C überschreiten was bei längerer Exposition zu irreparablen Schäden an der Radio führen kann Setzen Sie die Radio nicht längere Zeit dem Sonnenlicht aus Stellen Sie n...

Страница 16: ...lbarer ASQ SQ ASQ Taste am Mikrofon EMG Taste Aktivierung des Notfallkanals ANC Funktion Automatic Noise Cancelling RF Gain Funktion Scanfunktion On Screen Signal für die Stromübertragung empfang Externer Lautsprecherstecker USB Anschluss an der Vorderseitel Installationsanleitung Wählen Sie vor dem Einbau der Radio in das Auto den am besten geeigneten Ort damit Sie sie verwenden können ohne sich ...

Страница 17: ...ezialisierten Techniker Normalerweise muss die Antenne auf dem höchsten Teil des Fahrzeugs positioniert werden ohne durch Hindernisse abgeschirmt zu sein und so weit wie möglich von elektrischen Quellen oder elektromagnetischen Störungen entfernt zu sein Das Koaxialkabel der Antenne darf nicht unterbrochen oder gedrückt werden Verbinden Sie den Stecker am Ende des Antennenkoaxialkabels mit dem Ant...

Страница 18: ...ie es los um es zu empfangen Überprüfen Sie den Pegel des über die Signalleisten an der Vorderseite der Radio gesendeten empfangenen Signals Beschreibung frontale Tafel Nr Name Funktion durch kurzes Drücken Funktion durch langes Drücken 1 Konnektor 6 Pins Mikrophon 2 AF SC Änderung Modulation Am FM Aktivierung Funktion Scannen Sender 3 RFG MENU Aktivierung Funktion RF Gain Abruf Menü Einstellungen...

Страница 19: ...g 1 Drehen Sie den Potentiometer 8 im Uhrzeigersinn um das Funkgerät einzuschalten Auf dem Bildschirm erscheint den aktuellen Sender die aktuelle Frequenz die Modulation und die aktiven Funktionen 2 Drehen Sie den Potentiometer weiter nach rechts um die gewünschte Lautstärke anzupassen 3 Drehen Sie den Potentiometer 8 im Gegenuhrzeigersinn um das Funkgerät auszuschalten Auswahl Sender Drücken Sie ...

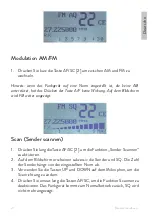
Страница 20: ...nn nur die stärksten Signale hören Hinweis Das Squelch Niveau hängt von der Antennenlänge und von den Wetterbedingungen ab 3 Drücken Sie kurz die Taste ASQ SQ um zum Normalbetrieb zurückzukehren Aktivierung Squelch automatisch ASQ und Einstellung Niveau 1 Drücken Sie lang die Taste ASQ SQ 4 Auf dem Bildschirm blinkt AQ und das aktuelle Squelch Niveau 2 Drücken Sie kurz die Tasten UP und DOWN auf d...

Страница 21: ...ter angezeigt Scan Sender scannen 1 Drücken Sie lang die Taste AF SC 2 um die Funktion Sender Scannen zu aktivieren 2 Auf dem Bildschirm erscheinen sukzessiv die Sender und SQ Die Zahl der Sender hängt von der eingestellten Norm ab 3 Verwenden Sie die Tasten UP und DOWN auf dem Mikrophon um die Scanrichtung zu ändern 4 Drücken Sie erneut lang die Tasten AF SC um die Funktion Scannen zu deaktiviere...

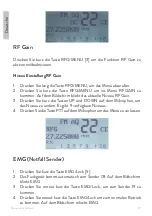
Страница 22: ... Niveau RF Gain 3 Drücken Sie kurz die Tasten UP und DOWN auf dem Mikrophon um das Niveau zu ändern Es gibt 9 verfügbare Niveaus 4 Drücken Sie die Taste PTT auf dem Mikrophon um das Menü zu verlassen EMG Notfall Sender 1 Drücken Sie kurz die Taste EMG Lock 5 2 Das Funkgerät kommt automatisch zum Sender 09 Auf dem Bildschirm blinkt EMG 3 Drücken Sie erneut kurz die Taste EMG Lock um zum Sender 19 z...

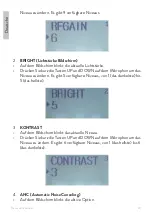
Страница 23: ...TT 4 Drücken Sie lang die Taste EMG Lock um die Funktion Lock zu deaktivieren Das Symbol der Funktion wird nicht mehr angezeigt Menü Option RFGAIN BRIGHT KONTRAST ANC Drücken Sie lang die Taste RFG MENU um das Menü abzurufen Drücken Sie kurz die Taste RFG MENU um zwischen die Optionen zu wechseln 1 RFGAIN Auf dem Bildschirm blinkt das aktuelle Niveau des RF Gain Drücken Sie kurz die Tasten UP und ...

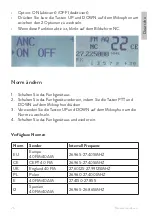
Страница 24: ...DOWN auf dem Mikrophon um das Niveau zu ändern Es gibt 5 verfügbare Niveaus von 1 das dunkelste bis 5 das hellste 3 KONTRAST Auf dem Bildschirm blinkt das aktuelle Niveau Drücken Sie kurz die Tasten UP und DOWN auf dem Mikrophon um das Niveau zu ändern Es gibt 6 verfügbare Niveaus von 1 das hellste bis 6 das dunkelste 4 ANC Automatic Noise Canceling Auf dem Bildschirm blinkt die aktive Option ...

Страница 25: ...chalten Sie das Funkgerät wieder ein indem Sie die Tasten PTT und DOWN auf dem Mikrophon drücken 3 Verwenden Sie die Tasten UP und DOWN auf dem Mikrophon um die Norm zu wechseln 4 Schalten Sie das Funkgerät aus und wieder ein Verfügbare Normen Norm Sender Intervall Frequenz EU Europa 40FM 40AM 26 965 27 405MHZ CE CEPT 40 FM 26 965 27 405MHZ UK England 40 FM 27 60125 27 99125MHZ PL Polen 26 960 27 ...

Страница 26: ... 965 27 405MHZ Deutschland 80FM 26 565 26 955MHZ Technische Spezifikationen Sender 40 AM FM Frequenz 26 965 27 405 MHz Versorgung 12V 24V Dimensionen Gewicht 115 x 150 x 38 mm 0 8 kg Temperatur 26 60 C Empfang Sensibilität 1µV Fehler Frequenz 300Hz Stromverbrauch 200 mA in stand by Emission Höchstleistung 4W FM Modulation 70 90 AM 1 9KHz FM Impedanz Antenne 50 Ohm Stromverbrauch max 2 A ...

Страница 27: ...e objetos metálicos a la parte eléctrica interna de la estación peligro de descarga eléctrica Evite exponer la estación a temperaturas inferiores a 26 C y superiores a 60 C la temperatura a bordo de un vehículo en ocasiones puede superar los 80 C lo que puede causar daños irreparables a la estación en caso de exposición prolongada No exponga la estación a la luz solar durante mucho tiempo No coloq...

Страница 28: ... en el micrófono Botón EMG activación del canal de emergencia Función ANC cancelación automática de ruido Función RF Gain Función de escaneo Indicador de transmisión recepción de potencia de señal en pantalla Enchufe de altavoz externo Puerto USB 5V 1 7Aen el panel frontal Instrucciones de instalación Antes de instalar la estación en el automóvil elija la ubicación más adecuada para que pueda usar...

Страница 29: ...sible de cualquier fuente eléctrica o ruido electromagnético El cable coaxial de la antena no debe interrumpirse ni presionarse Conecte el enchufe en el extremo del cable coaxial de la antena al enchufe de la antena en la parte posterior de la estación Probando el funcionamiento de la estación Una vez que la estación esté instalada y alimentada pruebe su correcto funcionamiento Verifique que la es...

Страница 30: ...nector 6 pines micrófono 2 AF SC Cambiar la modulación AM FM Activar la función de escaneo de canales 3 RFG MENU Activación de la función de RF Gain Acceso Menú de configuración 4 ASQ SQ Entre en el modo de ajuste del nivel de SQ ASQ utilice las teclas UP DOWN Arriba Abajo en el micrófono Cambiar entre SQ y ASQ 5 EMG Lock Cambio automático en los canales de emergencia 9 19 Bloqueo de teclas except...

Страница 31: ...ire el potenciómetro 8 en el sentido de las agujas del reloj para apagar la emisora Selección de canales Toque brevemente las teclas UP arriba y DOWN abajo del micrófono para cambiar el canal Mantenga tocado para desplazarse por los canales más rápido Descripción de funciones SQ ASQ Activación de squelch manual SQ y ajuste de nivel 1 Mantenga tocada la tecla ASQ SQ 4 En la pantalla parpadeará el i...

Страница 32: ...icono AQ y el nivel actual del squelch 2 Toque brevemente las teclas UP arriba y DOWN abajo del micrófono para cambiar el nivel Hay 5 niveles disponibles desde el nivel 01 hasta el nivel 05 solo se escucharán las señales más fuertes 3 ToquebrevementelateclaASQ SQparavolveralmododefuncionamiento normal Modulación AM FM 1 Toque brevemente la tecla AF SC 2 para cambiar entre AM y FM Nota Si tiene la ...

Страница 33: ...escaneo 4 Mantenga tocada la tecla AF SC de nuevo para desactivar la función de escaneo La emisora volverá al modo de funcionamiento normal y el icono SQ desaparecerá de la pantalla RF Gain Toque brevemente la tecla RFG MENU 3 para activar desactivar la función RF Gain Configuración del nivel de RF Gain 1 Mantenga tocada la tecla RFG MENU para acceder al menú 2 Toque brevemente la tecla RFG MENU h...

Страница 34: ... la tecla EMG Lock para cambiar al Canal 19 4 Vuelva a tocar brevemente la tecla EMG Lock para volver al funcionamiento normal El icono EMG desaparecerá de la pantalla Lock Bloqueo de teclas 1 Mantenga tocada la tecla EMG Lock 5 para activar la función Lock 2 En la pantalla aparecerá un icono en forma de candadito 3 Todas las teclas están bloqueadas excepto la tecla PTT 4 Mantenga tocada la tecla ...

Страница 35: ...vel actual de RF Gain parpadeará en la pantalla Toque brevemente las teclas UP arriba y DOWN abajo del micrófono para cambiar el nivel 9 niveles están disponibles 2 BRIGHT brillo de la pantalla En la pantalla parpadeará el nivel actual de brillo Toque brevemente las teclas UP arriba y DOWN abajo del micrófono para cambiar el nivel 5 niveles están disponibles que van desde 1 más oscuro a 5 más bril...

Страница 36: ...ambiar el nivel 6 niveles están disponibles que van desde 1 más brillante a 6 más oscuro 4 ANC Automatic Noise Cancelling En la pantalla parpadeará la opción activa Opciones ON activado OFF desactivado Toque brevemente las teclas UP arriba y DOWN abajo del micrófono para cambiar entre las dos opciones Si esta función está activa el icono NC aparecerá en la pantalla ...

Страница 37: ...ándares disponibles Estándar Canales Rango de frecuencia EU Europa 40FM 40AM 26 965 27 405MHZ CE CEPT 40 FM 26 965 27 405MHZ UK Inglaterra 40 FM 27 60125 27 99125MHZ PL Polonia 40FM 40AM 26 960 27 400MHZ E España 40FM 40AM 27 4150 27 855 I2 Italia 34FM 34AM 26 965 26 865MHZ D Alemania 40FM 40AM FM 26 965 27 405 26 565 26 955 AM 27 005 27 135 D2 Alemania 40FM 40AM FM 26 965 27 405 AM 27 005 27 135 ...

Страница 38: ...limentación 12V 24V Dimensiones peso 115 x 150 x 38 mm 0 8 kg Temperatura de funcionamiento 26 60 C Recepción Sensibilidad 1µV Error de frecuencia 300Hz Consumo de corriente 200 mA in stand by Emisión Potencia máxima 4W FM Modulación 70 90 AM 1 9KHz FM Impedancia de la antena 50 Ohm Consumo de corriente max 2 A ...

Страница 39: ...alliques de la partie électrique interne de la radio risque d électrocution Evitez d exposer la radio à des températures inférieures à 26 C et supérieures à 60 C la température à bord d un véhicule peut parfois dépasser 80 C ce qui peut causer des dommages irréparables à la radio en cas de longue exposition N exposez pas la radio au soleil pendant une période prolongée Ne posez rien sur l appareil...

Страница 40: ...G activation du canal d urgence Fonction ANC Automatic Noise Canceling Fonction de gain RF Fonction de numérisation Indicateur de transmission réception de la puissance du signal à l écran Prise de haut parleur externe Port USB 5V 1 7Asur le panneau avant Instructions d installation Avant d installer la radio dans la voiture choisissez l emplacement le plus adapté afin de pouvoir l utiliser sans v...

Страница 41: ... loin que possible de toute source électrique ou de bruit électromagnétique Le câble coaxial de l antenne ne doit pas être interrompu ou enfoncé Connectez la fiche à l extrémité du câble coaxial d antenne à la fiche d antenne à l arrière de la radio Tester le fonctionnement de la radio Une fois la radio installée et alimentée testez son bon fonctionnement Vérifiez que la radio est correctement ali...

Страница 42: ...es microphone 2 AF SC Changement de la modulation AM FM Activer la fonction de scanner les chaînes 3 RFG MENU Activer la fonction RF Gain Accédez au menu des réglages 4 ASQ SQ Entrez dans le mode de réglage du niveau de SQ ASQ utilisez les touches UP DOWN du microphone Changez entre SQ et ASQ 5 EMG Lock Changement automatique aux chaînes d urgence 9 19 Blocage des touches à l exception de la touch...

Страница 43: ...lection des chaînes Appuyez courtement sur les touches UP et DOWN du microphone pour changer la chaîne Tenez longuement appuyé sur le bouton pour dérouler les chaînes plus vite Description des fonctions SQ ASQ Activer le squelch manuel SQ et réglage du niveau 1 Appuyez longuement sur la touche ASQ SQ 4 Sur l écran le pictogramme SQ et le niveau courant du squelch vont clignoter 2 Appuyez courtemen...

Страница 44: ...DOWN du michrophone pour changer le niveau Il y a 5 niveaux disponibles du niveau 01 squelch ouvert à la limite maximale jusqu au niveau 05 on peut entendre uniquement les signaux les plus forts 3 Appuyez courtement sur la touche ASQ SQ pour rentrer au mode normale de fonctionnement Modulation AM FM 1 Appuyez courtement sur la touche AF SC 2 pour changer entre AM et FM Observation si votre radio a...

Страница 45: ...n du scan 4 Appuyez de nouveau longuement sur la touche AF SC pour désactiver la fonction du scan La radio va rentrer au mode normal de fonctionnement et le pictogramme SQ ne sera plus affiché sur l écran RF Gain Appuyez courtement sur la touche RFG MENU 3 pour activer désactiver la fonction RF Gain Réglage du niveau RF Gain 1 Appuyez longuement sur la touche RFG MENU pour accéder au menu 2 Appuye...

Страница 46: ...e 09 Sur l écran le pictogramme EMG va clignoter 3 Appuyez de nouveau courtement sur la touche EMG Lock pour passer à la chaîne 19 4 Appuyez de nouveau courtement sur la touche EMG Lock pour rentrer au mode normal de fonctionnement Le pictogramme ne sera plus visible sur l écran EMG Lock Blocage des touches 1 Appuyez longuement sur la touche EMG Lock 5 pour activer la fonction Lock 2 Sur l écran u...

Страница 47: ...Appuyez courtement sur la touche RFG MENU pour naviguer parmi les options 1 RFGAIN Sur l écran le niveau courant du RF Gain va clignoter Appuyez courtement sur les touches UP et DOWN du microphone pour changer le niveau Il y a 9 niveaux disponibles 2 BRIGHT luminosité de l écran Sur l écran le niveau courant de luminosité va clignoter Appuyez courtement sur les touches UP et DOWN du microphone pou...

Страница 48: ...hanger le niveau Il y a 6 niveaux disponibles du 1 er le plus clair au 6 ème le plus obscur 4 ANC Automatic Noise Cancelling Sur l écran l option active va clignoter Options ON activé OFF désactivé Appuyez courtement sur les touches UP et DOWN du microphone pour changer entre les deux options Si cette fonction est active sur l écran sera affiché le pictogramme NC ...

Страница 49: ...ibles La norme Les chaînes L intervalle de fréquence EU Europe 40FM 40AM 26 965 27 405MHZ CE CEPT 40 FM 26 965 27 405MHZ UK Angleterre 27 60125 27 99125MHZ PL Pologne 40FM 40AM 26 960 27 400MHZ E Espagne 40FM 40AM 27 4150 27 855 I2 Italie 34FM 34AM 26 965 26 865MHZ D Allemagne 40FM 40AM FM 26 965 27 405 26 565 26 955 AM 27 005 27 135 D2 Allemagne 40FM 40AM FM 26 965 27 405 AM 27 005 27 135 DE Alle...

Страница 50: ...z Alimentation 12V 24V Dimensions Poids 115 x 150 x 38 mm 0 8 kg Temperature de fonctionnement 26 60 C Réception Sensibilité 1µV Erreur de fréquence 300Hz Consommation de courant 200 mA in stand by Emission Puissance maximale 4W FM Modulation 70 90 AM 1 9KHz FM Impédance antenne 50 Ohm Consommation de courant max 2 A ...

Страница 51: ...sonyabb hőmérsékletnek a jármű fedélzetén a hőmérséklet néha meghaladhatja a 80 C ot ami hosszantartó expozíció esetén helyrehozhatatlan károkat okozhat az állomáson Ne tegye ki az állomást sokáig napfénynek Ne tegyen semmit a készülékre mert ez megakadályozza a lehűlést A gyors lemerülés elkerülése érdekében ellenőrizze hogy a jármű akkumulátora megfelelően fel van e töltve Fontos hogy a motor be...

Страница 52: ...t az előlapon Telepítési útmutató Mielőtt az állomást behelyezné az autóba válassza ki a legmegfelelőbb helyet hogy használhassa azt anélkül hogy zavarja magát vezetés közben Az állomás telepítéséhez használja a csomagtartót és a tartozékokat A tartócsavarokat meg kell húzni hogy elkerüljék az állomás mozgás közbeni rezgését A rögzítő konzol elhelyezhető az állomás felett vagy alatt és a felszerel...

Страница 53: ...alatt vagy azt követően Csatlakoztassa az antennát a koax kábel segítségével a rádió hátsó részébe A rádió tesztelése Az állomás telepítése és áramellátása után ellenőrizze megfelelő működését Ellenőrizze hogy az állomás megfelelően van e bekapcsolva Ellenőrizze az antenna csatlakozását az állomáshoz Csatlakoztassa a mikrofont az állomás előlapjának aljzatához Kapcsolja be az állomást a hangerő sz...

Страница 54: ...resés funkció aktiválása 3 RFG MENU RF Jelerősség funkció használata Menü megnyitása 4 ASQ SQ SQ ASQ szint módosítása használja a FEL LE gombokat a mikrofonon SQ és ASQ közötti funkció közötti változtatás 5 EMG Lock Automatikus segélyhívó csatorna megnyitása 9 19 Gombzárolása A PTT mikrofon gomb kivételével 6 LCD képernyő 7 USB 5V 1 7Aport 8 Rádió ki és bekapcsolása és hangerő módosítás ...

Страница 55: ...a csatornaváltáshoz Nyomja meg és tartsa lenyomva a gombot a gyorsabb csatornaváltáshoz Elérhető Funkciók SQ ASQ Manuális némahangolás funkció engedélyezése SQ és beállítása 1 Nyomja meg hosszan az ASQ SQ 4 gombot Az SQ ikon és a jelenlegi némahangolás szint megjelenik a képernyőn 2 Nyomja meg röviden az UP Fel és a DOWN Le gombokat a mikrofonon a szint módosításához Az eszközön 28 elérhető szint ...

Страница 56: ...mikrofonon a szint megváltoztatásához Az eszközön 5 szint elérhető 01 szinttől egészen 05 szintig csak a legerősebb jel hallható 3 Nyomja meg röviden az ASQ SQ gombot a normál üzemmódba történő visszalépéshez AM FM modulációk 1 Nyomja meg röviden az AF SC 2 gombot az AM és az FM modulációk közötti navigációhoz Megjegyzés Ha a rádiója beállításai szerint az eszköz nem támogatja az AM modulációt azA...

Страница 57: ...on a keresési irány beállításához 4 Nyomja meg és tartsa lenyomva az AF SC gombot ismét a keresési funkció leállításához A rádió ismét normál üzemmódba lép az SQ ikon pedig eltűnik a képernyőről RF Gain Nyomja meg röviden az RFG MENU 3 gombot az RF Jelerősség funkció ki és bekapcsolásához RF Gain szint beállítása 1 Nyomja meg hosszan az RFG MENU gombot a menü eléréshez 2 Nyomja meg röviden az RFG ...

Страница 58: ...a vált Az EMG ikon megjelenik a képernyőn 3 Nyomja meg röviden az EMG Lock gombot ismét a 19 es csatornára történő ugráshoz 4 Nyomja meg röviden az EMG Lock gombot ismét a normál működéshez való visszalépéshez Az EMG ikon ezt követően eltűnik a képernyőről Lock Gombok Zárolása 1 Nyomja meg hosszan az EMG Lock gombot 5 a gombok zárolásához 2 Egy gomb zárolás ikon jelenik meg a képernyőn 3 Minden go...

Страница 59: ...áshoz 1 RFGAIN A jelenlegi RF jelerősség RF Gain szint jelenik meg a képernyőn Nyomja meg röviden az UP Fel és a DOWN Le gombokat a mikrofonon a szintváltáshoz Az eszközön 9 elérhető szint között lehet értéket változtatni 2 BRIGHT Képernyő fényereje A képernyőn a jelenlegi fényerő szint jelenik meg alapértelmezettként Nyomja meg röviden az UP Fel és a DOWN Le gombokat a mikrofonon a szint megválto...

Страница 60: ...a fényerő kontraszt beállításához Az eszközön 6 szint elérhető 1 től nagyon világos 6 ig nagyon sötét 4 ANC Automatic Noise Cancelling Az aktív beállítás megjelenik a képernyőn Beállítások ON OFF Ki Be Nyomja meg röviden az UP Fel és a DOWN Le gombot a mikrofonon a beállítás megváltoztatásához Ha ez a funkció aktív az NC ikon megjelenik a képernyőn ...

Страница 61: ...iót Az elérhető beállítások Sztenderd Csatorna Frekvenciatartomány EU Europa 40FM 40AM 26 965 27 405MHZ CE CEPT 40 FM 26 965 27 405MHZ UK Anglia 40 FM 27 60125 27 99125MHZ PL Lengyelország 40FM 40AM 26 960 27 400MHZ E Spanyolor szág 40FM 40AM 27 4150 27 855 I2 Olaszor szág 34FM 34AM 26 965 26 865MHZ D Németország 40FM 40AM FM 26 965 27 405 26 565 26 955 AM 27 005 27 135 D2 Németország 40FM 40AM FM...

Страница 62: ...mellátás 12V 24V Méretek Az eszköz súlya 115 x 150 x 38 mm 0 8 kg Üzemhőmérséklet 26 60 C Jelfogadás Érzékenység 1µV Frekvenciahiba 300Hz Áramerősség fogyasztás 200 mA in stand by Jelsugárzás Maximális kimeneti feszültség 4W FM Moduláció 70 90 AM 1 9KHz FM Antenna Impendencia 50 Ohm Áramerősség fogyasztás max 2 A ...

Страница 63: ...re oggetti metallici alla parte elettrica interna pericolo di scossa elettrica Evitare di esporre la radio a temperature inferiori a 26 C e superiori a 60 C La temperatura a bordo di un veicolo può talvolta superare gli 80 C il che può causare danni irreparabili in caso di esposizione prolungata Non esporre la radio alla luce solare prolungata Non posizionare nulla sulla radio impedirà il raffredd...

Страница 64: ...o Pulsante EMG attivazione canale di emergenza Funzione ANC Automatic Noise Cancelling Funzione RF Gain Funzione di scansione Indicatore di trasmissione ricezione della potenza del segnale sullo schermo Spina per altoparlante esterno Porta USB 5V 1 7Asul pannello frontale Istruzioni per l installazione Prima di installare la radio in auto scegliere la posizione più adatta in modo da poterla utiliz...

Страница 65: ... o rumore elettromagnetico Il cavo coassiale dell antenna non deve essere interrotto o premuto Collegare la spina all estremità del cavo coassiale dell antenna alla spina dell antenna sul retro della radio Testare il funzionamento della radio Una volta installata e alimentata la radio testarne il corretto funzionamento Verificare che la radio sia alimentata correttamente Verificare il collegamento...

Страница 66: ...ne funzione Scan 3 RFG MENU Attivazione funzione RF Gain Accedere al menu delle impostazioni 4 ASQ SQ Accedere alla modalità di impostazione del livello SQ ASQ utilizzare i tasti SU GIÙ sul microfono Cambiare tra SQ e ASQ 5 EMG Lock Spostamento sui canali di emergenza 9 19 Blocco dei tasti ad eccezione di PTT sul microfono 6 Schermo LCD 7 Porta USB 8 Manopola avviamento spegnimento della radio e r...

Страница 67: ...brevemente i tasti SU e GIÙ sul microfono per cambiare canale Tenere premuto per scorrere i canali più velocemente Funzioni SQ ASQ Attivazione squelch manuale SQ e impostazione del livello 1 Premere a lungo il tasto ASQ SQ 4 L icona SQ e il livello di squelch corrente lampeggeranno sullo schermo 2 Premere brevemente i tasti SU e GIÙ sul microfono per modificare il livello Sono disponibili 28 livel...

Страница 68: ...l microfono per modificare il livello Sono disponibili 5 livelli dal livello 01 al livello 05 si sentono solo i segnali più forti 3 Premere brevemente il tasto ASQ SQ per tornare al normale funzionamento Modulazione AM FM 1 Premere brevemente il tasto AF SC 2 per passare da AM a FM Nota Se la radio è impostata su una norma che non supporta AM la pressione del tasto A F non avrà alcun effetto Sullo...

Страница 69: ...modificare la direzione di scansione 4 Tenere nuovamente premuto il tasto AF SC per disattivare la funzione di scansione La radio tornerà al normale funzionamento e l icona SQ scomparirà dallo schermo RF Gain Premere brevemente il tasto RFG MENU 3 per attivare disattivare la funzione RF Gain Impostazione del livello RF Gain 1 Premere a lungo il tasto RFG MENU per accedere al menu 2 Premere breveme...

Страница 70: ...erà sullo schermo 3 Premere di nuovo brevemente il tasto EMG Lock per passare al canale 19 4 Premere di nuovo brevemente il tasto EMG Lock per tornare al normale funzionamento L icona EMG scomparirà dallo schermo Lock blocco dei tasti 1 Premere a lungo il tasto EMG Lock 5 per attivare la funzione Lock 2 Sullo schermo apparirà l icona di un lucchetto 3 Tutti i tasti sono ora bloccati tranne il tast...

Страница 71: ...GAIN Il livello di guadagno RF corrente lampeggerà sullo schermo Premere brevemente i tasti SU e GIÙ sul microfono per modificare il livello Sono disponibili 9 livelli 2 BRIGHT luminosità dello schermo Il livello di luminosità corrente lampeggerà sullo schermo Premere brevemente i tasti SU e GIÙ sul microfono per modificare il livello Sono disponibili 5 livelli da 1 il più scuro a 5 il più luminos...

Страница 72: ...Ù sul microfono per modificare il livello Sono disponibili 6 livelli da 1 più luminoso a 6 più scuro 4 ANC Automatic Noise Cancelling L opzione attiva lampeggerà sullo schermo Opzioni ON OFF Premere brevemente i tasti SU e GIÙ sul microfono per passare tra le due opzioni Se questa funzione è attiva l icona del NC apparirà sullo schermo ...

Страница 73: ...sponibili Norma Canale Intervallo di frequenza EU Europa 40FM 40AM 26 965 27 405MHZ CE CEPT 40 FM 26 965 27 405MHZ UK UK 40 FM 27 60125 27 99125MHZ PL Polonia 40FM 40AM 26 960 27 400MHZ E Spania 40FM 40AM 27 4150 27 855 I2 Italia 34FM 34AM 26 965 26 865MHZ D Germania 40FM 40AM FM 26 965 27 405 26 565 26 955 AM 27 005 27 135 D2 Germania 40FM 40AM FM 26 965 27 405 AM 27 005 27 135 DE Germania 40FM 4...

Страница 74: ...405 MHz Alimentazione 12V 24V Dimensioni peso 115 x 150 x 38 mm 0 8 kg Temperatura di esercizio 26 60 C Ricezione Sensibilità 1µV Errore di frequenza 300Hz Consumo attuale 200 mA in stand by Emissione Potenza massima 4W FM Modulazione da 70 a 90 AM 1 9KHz FM Impedenza antenna 50 Ohm Consumo max 2 A ...

Страница 75: ...części elektrycznej radio niebezpieczeństwo porażenia prądem Należy unikać wystawiania radio na działanie temperatur niższych niż 26 C i wyższych niż 60 C temperatura na pokładzie pojazdu może czasami przekroczyć 80 C co może spowodować nieodwracalne uszkodzenie radio w przypadku długotrwałej ekspozycji Nie wystawiaj radio na długotrwałe działanie promieni słonecznych Nie kładź niczego na urządzen...

Страница 76: ...Klawisz ASQ na mikrofonie Przycisk EMG awaryjna aktywacja kanału Funkcja ANC automatyczna redukcja szumów Funkcja wzmocnienia RF Funkcja skanowania Wskaźnik nadawania odbioru sygnału na ekranie Wtyczka głośnika zewnętrznego Port USB 5V 1 7Ana przednim panelu Instrukcje Instalacji Przed zainstalowaniem radio w samochodzie należy wybrać najbardziej odpowiednie miejsce aby móc z niej korzystać bez pr...

Страница 77: ...zelkich źródeł energii elektrycznej lub zakłóceń elektromagnetycznych Nie wolno przerywać ani wciskać kabla koncentrycznego anteny Podłącz wtyczkę na końcu kabla koncentrycznego anteny do wtyczki anteny z tyłu radio Testowanie działania radio Po zainstalowaniu i włączeniu radio należy przetestować jej prawidłowe działanie Sprawdź czy stacja jest prawidłowo zasilana Sprawdź połączenie anteny ze sta...

Страница 78: ...kcję skanowania kanałów 3 RFG MENU Aktywuj funkcję RF Gain Wejdź do menu ustawień 4 ASQ SQ Wejdź do trybu ustawiania poziomu SQ ASQ użyj klawiszy GÓRA DÓŁ na mikrofonie Przełączaj się między SQ i ASQ 5 EMG Lock Automatyczny ruch na kanałach alarmowych 9 19 Blokada klawiszy z wyjątkiem klawisza PTT na mikrofonie 6 Ekran LCD 7 Port USB 8 Potencjometr start stop radio i regulacja głośności ...

Страница 79: ...Wybór programu Krótko naciśnij klawisze UP i DOWN na mikrofonie aby zmienić kanał Naciśnij i przytrzymaj aby szybciej przewijać kanały Opis funkcji SQ ASQ Włącz ręczną blokadę szumów SQ i ustaw poziom 4 Długo naciśnij klawisz ASQ SQ 4 Ikona SQ i aktualny poziom blokady szumów będą migać na ekranie 5 Krótko naciśnij klawisze UP i DOWN na mikrofonie aby zmienić poziom Dostępnych jest 28 poziomów od ...

Страница 80: ...rofonie aby zmienić poziom Dostępnych jest 5 poziomów od poziomu 01 do poziomu 05 słychać tylko najsilniejsze sygnały 3 Krótko naciśnij klawisz ASQ SQ aby powrócić do normalnej pracy Modulacja AM FM 1 Krótko naciśnij klawisz AF SC 2 aby przełączyć między AM i FM Uwaga Jeśli masz stację ustawioną na normę która nie obsługuje AM naciśnięcie klawisza A F nie przyniesie żadnego efektu Na ekranie zosta...

Страница 81: ...by wyłączyć funkcję skanowania Radio powróci do normalnego działania a ikona SQ zniknie z ekranu RF Gain Naciśnij krótko przycisk RFG MENU 3 aby włączyć wyłączyć funkcję RF Gain Ustawienie poziomu wzmocnienia RF 5 Długo naciśnij przycisk RFG MENU aby uzyskać dostęp do menu 6 Krótko naciśnij przycisk RFG MENU aż dojdziesz do menu RFGAIN Aktualny poziom wzmocnienia RF będzie migał na ekranie 7 Krótk...

Страница 82: ...ck aby przełączyć na kanał 19 4 PonowniekrótkonaciśnijklawiszEMG Lock abypowrócićdonormalnego działania Ikona EMG zniknie z ekranu Lock Zamek na klucz 1 Długo naciśnij klawisz EMG Lock 5 aby aktywować funkcję Lock 2 Na ekranie pojawi się ikona kłódki 3 Wszystkie klawisze są teraz zablokowane z wyjątkiem klawisza PTT 4 Długo naciśnij klawisz EMG Lock aby dezaktywować funkcję Lock Ikona funkcji znik...

Страница 83: ...opcjach 1 RFGAIN Aktualny poziom wzmocnienia RF będzie migał na ekranie Krótko naciśnij klawisze W GÓRĘ i W DÓŁ na mikrofonie aby zmienić poziom Dostępnych jest 9 poziomów 2 BRIGHT jasność ekranu Aktualny poziom jasności będzie migał na ekranie Krótko naciśnij klawisze W GÓRĘ i W DÓŁ na mikrofonie aby zmienić poziom Dostępnych jest 5 poziomów od 1 najciemniejszy do 5 najjaśniejszy ...

Страница 84: ...mikrofonie aby zmienić poziom Dostępnych jest 6 poziomów od 1 najjaśniejszy do 6 najciemniejszy 4 ANC Automatic Noise Cancelling Aktywna opcja będzie migać na ekranie Opcje ON OFF Krótko naciśnij klawisze W GÓRĘ i W DÓŁ na mikrofonie aby przełączać się między dwiema opcjami Jeśli ta funkcja jest aktywna ikona NC pojawi się na ekranie ...

Страница 85: ...rdy Standardy Kanały Zakres częstotliwości EU Europa 40FM 40AM 26 965 27 405MHZ CE CEPT 40 FM 26 965 27 405MHZ UK UK 40 FM 27 60125 27 99125MHZ PL Polska 40FM 40AM 26 960 27 400MHZ E Hiszpania 40FM 40AM 27 4150 27 855 I2 Włochy 34FM 34AM 26 965 26 865MHZ D Niemcy 40FM 40AM FM 26 965 27 405 26 565 26 955 AM 27 005 27 135 D2 Niemcy 40FM 40AM FM 26 965 27 405 AM 27 005 27 135 DE Niemcy 40FM 40AM 26 9...

Страница 86: ...965 27 405 MHz Karmienie 12V 24V Rozmiar waga 115 x 150 x 38 mm 0 8 kg Temperatura robocza 26 60 C Przyjęcie Wrażliwość 1µV Błąd częstotliwości 300Hz Obecne zużycie 200 mA in stand by Nadawanie Maksymalna moc 4W FM Modulacja 70 do 90 AM 1 9KHz FM Antena impedancyjna 50 Ohm Obecne zużycie max 2 A ...

Страница 87: ...expunerea statiei la temperaturi mai mici de 26 C si mai mari de 60 C temperatura de la bordul unui vehicul poate depasi uneori 80 C fapt care poate produce statiei pagube ireparabile in cazul expunerii indelungate Nu expuneti statia timp indelugat la razele solare Nu puneti nimic pe aparat va impiedica racirea acestuia Verificati daca bateria vehiculului este suficient incarcata pentru a evita de...

Страница 88: ...xtern Port USB 5V 1 7Ape panoul frontal Instructiuni de instalare Inainte de a instala statia in masina alegeti locatia cea mai potrivita astfel incat sa o puteti folosi fara sa va deranjeze in timpul condusului Pentru a instala statia utilizati suportul si accesoriile din pachet Suruburile suportului trebuie stranse bine pentru a evita vibratia statiei in timpul deplasarii Suportul de montaj poat...

Страница 89: ...n capatul cablului coaxial al antenei la mufa de antena din spatele statiei Testarea functionarii statiei Odata instalata si alimentata statia testati functionarea corecta a acesteia Verificati daca statia este alimentata in mod corect Verificati conexiunea antenei la statie Conectati microfonul la mufa de pe panoul frontal al statiei Porniti statia prin rotirea potentiometrului de volum in sensul...

Страница 90: ...tie scanare canale 3 RFG MENU Activare functie RF Gain Accesare meniu setari 4 ASQ SQ Intrati in modul de setare a nivelului de SQ ASQ folositi tastele UP DOWN de pe microfon Schimbati intre SQ si ASQ 5 EMG Lock Mutare automata pe canalele de urgenta 9 19 Blocare taste cu exceptia tastei PTT de pe microfon 6 Ecran LCD 7 Port USB 5V 1 7A 8 Potentiometru pornire oprire statie si reglare volum ...

Страница 91: ...astele UP si DOWN de pe microfon pentru a schimba canalul Tineti apasat lung pentru a derula mai rapid canalele Descriere functii SQ ASQ Activare squelch manual SQ si setare nivel 1 Apasati lung tasta ASQ SQ 4 Pe ecran va clipi pictograma SQ si nivelul curent al squelch ului 2 Apasati scurt tastele UP si DOWN de pe microfon pentru a schimba nivelul Sunt disponibile 28 de niveluri de la nivelul 00 ...

Страница 92: ...sponibile 5 niveluri de la nivelul 01 pana la nivelul 05 doar semnalele cele mai puternice vor mai putea fi auzite 3 Apasati scurt tasta ASQ SQ pentru a va intoarce la modul normal de functionare Nota Recomandam setarea ASQ ului pe nivelul 02 de sensibilitate Modulatie AM FM 1 Apasati scurt tasta AF SC 2 pentru a schimba intre AM si FM Nota Daca aveti statia setata pe o norma care nu suporta AM ap...

Страница 93: ...nou lung tasta AF SC pentru a dezactiva functia de scanare statia se va intoarce la modul normal de functionare iar pictograma SQ va disparea de pe ecran RF Gain Apasati scurt tasta RFG MENU 3 pentru a activa dezactiva functia RF Gain Setare nivel RF Gain 1 Apasati lung tasta RFG MENU pentru a accesa meniul 2 Apasati scurt tasta RFG MENU pana ajungeti la meniul RFGAIN Pe ecran va clipi nivelul cur...

Страница 94: ... din nou scurt tasta EMG Lock pentru a trece pe canalul 19 4 Apasati din nou scurt tasta EMG Lock pentru a va intoarce la modul normal de functionare De pe ecran va disparea pictograma EMG Lock Blocare taste 1 Apasati lung tasta EMG Lock 5 pentru a activa functia Lock 2 Pe ecran va aparea o pictograma sub forma de lacatel 3 Toate tastele sunt acum blocate cu exceptia tastei PTT 4 ApasatilungtastaE...

Страница 95: ...velul curent al RF Gain ului Apasati scurt tastele UP si DOWN de pe microfon pentru a schimba nivelul Sunt disponibile 9 niveluri RF Gain ul are rolul de a diminua zgomotul pe receptie 2 BRIGHT luminozitatea ecranului Pe ecran va clipi nivelul curent de luminozitate Apasati scurt tastele UP si DOWN de pe microfon pentru a schimba nivelul Sunt disponibile 5 niveluri ce la 1 cel mai intunecat la 5 c...

Страница 96: ...chimba nivelul Sunt disponibile 6 niveluri ce la 1 cel mai luminos la 6 cel mai intunecat 4 ANC Automatic Noise Cancelling Pe ecran va clipi optiunea activa Optiuni ON activat OFF dezactivat Apasati scurt tastele UP si DOWN de pe microfon pentru a schimba intre cele doua optiuni Daca aceasta functie este activa pe ecran va aparea pictograma NC ...

Страница 97: ...ecventa EU Europa 40FM 40AM 26 965 27 405MHZ CE CEPT 40 FM 26 965 27 405MHZ UK Anglia 40 FM 27 60125 27 99125MHZ PL Polonia 40FM 40AM 26 960 27 400MHZ E Spania 40FM 40AM 27 4150 27 855 I2 Italia 34FM 34AM 26 965 26 865MHZ D Germania 40FM 40AM FM 26 965 27 405 26 565 26 955 AM 27 005 27 135 D2 Germania 40FM 40AM FM 26 965 27 405 AM 27 005 27 135 DE Germania 40FM 40AM 26 965 27 405MHZ Germania 80FM ...

Страница 98: ...27 405 MHz Alimentare 12V 24V Dimensiuni greutate 115 x 150 x 38 mm 0 8 kg Temperatura de functionare 26 60 C Receptie Sensibilitate 1µV Eroare frecventa 300Hz Consum curent 200 mA in stand by Emisie Putere maxima 4W FM Modulatie 70 90 AM 1 9KHz FM Impedanta antena 50 Ohm Consum curent max 2 A ...

Страница 99: ...est disponible à l adresse Internet suivante https www mypni eu products 7591 download certifications HU Egyszerűsített EU Megfelelési Közlemény SC ONLINESHOP SRL kijelenti azt hogy a CB rádió PNI Escort HP 9700 megfelel az EMC 2014 30 EU és RED 2014 53 UE irányelvnek Az EU megfelelőségi nyilatkozat teljes szövege a következő internetes címen érhető el https www mypni eu products 7591 download cer...

Страница 100: ......

Отзывы: