


27
28
F
¡ ã
¡ ã
¡ ã
C
¡ ã
C
F
9V
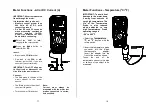
SAFETY
Use extreme caution when the laser beam is turned on.
Do not let the beam enter your eye, another person’s eye or the eye of
an animal.
Be careful not to let the beam on a reflective surface strike your eye.
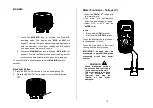
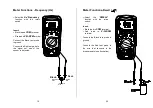
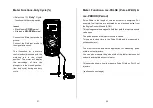
Operation
To take a measurement, perform the following steps:
1. Plug the red connector into the V mV dc input jack and the black connector
into the common or ground input jack on the test instrument.
2. Select Infrared Temperature (
0
C /
0
F ) or mV dc range on the test
instrument.
3. Press the probe button laser, the Infrared Temperature Probe ON
4. Point the tip of the probe as close as possible to the object being measured
without touching the object.
5. Read the test instrument display.
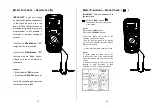
Additional considerations are:
Release the probe button laser and the Infrared Temperature Probe OFF
the DMM display will show 0°C or 0°F or 0mV.
The temperature scale can be changed to °C or °F by removing the
battery from the battery compartment and moving the internal °C/°F
switch to the desired position.
If the test instrument displays an overload condition, switch the DMM
range from mV dc to V dc. Increasing the range to V dc moves the
decimal position three places to the left (500°F displays as 0.500V).
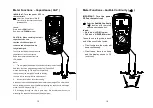
Note: Measurement considerations
Holding the meter by its handle, point the IR Sensor toward the
object whose temperature is to be measured. The meter
automatically compensates for temperature deviations from
ambient temperature. Keep in mind that it will take up to 30
minutes to adjust to wide ambient temperatures are to be
measured
followed
by
high
temperature
measurements,
sometime (several minutes) is required after the low (and
before the high) temperature measurements are made.
This is a result of the cooling process which must take place for the IR
sensor.


