15
Follow this section if your playset is a .
If your playset is , proceed to page 17.
STOP
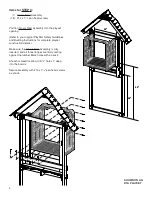
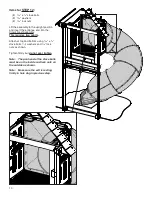
Align the top edge and the second
slot of the support bracket with the
top and end of the 2" x 4" x 9
¹₂
"
board as shown.
Use the bracket as template and
drill
¹₈
" holes 1" deep. Secure with
#8 x 1
¹₄
" deck screws.
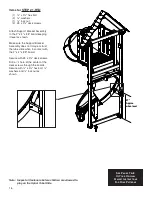
Items for
STEP 18-RTA:
(1) Support Bracket
(1) 2" x 4" x 9
¹₂
" board
(4) #8 x 1
¹₄
" deck screws
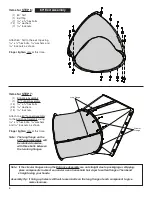
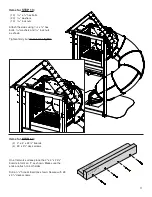
Flush
Drill a
³₈
" hole through the
2" x 4" x 9
¹₂
" board. Attach
with
³⁄₈
" x 2" hex bolt,
³⁄₈
" washers
and
³⁄₈
" lock nut as shown.
Items for
STEP 19-RTA:
(1)
³⁄₈
" x 2" hex bolt
(2)
³⁄₈
" washers
(1)
³⁄₈
" lock nut
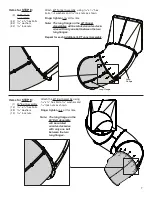
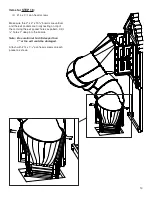
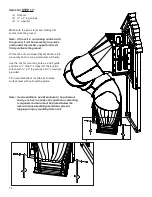
Locate the second bolt from the top on the
60º Exit Assembly as shown. Remove and discard
the bolt, save the nut and the washers.
Attach the Support Bracket Assembly to the slide
using a
⁵₁₆
" x 1" hex bolt and the washers and nut
saved previously through the hole in the middle of
the bracket flange as shown.
Tighten firmly but
do not over tighten
.
Items for
STEP 20-RTA:
(1) Support Bracket Assembly
(1)
⁵₁₆
" x 1" hex bolt
Ready To Assemble
Build it Yourself


