5
GB
USA
CDN
M
IRL
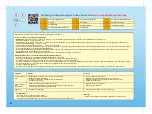
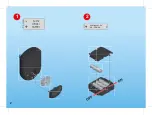
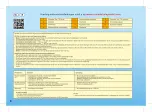
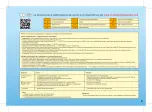
Set up your RC-Module-Set in accordance with the assembly instructions of the relevant vehicle.
RC-Car functions and tips for beginners
•
To start the game:
first, switch on transmitter at switch (1) (control indicator 3 lights up) and now switch on battery box at switch (9).
• Always position yourself behind your RC-Car at the beginning.
• Slowly push the accelerator lever (2) forwards → RC-Car travels forwards (should your RC-Car travel backwards instead of forwards, push the reversing switch (4) in the opposite direction.)
• Accelerator lever (2) in mid position → RC-Car stops.
• Slowly push accelerator lever (2) backwards → RC-Car travels backwards.
• To travel through curves and in circles, push the accelerator lever (2) forwards and simultaneously move the control lever (6) to the right (should the RC-Car turn left instead of right, set the
reversing switch (5) in the opposite direction.)
• The fine adjustment screw (8) can be used to adjust the straight-ahead travel at the steering. If your RC-Car will deviate to the right or left during the straight-ahead travel, turn the fine
adjustment screw (8) until straight ahead travel is set.
•
Ending the game:
First, switch off the battery box at the switch (9) and switch off the transmitter at switch (1) afterwards.
Simultaneous driving with several transmitter-/car combinations:
• Switch on all transmitters at switch (1) and all battery boxes at switch (9).
• One transmitter-/car combination can remain unchanged, but all of the other must be paired.
• The distance between each transmitter and each RC-Car shall at least to 30 cm (12 inch).
• Pairing: First of all, you have to newly couple your transmitter with your car. For this purpose, you have to push the pairing button (7) at the transmitter and, at the same time, the pairing
button (11) at the receiver. The control displays (3 + 10) will flash for 5 seconds and will be constantly lit up upon completion of the pairing.
• Now the race can start.
• After switching-off, each transmitter-/car combination will be reset to reference position → When driving with several cars again, pairing must be carried out again.
On- and Off switch transmitter
Accelerator lever
Control display
Reversing switch Forwards/Backwards
Reversing switch Left/Right
Control lever
Pairing button transmitter
Fine adjustment
5
6
7
8
On- and Off switch battery box
Control lamp Pairing
Pairing button receiver
9
10
11
1
2
3
4
Reason
• Battery box 9 or transmitter 1 are not switched on
• Batteries have been incorrectly loaded
• No or empty battery in RC-Car or transmitter
• Wiring in RC-Car
• Batteries in RC-Car or transmitter become empty
• Large metal objects (e.g. radiators) or electrical appliances may interfere
with the transmission
• Range exceeded
Problems
RC-Car does not
react
RC-Car moves in an
uncontrolled manner
In general
Solution
• Switch on RC-Car and transmitter
• Watch for correct polarity when inserting batteries (+/-)
• Insert batteries or replace exhausted batteries with new ones
• Check wiring
• Replace batteries through new ones
• Choose other location for game
• The range is approx. 14 meters (550 inch)
Note:
• Drive vehicle inside rooms only
• Avoid any driving on shaggy carpets
• You may also use rechargeable batteries (4xHR6) for reasons of environmental protection.
Caution:
• Keep your hair well away from the driving block, your hair can become caught.
Содержание 6914
Страница 1: ...6914 1 Freq uency Range 2 401 GHz 2 483 GHz Maximum FR output 5 0 dBm...
Страница 3: ...2 1 2 4x Mignon 1 5V R6 LR6 AA...
Страница 6: ...6...
Страница 7: ...7...
Страница 8: ...8...
Страница 9: ...9...
Страница 10: ...1 0...
Страница 11: ...1 1...
Страница 12: ...1 2...
Страница 13: ...1 3...
Страница 14: ...1 4...
Страница 15: ...1 5...
Страница 16: ...1 6...
Страница 17: ...1 7...
Страница 18: ...1 8...
Страница 19: ...1 9...
Страница 20: ...2 0...
Страница 21: ...2 1...
Страница 22: ...2 2...
Страница 23: ...2 3...
Страница 24: ...2 4...
Страница 25: ...2 5...
Страница 26: ...2 6...
Страница 27: ...2 7...
Страница 28: ...28...
Страница 30: ...30...
Страница 31: ...31...


