background image

22

Owner

’s manual 

 PLA

TINUM PRO

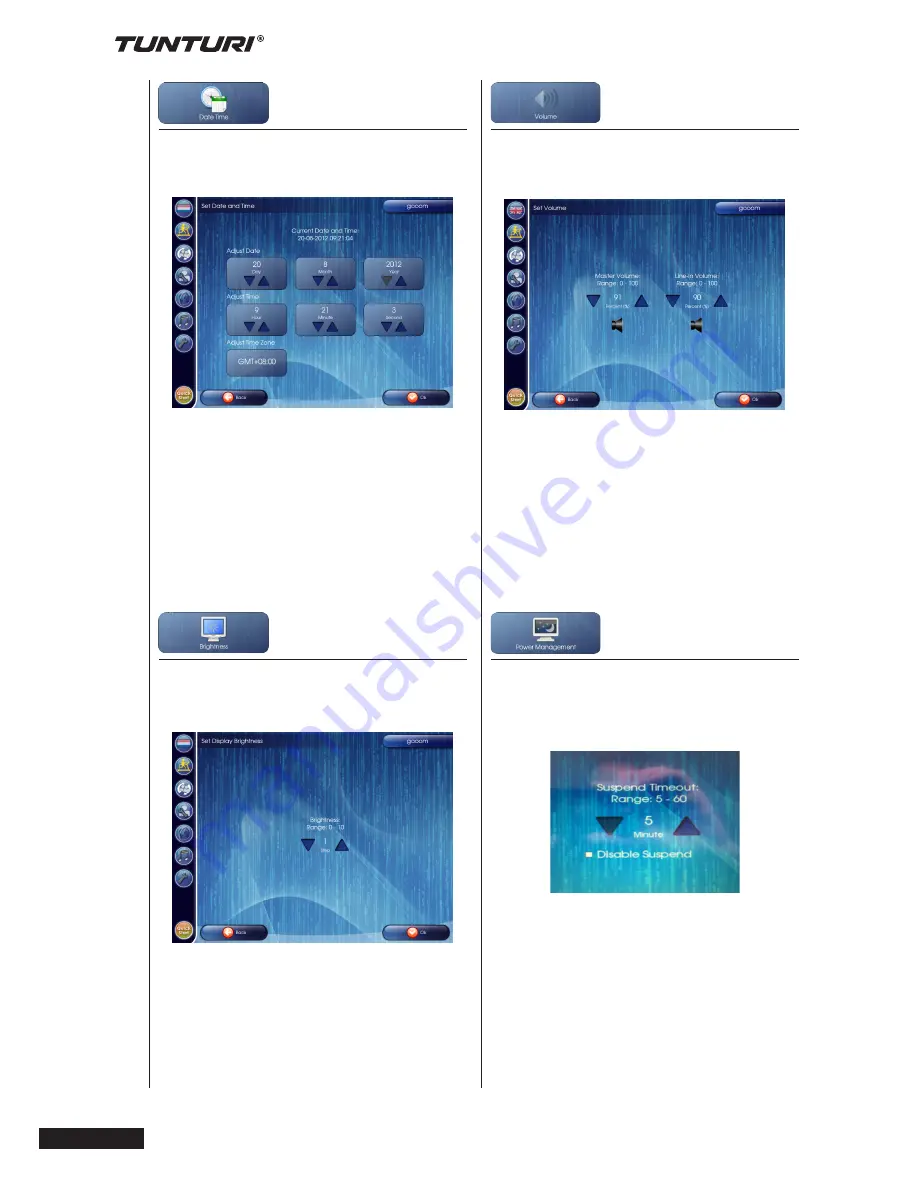
Date Time

When pressing “Date Time“ button it 

opens Date Time settings window.

In here you can set date and time 

correct. You can also set correct time 

zone if required.

Use arrow up or down buttons to adjust. 

Press OK button to confirm, and go back 

to setting menu.

Press Back button to go back to settings 

menu without change. 

Brightness

When pressing “brightness“ button it 

opens brightness settings window.

In here you can adjust brightness 

in range between 0 (darker) and 10 

(lighter).  

Use arrow up or down buttons to adjust.. 

Press OK button to confirm, and go back 

to setting menu.

Press Back button to go back to settings 

menu without change.

Volume

When pressing “Volume“ button it opens 

master volume settings window.

In here you can adjust the master 

volume  for web and media player and 

line in volume in range between 0 and 

100(max).

Use arrow up or down buttons to adjust.

Press OK button to confirm, and go back 

to setting menu. 

Press Back button to go back to settings 

menu without change.

Power Management

When pressing “Power Management“ 

button it opens power management 

window.

In factory mode the display will shut in 

standby mode after 10 minutes being 

idle. In power management mode you 

can suspend this by plus/ minus 5 

minutes. Range 5/ 60 min. 

Use arrow up or down buttons to adjust. 

Press OK button to confirm, and go back 

to setting menu.

Press Back button to go back to settings 

menu without change.

Содержание Tunturi

Страница 1: ...www tunturi com TREADMILL PRO USER MANUAL SERIAL NUMBER...

Страница 2: ......

Страница 3: ...uipment 3 Important Electrical information 4 Circuit breaker 4 Grounding instruction 4 General inscructions 5 Heart rate training 5 A word about heart rate training 5 How to wear your chest strap 6 As...

Страница 4: ...cold do not exercise in a draughty place In training the equipment tolerates an environment measuring 10 C to 35 C The equipment can be stored in temperatures ranging between 15 C and 40 C Air humidit...

Страница 5: ...e in doubt as to whether the product is properly grounded Do not modify the plug provided with the product if it will not fit the outlet have a proper outlet installed by a qualified electrician Do no...

Страница 6: ...of maximum So for a 40 year old the training zone would be 126 to 144 beats per minute General Instructions NEVER operate this treadmill without reading and completely understanding the results of an...

Страница 7: ...or a pet Some people have problems with the transmitter picking up a signal from their skin If you have problems try wearing the transmitter upside down Normally the transmitter will be oriented so th...

Страница 8: ...t pinched between the tube and the base frame Assemble one 3 8 x 3 3 4 Button Head Socket bolt 104 3 8 split washer 58 and 3 8 1 flat washer 59 and 10 nylon washer 153 through the top hole in the reta...

Страница 9: ...U M P R O Step 2 Console Assembly to Upright Tubes Connect wire connections between user interface electronics and user interface assembly frame Fix the upper cover with the lower cover by fastening t...

Страница 10: ...o the back of the console then tighten the screws Connect the console computer cable C to the mating cable A from the upright tube 3 Attach the console assembly to the top of the uprights with six 3 8...

Страница 11: ...tep 4 Lower side caps Fully tighten the in assembly step 1 hand tight tightened bolts 104 on the right hand and left hand side to fix the upright tubes Install the lower side caps 32 33 with four M5x1...

Страница 12: ...console control head Your treadmill will not start and operate without this Fasten the plastic clip onto your clothing securely to assure good holding power Note The magnet has strong enough power to...

Страница 13: ...touch screen region Main display region Centre Main display region is changing in every program mode In active mode it shows the progress of your program and in programming mode it shows buttons and s...

Страница 14: ...step in programming Use the arrow buttons to upper or lower your goal The goal limits are shown in window too this image shows the limits in metric settings Press OK button to confirm You will go to...

Страница 15: ...ill show the standard adjust arrows again for speed and incline Setting your goal for heart rate When your program allows you to set a heart rate limit to control your workout intensity see the below...

Страница 16: ...de Time when in time mode Window size is 2KM for distance unit and 10 Min for time unit Workout Trip The Workout Trip programs contain real geometric data like position altitude and incline Therefore...

Страница 17: ...kout result will show on chart region The workout screen outlook depends on workout mode type Scenery Tour Scenery Tour uses the same workout profiles as in Workout Trip except it has the video playba...

Страница 18: ...rate by resistance adjustments So heart rate transmitter is required for the workout There are 6 preset programs A HRC B P08 Fat Burner 1 C P09 Fat Burner 2 D P10 Cardio E P11 Fit Select your program...

Страница 19: ...is controlled by user Change user Open Change user menu by pressing Change user button in main function bar You can change a user in the same way as you would create a user Select a user you want to...

Страница 20: ...essing Edit User button in main function bar This menu shows in the upper section the total workout log of the user The lower section shows the workout log of latest workout Clear Log Clear Log button...

Страница 21: ...e formatted in FAT32 format Remark possibly not all files will be able to play Play control Use play control button to play pause stop or repeat your selection rapidly pressing the home button Scale P...

Страница 22: ...nection sign Wi Fi When pressing Wi Fi button it opens Wi Fi settings window Wi Fi networks Lists the available networks It shows authentication and signal strength sign Press the network you like to...

Страница 23: ...Press Back button to go back to settings menu without change Volume When pressing Volume button it opens master volume settings window In here you can adjust the master volume for web and media playe...

Страница 24: ...t opens about information window In here you can see the currently installed software information only Press Back button to go back to settings menu Quick Start Open Quick Start by pressing the Quick...

Страница 25: ...must be made from the rear roller The adjustment bolts are located at the end of the step rails in the end caps as noted in diagram below Tighten the rear roller bolts clockwise only enough to preven...

Страница 26: ...tracking is an owner responsibility common with all treadmills NOTE Damage to the running belt resulting from improper tracking tension adjustments is not covered under the warranty Troubleshooting De...

Страница 27: ...ry place with as little temperature variation as possible protected against dust Always unplug the treadmill from the electrical outlet when not in use Specifications Product Running deck 25mm MDF Run...

Страница 28: ...y enjoyable trainings with your new Tunturi training partner No Description Qty 1 Main frame 1 2 Incline bracket 1 3 Interface mounting bracket LH 1 4 Interface mounting bracket RH 1 5 Console support...

Страница 29: ...onnect cable 1 172 Sensor rack 1 173 Connecting wire 1 175 Socket head cap bolt 1 39 Round end cap 2 40 Incline carriage spacer 4 41 Nylon washer 2 42 Motor cover anchor 4 43 Rear roller end cap RH 1...

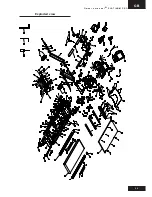
Страница 30: ...GB O w n e r s m a n u a l P L A T I N U M P R O 29 Exploded view...

Страница 31: ......

Страница 32: ...w ww tun tur i c om TUNTURI FITNESS B V P O BOX 60001 1320 AA THE NETHERLANDS www tunturi com Version 20140715...

Отзывы: