background image


6

 
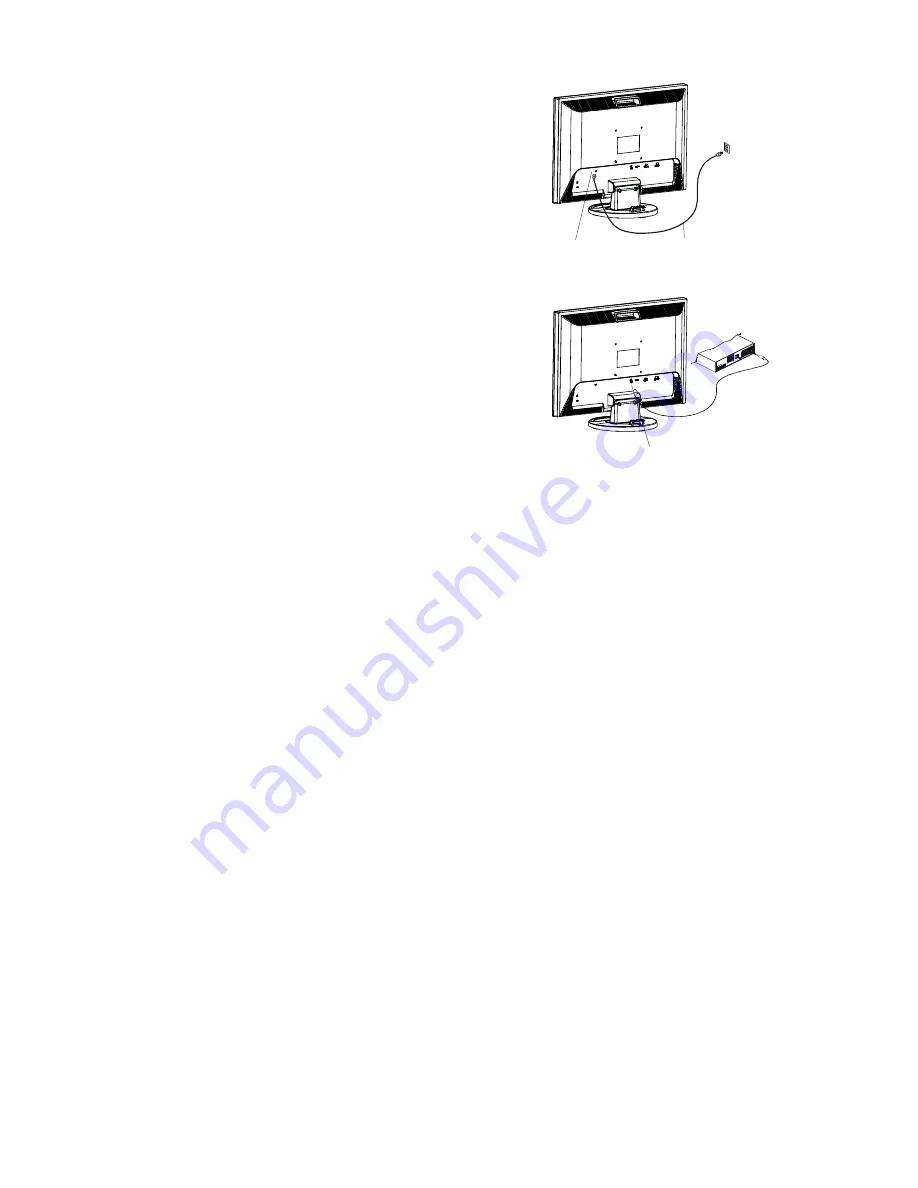
Connecting the AC Power 


1.    Connect the power cord to the LCD Monitor.(See Fig. 1-6)   
2.    Connect the power cord to an AC power source.


Figure

1-6


Connecting the Audio Cable 


1.


Connect the audio cable to the "LINE OUT" jack on your PC's 
audio card or to the front panel's “AUDIO OUT” jack of your CD 
ROM drive. (See Fig. 1-7) 

Connect the other end of the audio cable to the LCD Monitor's   
"LINE IN" jack.


Figure1-7


Setting Up the LCD Monitor 

1.  Make sure the


AC power cord is connected to the LCD Monitor.   

2.    Turn on the LCD Monitor's power switch, located on the bezel of the monitor.   


Power Management System 

This LCD Monitor complies with the VESA DPM Power Management guidelines. If you have VESA's DPM™ 
compliance display card or software installed in your PC, the monitor can automatically reduce its power 
consumption when not in use. If input from keyboard, mouse or other input devices is detected by the 
computer, the monitor will automatically "wake up". When the LCD Monitor is in power saving mode, the 
monitor screen will be blank and the power LED indicator will light yellow. 

Power Jack 

Power Cord 

Audio Jack

Содержание PL2210MW

Страница 1: ......

Страница 2: ...erface for Arm Applications 5 Connecting the Display 5 Connecting the AC Power 6 Connecting the Audio Cable 6 Setting Up the LCD Monitor 6 Power Management System 6 Display Controls 7 User Controls 7...

Страница 3: ...tion Ifthisequipmentdoescauseharmfulinterferencetoradioortelevisionreception whichcanbe determinedbyturningtheequipmentoffandon theuserisencouragedtotrytocorrecttheinterferencebyoneormoreof thefollowi...

Страница 4: ...om with a room temperature of 20 60 C or 4 140 F Storing the LCD Monitor outside this range could result in permanent damage 6 If any of the following occurs immediately unplug your monitor and call a...

Страница 5: ...ent airflow Though the LCD Monitor uses very little power some ventilation is needed to ensure that the Monitor does not become too hot After you unpack the LCD Monitor make sure that the following it...

Страница 6: ...e hinge to release Figure 1 3 Interface for Arm Applications Before installing to mounting device please refer to Fig 1 3 The rear of this LCD display has four integrated 4 mm 0 7 pitch threaded nuts...

Страница 7: ...er cord is connected to the LCD Monitor 2 Turn on the LCD Monitor s power switch located on the bezel of the monitor Power Management System This LCD Monitor complies with the VESA DPM Power Managemen...

Страница 8: ...de be dark when monitor in off mode 2 Power ON OFF switch Push to power on or power off Toggle switch 3 Menu Enter Shows main OSD menu Enter key in OSD menu Audio mute and unmute must activate Volume...

Страница 9: ...ptimal balance of brightness and contrast prevent eyestrain The most comfortable way to read onscreen text Preset Mode PHOTO Enhances colors and emphasize fine detail Brightness Adjusts the background...

Страница 10: ...color temperature to 7500K 5000K Sets the color temperature to 5000K sRGB Sets the color temperature to sRGB User R G B Allows users to adjust red green blue intensity Language Multi language selectio...

Страница 11: ...he CIE coordinate color temperature to 9300 K 7500 CIE coordinated Color Temperature of 7500 K Sets the CIE coordinate color temperature to 7500 K 5000 CIE coordinated Color Temperature of 6500 K Sets...

Страница 12: ...Impedance 75 Ohm 2 Polarity Positive Negative Amplitude 0 0 7 0 05 Vp Multi mode Supported Horizontal Frequency 30 83 kHz Vertical Frequency 56 75 Hz 30 80kHz 56 75Hz Control Power switch hard and sof...

Страница 13: ...negative Plug Play Supports VESA DDC2B DDC CI functions External Connection Power Input AC input AC socket Video Cable 15 pin D sub DVI D connector Monitor to PC DVI D Cable Audio Cable Stereo Jack P...

Страница 14: ...40 64 16 120 VESA 480 75Hz 75 500 480 3 1 16 31 5 720x350 31 47 900 720 108 18 54 70Hz 70 087 449 400 2 37 60 28 322 720x400 31 469 900 720 108 18 54 VGA 400 TEXT 70 087 449 400 2 12 35 28 322 832x624...

Страница 15: ...36 126 1280x960 75 1800 1280 112 96 312 75Hz 75 1000 960 3 1 36 135 1280x1024 64 1688 1280 112 48 248 VESA 1024 60Hz 60 1066 1024 3 1 38 108 1280x1024 80 1688 1280 144 16 248 VESA 1024 75Hz 75 1066 10...

Страница 16: ...is no picture on LCD Monitor If there s no picture on the LCD Monitor please perform the following steps 1 Make sure the power indicator on the LCD Monitor is ON all connections are secured and the s...

Страница 17: ...nitor touch screen or other Planar products visit our online store at www PlanarOnline com or find other stores who carry Planar products at http www planar com howtobuy Technical Support Visit Planar...

Страница 18: ......

Отзывы: