background image


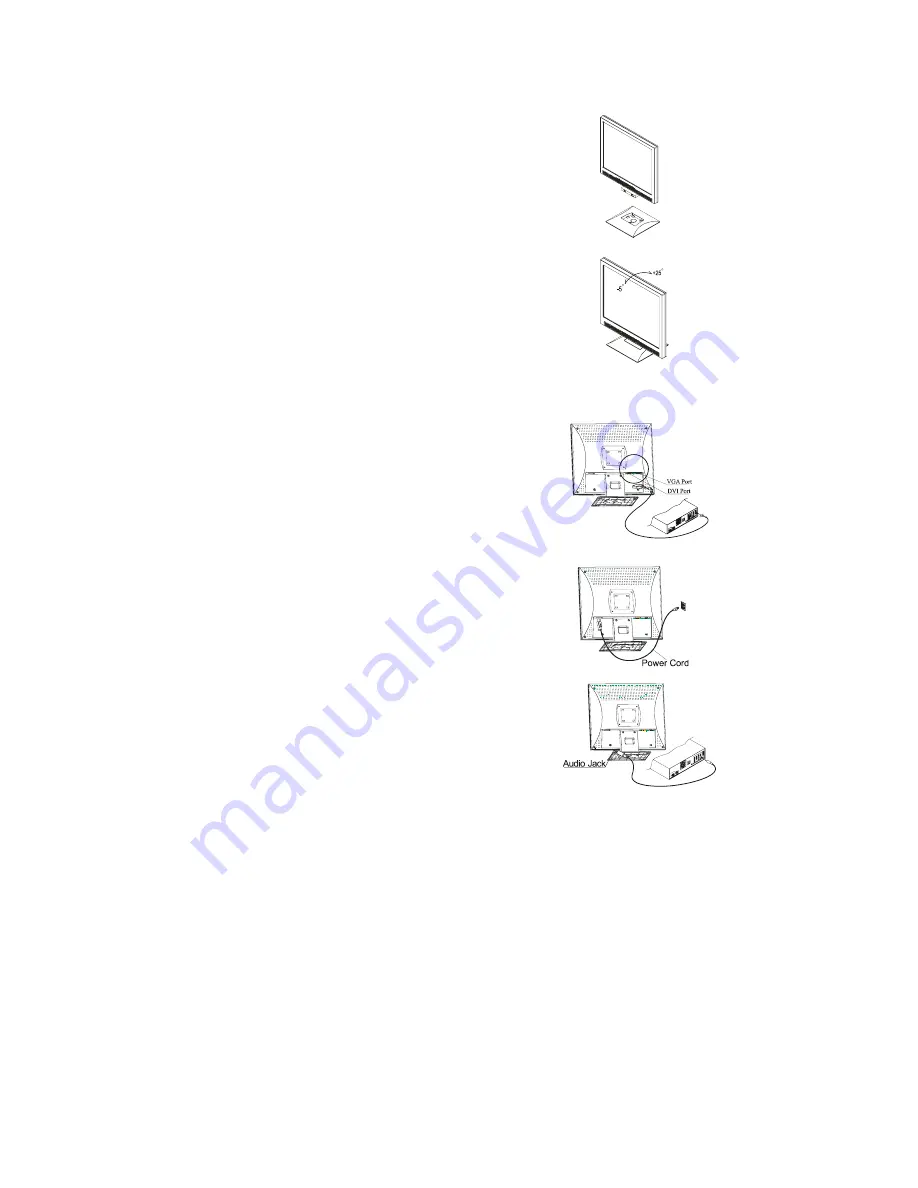
Connecting the LCD Monitor and Base 

When you open the box to take the base and put on the desk first. Then 
connect the LCD Monitor and base. 


Viewing Angle Adjustment   

The LCD Monitor is designed to allow users to have a 
comfortable viewing angle. The viewing angle can be adjusted 
from -5°to +25°. 


Warning:


Do not force the LCD Monitor over its maximum viewing angle settings as stated above. Attempting this will result in damaging 

the Monitor and Monitor stand. 


Connecting the Display to your Computer


1.


Power off your computer.   

2.


Connect one end of the signal cable to the LCD Monitor’s VGA port 
or DVI port. 

3.


Connect the other end of the signal cable to the VGA port or DVI port 
on your PC. 

4.


Make sure the connections are secure


Connecting the AC Power 


1.


Connect the power cord to the AC socket.   

2.


Connect the power cord to an AC power source.


Connecting the Audio Cable 

1.


Connect the audio cable to the "LINE OUT " jack on your PC's 

audio card or to the front panel's “AUDIO OUT” jack of your CD 

ROM drive.   

2.


Connect the other end of the audio cable to the LCD Monitor's 

"LINE IN" jack. 


Содержание PL1910 M

Страница 1: ......

Страница 2: ...ecting the Audio Cable 2 Multi Mount Ready Optional Mounting Alternatives 3 Detaching LCD Monitor from Its Stand 3 Interface for Wall Mount Arm or Alternate Deskstand Applications 3 Power Management S...

Страница 3: ...not expressly approved by the manufacturers may void the user s authority to operate this equipment Warning Use only shielded signal cables to connect I O devices to this equipment You are cautioned...

Страница 4: ...Monitor make sure that the following items were included in the box LCD Monitor User s Manual Monitor to PC VGA Cable Power Cord Monitor to PC DVI D Cable Stereo Jack Audio Cable Planar Connections C...

Страница 5: ...r and Monitor stand Connecting the Display to your Computer 1 Power off your computer 2 Connect one end of the signal cable to the LCD Monitor s VGA port or DVI port 3 Connect the other end of the sig...

Страница 6: ...illustrated in Figure 1 4 These specifications meet the VESA Flat Panel Monitor Physical Mounting Interface Standard paragraphs 2 1 and 2 1 3 version 1 dated 13 November 1997 Note Please using 4mm x...

Страница 7: ...utton to decrease the OSD setting and press the right button to increase the OSD setting 7 External Headphone Jack The monitor speakers will be disabled when using an external headphone or external sp...

Страница 8: ...menu window horizontally OSD V Position This function moves the OSD menu window vertically Graph Text Because the H and V Frequencies of both 640 x 400 70Hz and 720 x 400 70Hz are the same this functi...

Страница 9: ...p 75 Ohm 2 Positive Negative 0 0 7 0 05 Vp Horizontal Frequency 24 80 KHz Vertical Frequency 49 75 Hz Digital TMDS TMDS 24 80KHz 49 75 Hz Audio Input 500mVrms Output 1W 1W Control Power switch hard a...

Страница 10: ...5 pin D sub connector 24 pin DVI D Audio Cable Stereo Jack Environment Operating Condition Temperature 5 C to 40 C 41 F to 104 F Relative Humidity 20 to 80 Storage Condition Temperature 20 C to 60 C 4...

Страница 11: ...6 SVGA 56 25 625 600 2 1 22 800x600 37 879 1056 800 128 40 88 40 VESA 600 60Hz 60 317 628 600 4 1 23 800x600 48 077 1040 800 120 56 64 50 VESA 600 72Hz 72 188 666 600 6 37 23 800x600 46 875 1056 800 8...

Страница 12: ...re is no picture on LCD Monitor If there s no picture on the LCD Monitor please perform the following steps 1 Make sure the power indicator on the LCD Monitor is ON all connections are secured and the...

Страница 13: ...10...

Отзывы: