background image

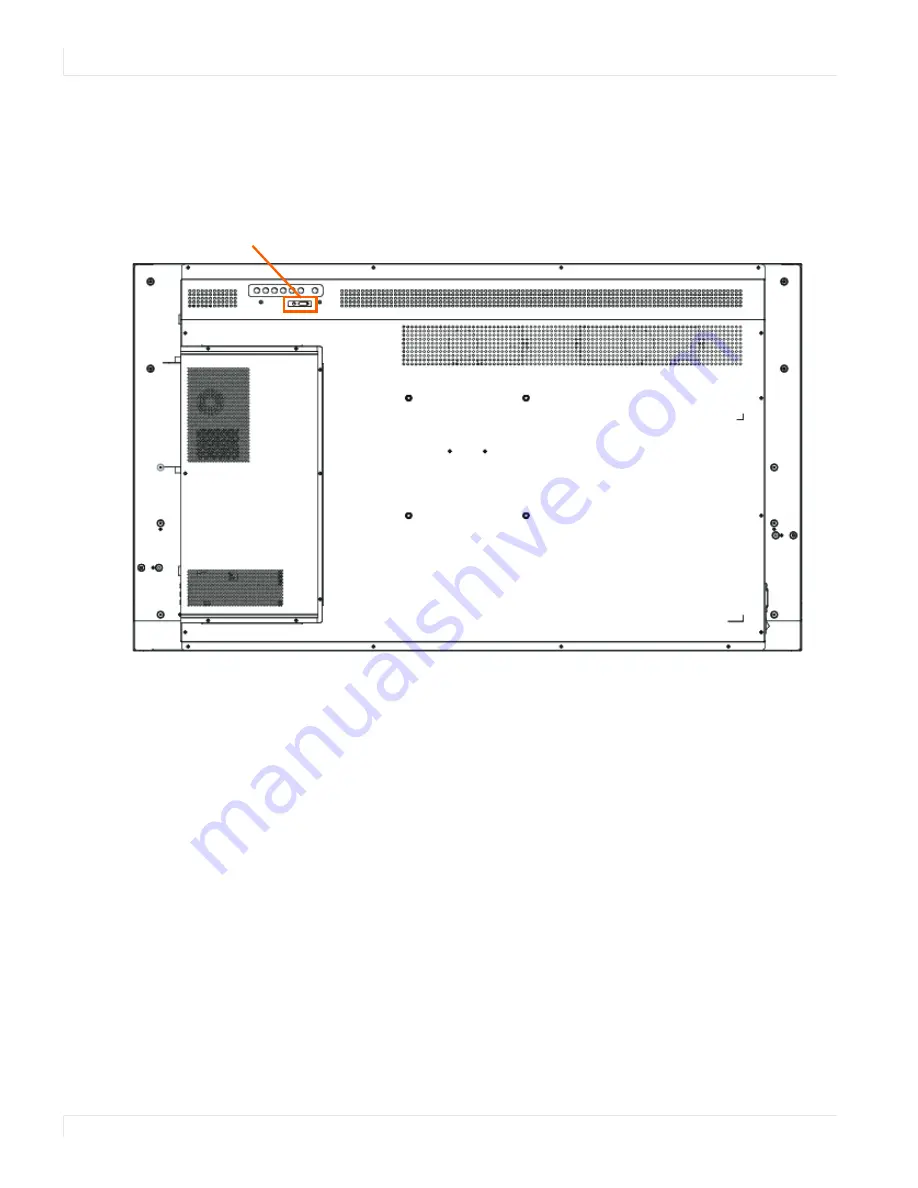
Remote Control Receiver

16

EP Series Ultra HD LCD Displays User Guide

Remo te Co ntro l Receiver

The remote control receiver is located near the keypad on the rear of the display. Use 

the IR extender cable for operating the remote from the front of the display.

Power ON standby indicator,
Remote control receiver

Содержание EP5024K

Страница 1: ...EP Series Ultra HD LCD Disp lays User Guide EP5024K EP5024K T EP5824K EP5824K T EP6524K EP6524K T...

Страница 2: ...he Company shall not be liable for errors or omissions contained herein or for incidental or consequential damages in connection with the furnishing performance or use of this material Warranty and Se...

Страница 3: ...play 7 Package Contents 8 Installing the Cable Clips 10 Planar EP Series Standard Inputs 11 Installing the Display 12 Before You Begin 12 Installing OPS Expansion Optional 14 Operating the Display 15...

Страница 4: ...3 Using the Touch Screen 47 LAN Control 48 Supported Operating Systems 48 Installation 49 Configuring VCOM 52 Function Descriptions 54 Setting Up Email Alerts 58 Login 58 Administrator 60 TCP Mode UDP...

Страница 5: ...Table of Contents iii EP Series Ultra HD LCD Displays User Guide EP6524K 75 EP6524K T 76 Troubleshooting 77 Accessing Planar s Technical Support Website 78...

Страница 6: ...ommercial grade features such as 4K 60Hz support through both HDMI and DisplayPort and HDCP 2 2 compliance which are required for digital signage corporate and control room environments Also available...

Страница 7: ...ur dealer for inspection WARNING Wall mounts must be secure If the display is hung on a wall the wall must be strong enough to hold it Simply mounting it to wallboard or wall paneling won t be adequat...

Страница 8: ...of the obsolete outlet 9 Protect the power cord from being walked on or pinched particularly at plugs convenience receptacles and the point where they exit from any of the displays 10 Only use the at...

Страница 9: ...any way Normal use of an LCD is defined as displaying continuously changing video patterns or images However LCDs can experience temporary image retention when recommended usage guidelines are not fo...

Страница 10: ...tional resources can be found online at http www planar com about green The crossed out wheelie bin symbol is to notify consumers in areas subject to Waste Electrical and Electronic Equipment WEEE Dir...

Страница 11: ...icted to be above the specified ambient temperature for the panel Cooling may be done behind the displays and depending on the wall configuration it may be helpful to place air ducts AC at every third...

Страница 12: ...eaning Failure to do so may result in electrical shock or damage Keep the following points in mind when cleaning the surface of the display When the surface of the display becomes dirty wipe the surfa...

Страница 13: ...ckage Co ntents Part Description Number Picture LCD display One per box 1 HDMI cable HDMI cable 1 USB cable Connects to a PC for touch functionality touch models only 1 AC power cord Power cord 1 IR e...

Страница 14: ...splays User Guide 9 Remote control Used to control the display AAA batteries included 1 Cable clips Used to clamp and organize the cables 2 TouchMark License Key TouchMark License Key touch models onl...

Страница 15: ...lips 10 EP Series Ultra HD LCD Displays User Guide Installing the Cable Clip s The cable clips included in the Accessory Kit are used to assist with cable management These clips snap into place as sho...

Страница 16: ...uts EP Series Ultra HD LCD Displays User Guide 11 Planar EP Series Standard Inp uts 1 RS232 In 8 DP2 2 LAN 9 VGA 3 HDMI 1 10 PC Audio In 4 HDMI 2 11 IR 5 HDMI 3 12 Audio Out 6 HDMI 4 13 SPDIF Out 7 DP...

Страница 17: ...east two very strong people to help lift units into place Plan Yo ur Installatio n You should have a detailed plan of how the units are to be configured The plan should include calculations for the fo...

Страница 18: ...ns Cable length performance may vary between different cables and sources The recommended maximum cable lengths are as follows HDMI 4K 50 60Hz 8m 25 ft maximum 4K 24 25 30Hz 15m 50 ft maximum 1080p 60...

Страница 19: ...s PC s SDI modules etc To install an OPS device remove the protective cover on the display and slide the device firmly into position When installed the OPS device will be connected internally to the d...

Страница 20: ...ating the Disp lay OSD Keyp ad The OSD keypad is located on the rear of the display OSD Keypad Buttons Key Descriptions Power Power on Power off Source Source selection toggle X Menu Right Increase va...

Страница 21: ...ays User Guide Remo te Co ntro l Receiver The remote control receiver is located near the keypad on the rear of the display Use the IR extender cable for operating the remote from the front of the dis...

Страница 22: ...lays User Guide 17 Installing IR Extender The position of the IR extender will affect the reception of the IR signal To ensure the best IR reception P1 and P2 the two positions marked in the figure be...

Страница 23: ...e or portrait on the OSD menu MAIN MENU OSD SETTINGS OSD ROTATION Caution Improper ventilation may shorten the life of the display Using the Disp lay in Flat o r Tilted Orientatio n The display is not...

Страница 24: ...Control EP Series Ultra HD LCD Displays User Guide 19 Using the Remo te Co ntro l Below is a picture of the remote control and its corresponding Hex codes See the following page for button descriptio...

Страница 25: ...3 40AF 10EF Selects the HDMI source 3 12 PIP 40AF 11EE Selects the Multi Source View 13 Not used 14 HDMI4 40AF 16E9 Selects the HDMI source 4 15 SWAP 40AF 06F9 Swaps the main input source with source...

Страница 26: ...the menu you will see one of the following messages on the screen 26 SCALING 40AF 14EB Toggles between different aspect ratios Auto Native 4 x 3 Full Screen and Letterbox 27 FREEZE 40AF 43BC Freezes...

Страница 27: ...e AC switch is set to 3 Press the power button on the remote or side control panel 1 Remove the battery cover Slide back and remove the battery cover in the direction of the arrow 2 Insert the batteri...

Страница 28: ...ly turn off all sound To restore the sound press the MUTE button again Note The analog audio out is variable S PDIF is fixed Selecting the Inp ut So urce Do one of the following Using the remote press...

Страница 29: ...he display will automatically scan for a Main Input source Options On Off Default Off Multi Source Views Select the Multi Source View mode Options Off PiP Dual View Quad View Default Off Source 2 Sele...

Страница 30: ...d as another source OPS cannot be selected If OPS was selected as another source HDMI4 cannot be selected PIP Size Select the size of the PiP Picture in Picture Options Small Mid Large Note This funct...

Страница 31: ...iguratio ns 1 Set up the single or multi source layout as desired 2 Select PRESET1 SAVE PRESET2 SAVE PRESET3 SAVE or PRESET4 SAVE to assign the configuration to one of the preset slots Recalling Sto r...

Страница 32: ...Letterbox 4 3 BUJWF Default VMM 4DSFFO Scheme Press e or f to select one of the following Options User Vivid Cinema Game Sport Default User Contrast Increase or decrease the contrast of picture Press...

Страница 33: ...100 Default 50 Note This function is not available when displaying PC or graphics sources Backlight Increase or decrease the intensity of the LCD backlight Press e or f to select the desired level Ra...

Страница 34: ...5 2 5 2 55 2 6 Default 2 2 Temperature Select color temperature Options User 3200K 5000K 6500K 7500K 9300K Default 9300K R Gain Adjust the amount of red in bright content Range 0 100 Default 50 G Gain...

Страница 35: ...t 50 B Offset Adjust the amount of blue in dark content Range 0 100 Default 50 Gamut Select the range of colors shown on the display Options Native Select the maximum range of colors REC709 Select the...

Страница 36: ...ult 50 Treble Adjust the sound in high tones treble Press e or f to select the desired level Range 6 6 Default 0 Bass Adjust the sound in low tones bass Press e or f to select the desired level Range...

Страница 37: ...io source that is played through the display s internal speakers audio out and digital audio out Options Audio In Main Input Source 2 Source 3 Source 4 Default Main Source Note Settings for Source 2 S...

Страница 38: ...ion Adjust the vertical position of the OSD menu Press e or f to select the desired level Range 0 100 Default 50 Transparency Submenu to adjust the transparency of the OSD menu Press e or f to select...

Страница 39: ...ish French German Italian Portuguese Spanish Chinese Traditional Chinese Simplified Japanese Default English Splash Screen Select whether a splash screen appears when the monitor is powered up Options...

Страница 40: ...osition Adjust the horizontal position of the image VGA source only Press e or f to select the desired level Range 0 100 Default 50 V Position Adjust the vertical position of the image VGA source only...

Страница 41: ...oom overscan of the image Default 0 Power LED Enable or disable the status LED Options On Off Default On OPS Power Down Check Allow the display to skip waiting for the OPS module to power down when th...

Страница 42: ...Guide 37 Real Time Clo ck Submenu This menu is used to set the internal clock of the display and to power on and power off the display at preset times if desired Current Time Set the year month day a...

Страница 43: ...r Mode 38 EP Series Ultra HD LCD Displays User Guide Real Time Clo ck User Mo de User Mode Select the power on off time for each day of the week Options Disable Enable Use the arrow keys to specify th...

Страница 44: ...P Series Ultra HD LCD Displays User Guide 39 Real Time Clo ck Wo rkday Mo de Workday Mode Select the power on off time for Monday Friday Saturday and Sunday Options Disable Enable Use the arrow keys t...

Страница 45: ...Mode 40 EP Series Ultra HD LCD Displays User Guide Real Time Clo ck Everyday Mo de Everyday Mode Select the power on off time for all days of the week Options Disable Enable Use the arrow keys to spec...

Страница 46: ...n Off Default Off Power Saving Config Options Wake on VGA Wake on All Always On Default Wake on VGA Note For Wake on VGA and Wake on All the display will enter power saving mode if no signal is receiv...

Страница 47: ...ta of the HDMI and DisplayPort inputs Options HDMI 1 HDMI2 1080p 4K2K 30Hz DP1 DP2 HDMI 3 HDMI 4 and OPS 1080p 4K2K 30Hz 4K2K 60Hz Default HDMI 1 HDMI2 4K2K 30Hz Other inputs 4K2K 60Hz Note Use the 10...

Страница 48: ...5200 38400 19200 9600 Default 19200 Enable Network Enable the display s built in Ethernet port Options On Off Default Off IP Address Settings Enable Dynamic IP mode or set the static IP address of the...

Страница 49: ...c alert when the video signal is lost Options On Off Default Off Load Default Load default communication settings Options No Yes Default No SNMP Configure the Simple Network Management Protocol SNMP s...

Страница 50: ...isplay access the IP Address Settings Menu in the Communication menu Consult your system administrator if you do not know how to configure the parameters shown in the menu The default settings are sho...

Страница 51: ...Information Menu 46 EP Series Ultra HD LCD Displays User Guide Info rmatio n Menu This read only menu provides information on the active sources and the latest firmware version...

Страница 52: ...without a driver Single touch only is supported for Mac operating systems To achieve more than single touch Mac support drivers will need to be installed which can be found on http www planar com supp...

Страница 53: ...VCOM driver can be found on http www planar com support Note RS232 commands over LAN can be achieved by opening a TCP connection to Port 23 to the display The LAN control functionality is most freque...

Страница 54: ...tra HD LCD Displays User Guide 49 Installatio n Use the following instructions to install the VCOM driver 1 Launch the vcomsetup exe file 2 You may see a security warning similar to the following exam...

Страница 55: ...ys User Guide 3 The vcomsetup exe installer installs both the VCOM virtual serial port and also a utility WinPcap for finding your displays on the network Follow the steps in the two installers accept...

Страница 56: ...4 When the installers are finished you will see a VCOM icon on your desktop and you find two new folders in your start menu IC Plus corp with VCOM sub folder and WinPcap If you need to uninstall the...

Страница 57: ...ility The utility starts up on the Device Info page shown below The controls on this page allow you to find and configure each display that you want to access via virtual COM ports Open a browser and...

Страница 58: ...3 Click on COM Mapping to display the COM Mapping page shown below The controls on this page allow you to make virtual COM ports and select the display to which you want to map each virtual COM port C...

Страница 59: ...n searches for any devices that are connected to the same network segment maximum of 254 devices as your PC Any devices found will be listed in the Device Info table Search By IP On the Device Info pa...

Страница 60: ...he network settings of the selected device We recommend using the on screen menus or the web interface described in the User Guide instead of this function Note To cancel this function scroll to the b...

Страница 61: ...ual COM port click the Add icon on the COM Mapping page to open the following dialog window Select the display you want to control from the table and accept defaults as shown Make a note of the COM nu...

Страница 62: ...tra HD LCD Displays User Guide 57 You can view details for the virtual COM port device using Device Manager shown below Remo ving a COM Po rt On the COM Mapping page select the COM port you want to de...

Страница 63: ...you do not need to use the web service and can skip this section Lo gin When you direct your browser to the network IP address of the display you are prompted to login as shown here The default ID is...

Страница 64: ...Login EP Series Ultra HD LCD Displays User Guide 59 When you first login you will see the System Status page as shown here...

Страница 65: ...Authenticatio n Co nfiguratio n Set user ID and password for login to the web service System IP Co nfiguratio n You can view and or change the network settings here However for best results we recomme...

Страница 66: ...he network interface Nickname Enter a device tag up to 12 characters This tag will appear in email alerts which help you identify the source of the alert Lo ad Default Setting 1 Click the LOAD button...

Страница 67: ...o ader Up grade In most cases you will not need to update firmware for the network interface If you do contact Planar s Technical Support Department See Accessing Planar s Technical Support Website on...

Страница 68: ...ore information SMTP Your network administrator must provide information for the following fields Enable SMTP Make sure this checkbox is checked Port 25 is the default SMTP Server Address Name or IP a...

Страница 69: ...subject and body of the email warnings which are sent when there is a power status change source change and signal lost The SMTP 04 and 05 warnings are not used Reset Device Click the RESET button to...

Страница 70: ...VESA CVT 1024x768 60 004 48 363 65 000 x x x x VESA DMT 1024x768 70 069 56 476 75 000 x x x x VESA DMT 1024x768 75 029 60 023 78 750 x x x x VESA DMT 1024x768 84 997 68 677 94 500 x x x x VESA DMT 11...

Страница 71: ...F VIC 16 with vertical parameters doubled 1920x2160 59 988 133 293 277 250 x x x VESA CVT R 2560x1440 59 951 88 787 241 500 x x x VESA CVT R 2560x1600 59 972 98 713 268 500 x x x VESA CVT R 3840x2160...

Страница 72: ...148 500 x x x x SMPTE 274M CEA 861 F Format 16 UHDTV 3840x2160 24 54 000 297 000 x x x CEA 861 F Format 93 HDMI 1 4b VIC 1 3840x2160 25 56 250 297 000 x x x CEA 861 F Format 94 HDMI 1 4b VIC 2 3840x2...

Страница 73: ...ys User Guide Co lo r Subsamp ling Sup p o rt Video Timing Input RGB 4 4 4 Supported YUV 4 4 4 Supported YUV 4 2 2 Supported YUV 4 2 0 Supported 4K 50 60 Hz DP x x x 4K 50 60 Hz HDMI 1 2 4K 50 60 Hz H...

Страница 74: ...IR Keypad Mechanical Display Dimensions Standard 44 9 x 26 x 2 65 1140 2mm x 659 6mm x 67 4mm Touch 44 9 x 26 x 3 34 1140 2mm x 659 6mm x 84 9mm Standard 51 2 x 29 6 x 3 14 1300 8mm x 752 2mm x 79 8mm...

Страница 75: ...93 BTU hr 135W x 3 42 BTU 462 BTU hr 541 BTU hr Standby Power Consumption 0 5W Input Voltage Frequency AC 100 240V 50 60 Hz OPS Power 12V 8A Environment Storage Temperature Min 4 F Max 140 F 20 C 60 C...

Страница 76: ...3m m 1 1in 15mm 0 6in 4x M8 VESA MOUNTING HOLES 200mm 7 9in 230 3mm 9 1in 200mm 7 9in 470 1mm 18 5in 27 4mm 1 1in 21 4mm 0 8in 20 6mm 0 8in 20 6mm 0 8in 659 6mm 26 0in 21 1mm 0 8in 21 1mm 0 8in 1140...

Страница 77: ...0 7in 659 6mm 26 0in 17 1mm 0 7in 1140 2mm 44 9in 17 7mm 0 7in 17 7mm 0 7in 15mm 0 6in 45 4mm 1 8in 27 3m m 1 1in 39 4mm 1 6in 4x M8 VESA MOUNTING HOLES 200mm 7 9in 470 1mm 18 5in 200mm 7 9in 230 3mm...

Страница 78: ...25 1m m 1 0in 752 2mm 29 6in 1300 8mm 51 2in 14mm 0 6in 14mm 0 6in 81 2m m 3 2in 150 2mm 5 9in 32 2m m 1 3in 79 8m m 3 1in 263 8mm 10 4in 4x M8 VESA MOUNTING HOLES 550 4mm 21 7in 200mm 7 9in 100mm 3 9...

Страница 79: ...A MOUNTING HOLES 559 4mm 22 0in 200mm 7 9in 100mm 3 9in 100mm 3 9in 200mm 7 9in 186 1mm 7 3in 772 2mm 30 4in 22mm 0 9in 22mm 0 9in 1318 8mm 51 9in 21mm 0 8in 21mm 0 8in 23 7m m 0 9in 35 1m m 1 4in 99m...

Страница 80: ...m 8 6in 400mm 15 7in 4x M8 VESA MOUNTING HOLES 532 2mm 21 0in 400mm 15 7in 16 8mm 0 7in 16 8mm 0 7in 99 6mm 3 9in 841 3mm 33 1in 16 8mm 0 7in 16 8mm 0 7in 1465 7mm 57 7in 49 7m m 2 0in 49 7mm 2 0in 51...

Страница 81: ...29 3mm 9 0in 400mm 15 7in 4x M8 VESA MOUNTING HOLES 400mm 15 7in 541 8mm 21 3in 858 5mm 33 8in 23mm 0 9in 23mm 0 9in 23mm 0 9in 23mm 0 9in 1483 5mm 58 4in 59 7mm 2 4in 51 9mm 2 0in 68 7m m 2 7in 117 2...

Страница 82: ...te on page 78 Issue Check for the following No image is displayed Make sure the correct source is selected Make sure the main power switch is turned ON Check that the source equipment is operating cor...

Страница 83: ...D Displays User Guide Accessing Planar s Technical Sup p o rt Website Go to http www planar com support to locate the following support documents and resources User Guide RS232 User Manual Touchscreen...

Страница 84: ...fault setting loading in web service 61 dimensions 71 display settings menu 24 E exemptions for product use 8 H HD SDI board installing 14 I image settings menu 27 input source selecting 24 installati...

Страница 85: ...ns 69 supported timings 65 system ip configuration page 60 system status page 59 61 T temporary image retention avoiding 4 definition 4 timings 65 TIR see temporary image retention touchscreen using t...

Отзывы: