Structures Testing Instrument User Guide 59921 V0217
5
•
Nondestructive test:
Using the force wheel, slowly and continuously apply force to the structure
until the measured force reading begins to drop and no longer tracks the peak force. You will often
hear a slight crack or pop come from the structure when this occurs. At this point, the structure
cannot bear any more load without continuing to damage the structure. Stop applying force.
•
Destructive test:
Apply force until the structure is broken.
The display will flash, make an audible noise, and show “Warning Maximum Force” when maximum force
is reached.
12. If you aren’t using the downloadable software, record the force readings from the test.
13. Remove the nut, washer, load block, and bridge from the tester. Press the Zero button.
Follow Steps 6-13 to test subsequent bridges or
structures, adjusting the width of the span columns as
needed.
Testing a Tower
If using the software, be sure to read the directions on
page 7 before testing a structure.
Note:
You do not need the span columns and
structure supports to test towers; however, you do
not have to remove them from the tester unless they
prevent placing the acrylic shield on the tester.
1. If the tester has the 5-1/2" threaded rod in, remove
it and replace it with the 11-1/2" rod. Be sure the
end with the stripped threads is pointing up.
2. Turn the tester’s turn force wheel clockwise until it
stops. The load cell indicator should be at the top.
Do not force the wheel any farther.
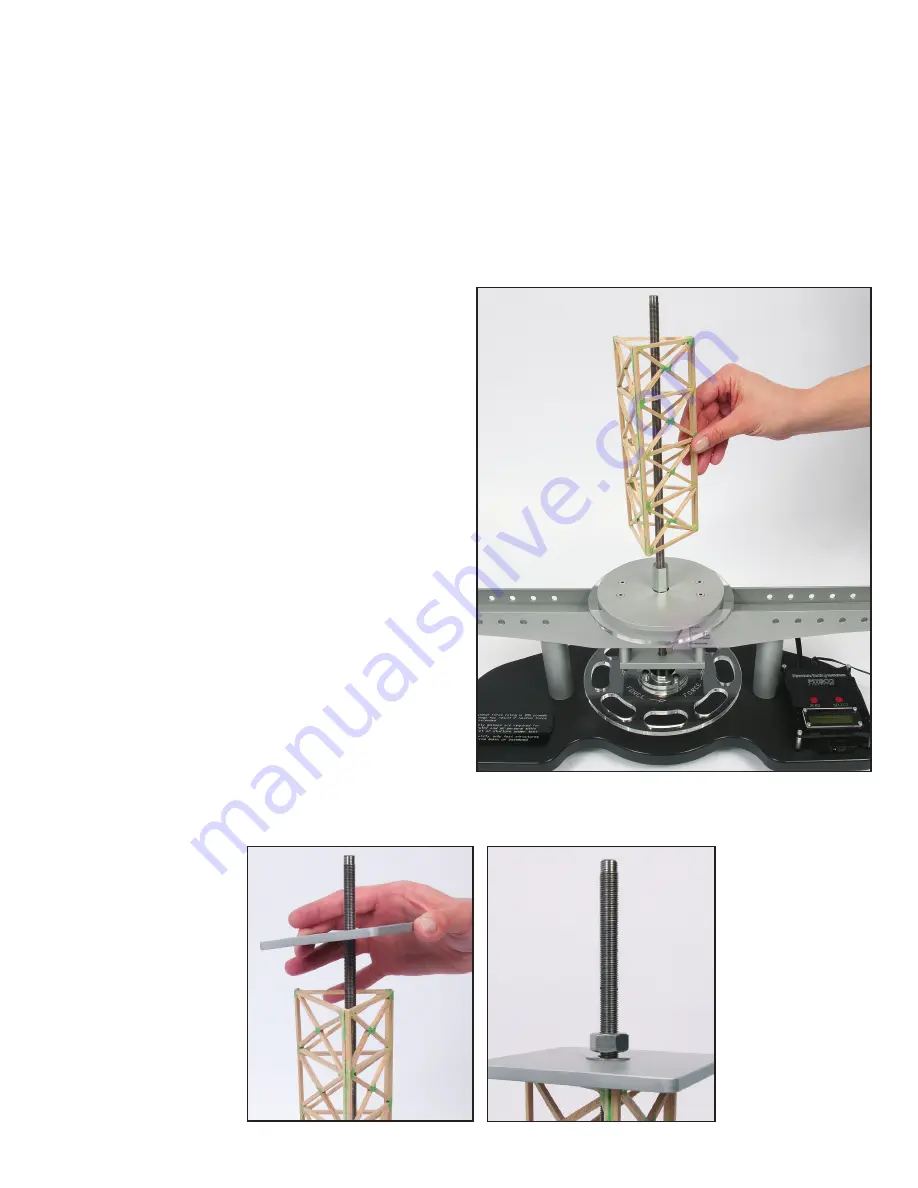
3. Place the tower over the rod (Figure 8).
4. Place the tower load plate over the threaded rod
and set it on top of the tower (Figure 9). Drop
the washer over the rod and onto the load plate
and screw the hex nut (not the wing nut) over
it, stopping approximately 1/16" above the load
plate (Figure 10).
Figure 8
Figure 9
Figure 10


