background image

rEPlacing thE ruBBEr PaDs
When a rubber pad has worn out, it can be peeled off using 
the finger lift under the tip of the pad. Peel the backing off 
one of the replacement rubber pads included with your 
cradle. start by aligning the round hole exactly around 
the torx flange screw, then align the eyes in the rubber 
with the eyes in the wood. aligning the eyes might require 
slight stretching or compressing of the rubber, depending 
on how strongly the rest has been bent. Before using, press 
the whole rubber pad strongly onto the wood, starting at 
the edges.

EN  15

Содержание KorfkerCradle Series

Страница 1: ...The ultimate in sound and comfort ...

Страница 2: ......

Страница 3: ...The ultimate in sound and comfort English Quick start guide Instruction manual Page 0 Deutsch Kurzanleitung Gebrauchsanweisung Seite Handmade in Germany ...

Страница 4: ... much for purchasing the Pirastro KorfkerCradle For full benefit of its features and to ensure a long life for your purchase please read this instruction manual care fully before use Patent US 8 618 392 Art No 700000 ...

Страница 5: ...he hooked feet 09 Aluminium foot 09 Lining up the hooked feet 09 Adjusting the ball feet 10 Attaching and removing the Cradle 11 Attaching the rest to the Cradle 12 Adjusting the legs 12 Height 12 Tilt 12 Bending the rest 13 Care 14 15 Silicon tubes 14 Leather 14 Hooked feet 14 Replacing the rubber pads 15 Contents ...

Страница 6: ...bber pad x2 17 Silicon tube x2 18 Aluminium foot with screw for use with side mounted chin rest 19 Extra short shoulder joint and screw forverylowpositions 20 Lubrication powder Large protection bag for Cradle Small protection bag for shoulder rest EN The ultimate in sound and comfort ...

Страница 7: ...10 0 01 cradle 02 hooked foot 03 Ball foot 04 leather disc 05 track 06 shoulder rest 07 chest leg 08 shoulder leg 09 adjustment screw 10 tightening disc 11 rubber pad 12 Eye 13 torx screws 14 torx flange screws 1 17 1 20 EN 5 ...

Страница 8: ...the wooden hooked feet onto the bottom edge of your violin When using a side mounted chin rest either change the position of the hooked foot or use the aluminium foot with its matching Torx screw found in the included accessories For further instructions about adjusting the hooked feet please refer to the instruction manual p 09 10 EN ...

Страница 9: ...so that they can be easily moved Now slide them beyond the edge of the violin After checking that the Cradle is positioned symmetrically on the violin position the ball feet in such a way that they tightly hug the edge of the violin as shown and tighten the screws carefully EN 7 ...

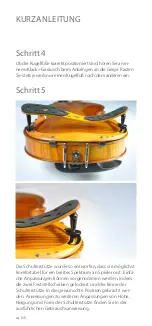
Страница 10: ...uick start guide Step 5 The shoulder rest has been set up to be comfortable for a wide range of players Simple adjustments can be made by loosening the two tightening discs and moving the shoulder rest legs to their desired position For further adjustments to the height degree of tilt and shape of the shoulder rest please refer to the instruction manual 8 EN ...

Страница 11: ...hree possible positions If the chin rest clamp is in the way of the left hooked foot use the Torx key to move the hooked foot to a position where it will not touch the metal of the clamp Move the hooked foot on the right side to a position corresponding to that of the left hooked foot so they are placed symmetrically It is easiest to adjust the rest to a middle mounted chin rest Aluminium foot If ...

Страница 12: ...orx screws of the ball feet so they can easily be moved With the violin upturned on your lap place the hooked feet around the lower edge of the violin and the ball feet just beyond the corners of the violin Check that the Cradle is symmetrically positioned on the violin Hold one side of the Cradle in place by the hooked foot and the ball foot Slide the leather disc of the ball foot towards the edg...

Страница 13: ...ounted onto the violin If the Cradle is positioned symmetrically both ball feet will encounter equal resistance from the edge of the violin Practice this a few times Once it is attached to the instrument firmly the cradle will only come off if the ball feet are pulled away from the violin To remove the Cradle from the violin press your thumb on the back of the violin and use the index finger to li...

Страница 14: ...e heads of the adjustment screws one by one towards the ends of the tracks and pull them out gently Adjusting the legs Height The height of the rest can be extensively adjusted Remove the rest from the Cradle and rotate the adjustment screws either into or out of the legs to achieve the desired height An extra high position on the shoulder can be achieved by exchanging the medium adjustment screw ...

Страница 15: ...time to adjust to a new shape therefore always bend the rest slowly and carefully The rest has a bending limit By bending it slowly and carefully you will feel when it cannot bend any further Do not force the wood to bend beyond this point Please bear in mind that small adjustments can have a significant effect on comfort After changing the bend of the shoulder rest loosen all the Torx screws in t...

Страница 16: ... If it is ripped or worn replace it with one of the new silicon tubes included in the accessories Leather discs After extended use the leather discs of the ball feet may become worn where they touch the violin To line up a fresh area of leather slightly loosen the Torx screw holding the disc and ball foot in place and rotate the disc to a suitable position before tightening the Torx screw Hooked f...

Страница 17: ...ads included with your Cradle Start by aligning the round hole exactly around the Torx flange screw then align the eyes in the rubber with the eyes in the wood Aligning the eyes might require slight stretching or compressing of the rubber depending on how strongly the rest has been bent Before using press the whole rubber pad strongly onto the wood starting at the edges EN 15 ...

Страница 18: ......

Страница 19: ...DE 17 Deutsch Kurzanleitung Gebrauchsanweisung The ultimate in sound and comfort Handmade in Germany ...

Страница 20: ...rfkerCradle Damit alle Vorzüge dieses Produkts optimal zur Geltung kommen können und eine lange Haltbarkeit gewährleistet ist lesen Sie bitte vor der ersten Benutzung diese Gebrauchsan weisung sorgfältig durch 18 DE Patent US 8 618 392 Art No 700000 ...

Страница 21: ...r Hakenfüße 25 Aluminiumfuß 25 Ausrichtung der Hakenfüße 26 Einstellung der Kugelfüße 26 Anbringen und Abnehmen der Cradle 27 Befestigung der Stütze an der Cradle 28 29 Einstellung der Beine 28 Höhe 28 Neigung 29 Biegen der Schulterstütze 29 Pflegehinweise 30 31 Silikonröhrchen 30 Leder 30 Hakenfuß 30 Austausch der Gummipads 31 ...

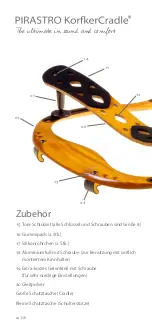
Страница 22: ...rchen 2 Stk 18 Aluminiumfuß mit Schraube zur Benutzung mit seitlich montiertem Kinnhalter 19 Extra kurzes Gelenkteil mit Schraube für sehr niedrige Einstellungen 20 Gleitpulver Große Schutztasche Cradle Kleine Schutztasche Schulterstütze 20 DE 01 02 06 12 11 07 14 13 The ultimate in sound and comfort ...

Страница 23: ...ederscheibe 05 schiene 06 schulterstütze 07 gelenkbein Brustseite 08 gelenkbein schulterseite 09 Einstellschraube 10 Feststellscheibe 11 gummipad 12 auge 13 torx schrauben 14 torx Flanschschrauben DE 21 03 04 0 13 13 0 10 0 1 1 16 1 17 1 20 ...

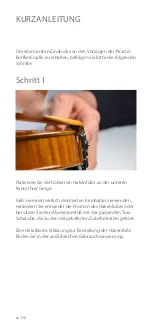
Страница 24: ...akenfüße an der unteren Kante Ihrer Geige Falls Sie einen seitlich montierten Kinnhalter verwenden verändern Sie entweder die Position des Hakenfußes oder benutzen Sie den Aluminiumfuß mit der passenden Torx Schraube die zu den mitgelieferten Zubehörteilen gehört Eine detaillierte Erklärung zur Einstellung der Hakenfüße finden Sie in der ausführlichen Gebrauchsanweisung 22 DE ...

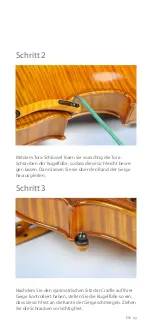
Страница 25: ... diese sich leicht bewe gen lassen Dann lassen Sie sie über den Rand der Geige hinaus gleiten Nachdem Sie den symmetrischen Sitz der Cradle auf Ihrer Geige kontrolliert haben stellen Sie die Kugelfüße so ein dass sie sich fest an die Kante der Geige schmiegen Ziehen Sie die Schrauben vorsichtig fest DE 23 ...

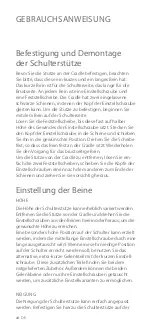
Страница 26: ...Schulterstütze wurde so entworfen dass sie möglichst komfortabel für ein breites Spektrum an Spielern ist Einfa che Anpassungen können vorgenommen werden indem die zwei Feststellscheiben gelockert und die Beine der Schulterstütze in die gewünschte Position gebracht wer den Anweisungen zu weiteren Anpassungen von Höhe Neigung und Form der Schulterstütze finden Sie in der ausführlichen Gebrauchsanwe...

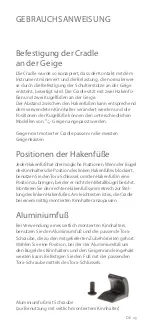
Страница 27: ...nn der Bügel des Kinnhalters die Position des linken Hakenfußes blockiert benutzen Sie denTorx Schlüssel um den Hakenfuß in eine Position zu bringen bei der er nicht den Metallbügel berührt Montieren Sie den rechten Hakenfuß symmetrisch zur Stel lung des linken Hakenfußes Am leichtesten ist es die Cradle bei einem mittig montierten Kinnhalter anzupassen Aluminiumfuß Bei Verwendung eines seitlich m...

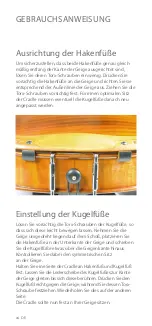
Страница 28: ...die Torx Schrauben der Kugelfüße so dass sich diese leicht bewegen lassen Nehmen Sie die Geige umgedreht liegend auf dem Schoß platzieren Sie die Hakenfüße an der Unterkante der Geige und schieben Sie die Kugelfüße etwas über die Geigenkante hinaus Kontrollieren Sie dabei den symmetrischen Sitz an der Geige Halten Sie eine Seite der Cradle an Hakenfuß und Kugelfuß fest Lassen Sie die Lederscheibe ...

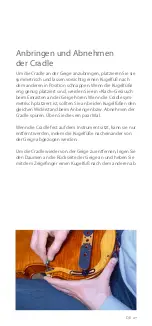
Страница 29: ...n Wenn die Cradle sym metrisch platziert ist sollten Sie an beiden Kugelfüßen den gleichen Widerstand beim Anbringen bzw Abnehmen der Cradle spüren Üben Sie dies ein paar Mal Wenn die Cradle fest auf dem Instrument sitzt kann sie nur entfernt werden indem die Kugelfüße nacheinander von der Geige abgezogen werden Um die Cradle wieder von der Geige zu entfernen legen Sie den Daumen an die Rückseite ...

Страница 30: ...adle zu entfernen lösen Sie ein fach die zwei Feststellscheiben schieben Sie die Köpfe der Einstellschrauben einen nach dem anderen zum Ende der Schienen und ziehen Sie sie vorsichtig heraus Einstellung der Beine Höhe Die Höhe der Schulterstütze kann erheblich variiert werden Entfernen Sie die Stütze von der Cradle und drehen Sie die Einstellschrauben aus den Beinen herein oder heraus um die gewün...

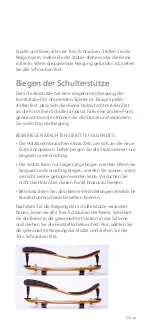
Страница 31: ... bitte folgendes Die Holzfasern brauchen etwas Zeit um sich an die neue Form anzupassen Daher biegen Sie die Stütze immer nur langsam und vorsichtig Die Stütze kann nur begrenzt gebogen werden Wenn Sie langsam und vorsichtig biegen werden Sie spüren wenn sie nicht weiter gebogen werden kann Versuchen Sie nicht das Holz über diesen Punkt hinaus zu biegen Bitte beachten Sie dass kleine Veränderungen...

Страница 32: ...tzt ist ersetzen Sie es mit einem neuen Röhrchen das Sie mit dem Zubehör erhalten haben Lederscheiben Durch intensive Nutzung können sich die Lederscheiben der Kugelfüße durch Kontakt mit der Geige abnutzen Um die Scheibe so zu drehen dass wieder unbenutztes Leder aufliegt lösen Sie einfach die Torx Schraube die die Scheibe und den Kugelfuß hält Drehen Sie die Scheibe in die gewünschte Position un...

Страница 33: ...eferten Ersatzpads ab und richten Sie das runde Loch genau um die Torx Flansch schraube aus Dann richten Sie die Augen des Gummipads mit denen im Holz aus Dazu müssen Sie eventuell das Pad leicht auseinanderziehen oder zusammendrücken je nachdem wie stark die Stütze gebogen ist Vor Benutzung drücken Sie das Pad fest auf das Holz beginnend an den Außenrändern DE 31 ...

Страница 34: ...Notes Notizen ...

Страница 35: ......

Страница 36: ...Pirastro GmbH Senefelderstrasse 80 63069 Offenbach am Main Germany www pirastro com www KorfkerCradle com ...

Отзывы: