background image

17

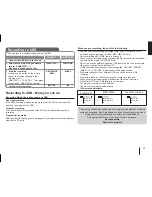
Recording to USB - More you can do

Recording Music file in disc source to USB

One track recording 


If the USB recording is played during playback of the CD, the one track/ file 
would be recording into the USB.

All tracks recording  

If the recording button is pressed at the CD stop, all tracks/ files would be 
recording.

Program list recording  

USB records after creating your own program if you want to record the track you 
want (Audio CD only).

The making of unauthorized copies of copy-protected material, including 

computer programs, files, broadcasts and sound recordings, may be an 

infringement of copyrights and constitute a criminal offence.  

This equipment should not be used for such purposes.

Be responsible

Respect copyrights

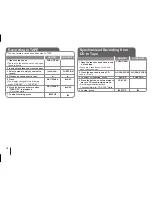
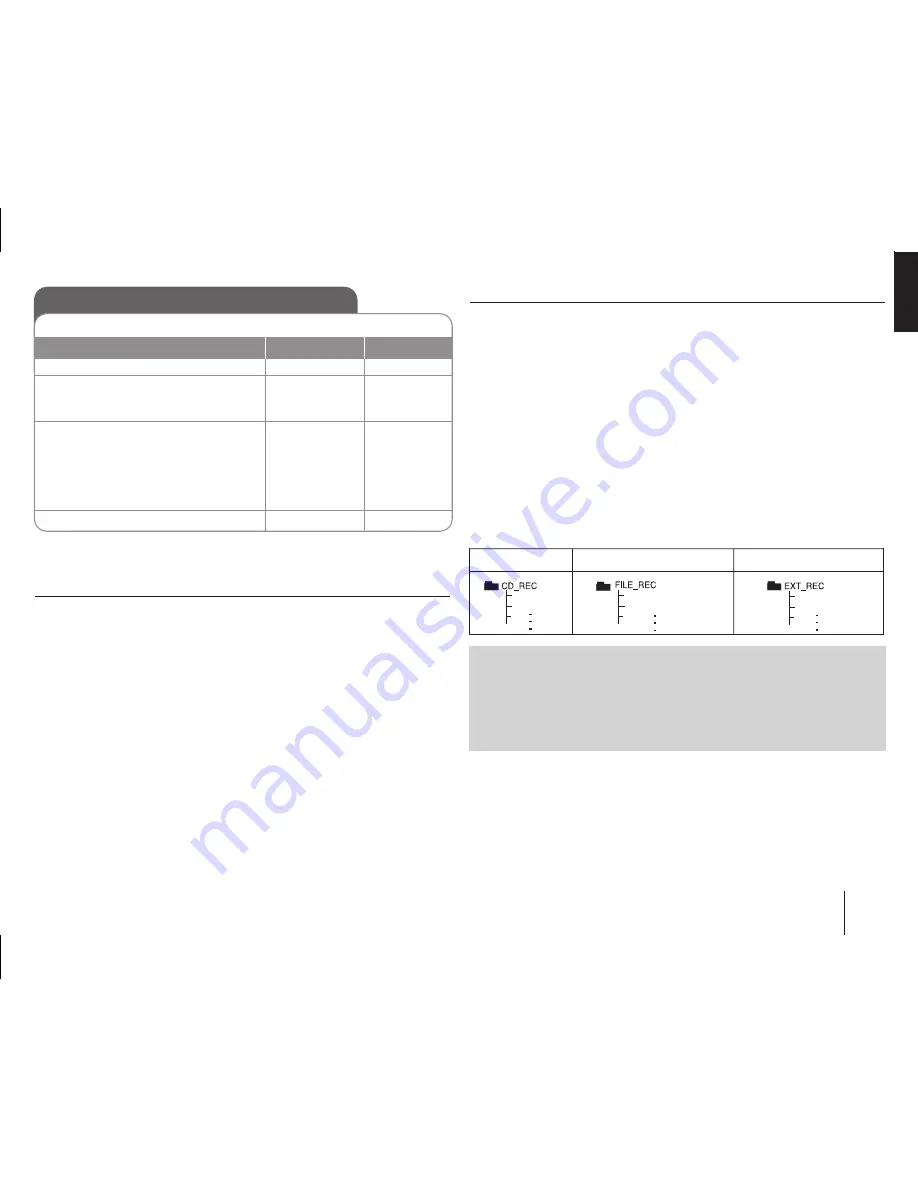
Recording to USB

You can record a various sound source to USB.

1   Connect the USB device to the unit.

2   Select a mode in which you want to 

record. (TUNER/ CD/ ....) 
Play back a sound source first.

3   Start the recording.

>  If you press the button on the remote 

control, the display changed in the  
following order,  

“USB REC” <-> “TAPE REC”

. Then press 

the button on “USB REC” once more.

4  To stop recording, press

ON UNIT

ON REMOTE

TUNER/TAPE/...


REC/PAUSE 

(USB) 


 

STOP

FUNCTION 


 REC


TRK-001
TRK-002

001-File name
002-File name

AUD-002

AUD-001

MP3/ WMA

the other sources

AUDIO CD

When you are recording, look out for the following

•   You can check the recording percentage rate for the USB record on the 

screen during the recording. (AUDIO, MP3/ WMA CD only)

•   

During recording MP3/ WMA, there is no sound. 

•   When you stop recording during playback, the file that has been recorded at 

that time will be stored. (AUDIO CD Only)

•   Do not remove the USB device during USB recording. If not, an incomplete 

file may be made and not deleted on PC.

•   If USB recording does not work, the message like “NO USB”, “ERROR”, 

“USB FULL” or “NO REC” is displayed on the display window.

•   Multi card reader device or External HDD can not be used for USB


recording.

•  A file is recoreded by 128 Mbyte when you record for a long term.

•  When you stop recording during playback, the file will not be stored.

•  In the state CD-G disc, USB record is not operated.

•  You may not record more than 999 files.

•   The file number is saved automatically.

  It’ll be stored as follows. 

TRK-001
TRK-002

001-File name
002-File name

AUD-002

AUD-001

TRK-001
TRK-002

001-File name
002-File name

AUD-002

AUD-001

Содержание RSM400DV

Страница 1: ...English Espanõl ...

Страница 2: ... performance of batteries CAUTION This product is a class 1 laser product classified under the Safety of laser products IEC 60825 1 2007 To ensure proper use of this product please read this owner s manual carefully and retain it for future reference Shall the unit require maintenance contact an authorized service center Use of controls adjustments or the performance of procedures other than those...

Страница 3: ...de 10 11 Setting the clock 11 Displaying Disc Information 12 Playing a Disc 12 14 Viewing photo files 14 Listening to the radio 15 Listening to the cassette tapes 15 Listening to music from your external device 16 Using an USB device 16 Recording to USB 17 Recording to TAPE 18 Synchronized Recording from CD to TAPE 18 Language Codes 19 Area Codes 19 Troubleshooting 20 Types of Playable Discs 21 Sp...

Страница 4: ...Connection to any other amplifier may result in alfunction or fire Connect the black end of each wire to the terminals marked minus and the other end to the terminals marked plus To connect the cable to the each speakers press each plastic finger pad to open the connection terminals on the back of each speaker Insert the wire and release the finger pad Red White Orange Front Front Subwoofer In fro...

Страница 5: ...t to the corresponding input jacks on your TV using a Video cable AUX IN AUDIO L R jacks connection Connect a VCR or Auxiliary device etc to the INPUT jack of this unit Press the FUNCTION button on the remote control until the AUX indicator is displayed in the display window Antenna connection Connect the FM aerial The reception will be at its best when the two loose ends of the aerial are in a st...

Страница 6: ...NE TUNE CLOCK 10 Cassette Door 1 2 6 Main unit 11 OPEN CLOSE Open or close your CD door 12 DISC SKIP Choose a desired disc 13 MIC VOL Adjust microphone volume 14 MIC 1 2 15 Headphone jack 16 Selects DVD CD function Selects TAPE function SET DVD CD PAUSE SET Confirms the settings TIMER CLOCK DVD CD PAUSE 17 CD SYNC CD to Tape Synchronized DUBB Recording from tape to tape PRESET STOP PRESET TIMER 18...

Страница 7: ...TUNE Tunes in the desired radio station RETURN Moving back wards in the menu REC Recording to USB TAPE STOP Stops playback or recording ST MONO MONO STEREO FM mode state selects MONO or STEREO by pressing this button PLAY Starts playback PAUSE STEP Pausing playback SCAN Search backward or forward SKIP Go to next or previous chapter track Title DISC SKIP Choose a desired disc MUTE Temporarily stop ...

Страница 8: ...5 Enter a new password numerical buttons 0 9 and ENTER 6 Recheck the entered new password numerical buttons 0 9 and ENTER 7 Select a code for a geographic area After select Rating and Password will be and activated page 19 ENTER 8 To confirm what you press Make sure to finish setting the Area Code before leaving the setup menu if you cannot set the rating and Password ENTER When you use this unit ...

Страница 9: ...hat is compatible with a progressive scan signal set Progressive Scan to On Press ENTER to confirm your selection If you not press ENTER within 10 seconds it will be Off Adjust the audio settings DRC Dynamic Range Control Make the sound accurate when the volume is turned down Dolby Digital only Set to On for this effect Vocal Select On to mix karaoke channels into normal stereo This function is ef...

Страница 10: ...e track is fully finished this function shows the score in the screen with a fanfare sound ABOUT DIVX VIDEO DivX is a digital video format created by DivX Inc This is an official DivX Certified device that plays DivX video Visit www divx com for more information and software tools to convert your files into DivX videos ABOUT DIVX VIDEO ON DEMAND This DivX Certified device must be regis tered in or...

Страница 11: ...select delay time between 10 and 180 minutes after the player will turn off To check the remaining time press SLEEP DIMMER ON SLEEP 180 SLEEP 10 DIMMEER OFF DIMMER The LED Light emitting diode of front panel is turned off and the dis play window will be darken by half The system has a number of pre set surround sound fields You can select a desired sound mode by using EQ P EQ The displayed items f...

Страница 12: ...ress twice briefly to step back to the previous chapter track file Pausing a playback ALL Press PAUSE STEP on the remote control to pause playback Press to continue playback Frame by Frame playback DVD DivX VCD Press PAUSE STEP on the remote control repeatedly to play Frame by Frame playback Playing repeatedly or randomly ALL 1 Press REPEAT RDM repeatedly The current track file will be played back...

Страница 13: ... that might be in the unit press and hold PAUSE STEP for more than five seconds to be able to select a system PAL NTSC AUTO Mixed disc or USB Flash Drive DivX MP3 WMA and JPEG When playing a disc or USB Flash Drive contained with DivX MP3 WMA and JPEG files together you can select file type with MENU button on the remote control Changing the character set to display DivX subtitle correctly Option ...

Страница 14: ...automati cally set to these standards There are many different types of recordable disc formats including CD R containing MP3 or WMA files and these require cer tain pre existing conditions see above to ensure compatible playback Customers should note that permission is required in order to download MP3 WMA files and music from the Internet Our company has no right to grant such permission Permiss...

Страница 15: ...tion 5 Start the tape playing 6 To stop a tape playing ON UNIT PUSH OPEN PUSH OPEN TAPE STOP ON REMOTE FUNCTION Listening to the radio More you can do Looking for radio stations automatically Press TUNE for more than 0 5 second The tuner will scan automati cally and stop when it finds a radio station Deleting all the saved stations 1 Press and hold PGM MEM on the remote control ERASE ALL shows 2 P...

Страница 16: ...efore disconnecting the portable USB device change to any other function USB STOP TUNER TAPE FUNCTION ENTER FUNCTION Compatible USB Devices MP3 Player Flash type MP3 player USB Flash Drive Devices that support USB 2 0 or USB 1 1 This USB Function may not be available depending on devices USB device requirement Devices which require additional program installation when you have connected it to a co...

Страница 17: ...e button on USB REC once more 4 To stop recording press ON UNIT ON REMOTE TUNER TAPE REC PAUSE USB STOP FUNCTION REC TRK 001 TRK 002 001 File name 002 File name AUD 002 AUD 001 MP3 WMA the other sources AUDIO CD When you are recording look out for the following You can check the recording percentage rate for the USB record on the screen during the recording AUDIO MP3 WMA CD only During recording M...

Страница 18: ...layed Recording starts 7 To stop recording press PUSH OPEN TUNER USB REC PAUSE REC PAUSE STOP FUNCTION REC REC ON UNIT ON REMOTE Synchronized Recording from CD to Tape 1 Open the tape deck and then insert a blank tape There are 2 tape decks on the unit open the second one 2 Close the door and insert a CD Audio CD only 3 To select CD function press 4 Press the button on a stop status to move to CD ...

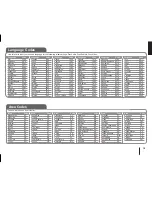
Страница 19: ...an 7289 Assamese 6583 Aymara 6588 Azerbaijani 6590 Bashkir 6665 Basque 6985 Bengali Bangla 6678 Bhutani 6890 Bihari 6672 Breton 6682 Bulgarian 6671 Burmese 7789 Byelorussian 6669 Chinese 9072 Language Code Croatian 7282 Czech 6783 Danish 6865 Dutch 7876 English 6978 Esperanto 6979 Estonian 6984 Faroese 7079 Fiji 7074 Finnish 7073 French 7082 Frisian 7089 Galician 7176 Georgian 7565 German 6869 Gre...

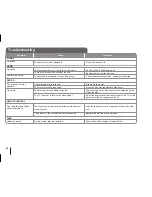
Страница 20: ...upside down The disc is not placed within the guide The TV is not set to receive the video signal Insert a playable disc Place the disc with the playback side down Place the disc on the disc tray correctly inside the guide Clean the disc Select the appropriate video input model on the TV so the picture from the unit appears on the TV Unable to record TAPE Record protect tabs are removed Cover hole...

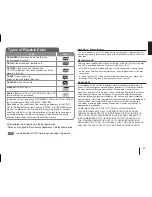
Страница 21: ...ted CONSUMERS SHOULD NOTE THAT NOT ALL HIGH DEFINITION TELEVISION SETS ARE FULLY COMPATIBLE WITH THIS PRODUCT AND MAY CAUSE ARTIFACTS TO BE DISPLAYED IN THE PICTURE IN CASE OF 525 OR 625 PROGRESSIVE SCAN PICTURE PROBLEMS IT IS RECOMMENDED THAT THE USER SWITCH THE CONNECTION TO THE STANDARD DEFINITION OUTPUT IF THERE ARE QUESTIONS REGARDING OUR TV SET COMPATIBILITY WITH THIS MODEL 525p AND 625p UNI...

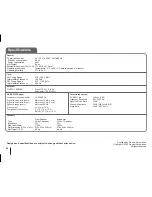
Страница 22: ... Ω DVD CD VCD player Frequency response audio 40 20000 Hz Signal to noise ratio audio More than 75 dB 1 kHz Signal to noise ratio video More than 55 dB 1 kHz Dynamic range audio More than 80 dB Video output 1 0 V p p 75 Ω Component Video output Y 1 0 V p p 75 Ω Pb Pr 0 7 V p p 75 Ω Speakers Front Speaker Subwoofer Type 2 way 2 speaker 1 Way 1 Speaker Impedance 4 Ω 3 Ω Max Input Power 110 W 180 W N...

Страница 23: ...23 ...

Страница 24: ...nte caluroso como el interior de un automóvil o junto a una estufa Ello podría ocasionar la fuga del electrolito que contienen las pilas o que las mismas se sobrecalentaran explotaran o empezaran a arder También podría reducir su duración o disminuir su rendimiento PRECAUCIÓN Éste es un producto láser clase I clasificado conforme a la norma CEI 60825 1 2007 sobre seguridad de los productos láser P...

Страница 25: ...Ajuste del reloj 11 Visualizar la información del disco 12 Lectura de un disco 12 14 Visualizar archivos fotográficos 14 Escuchar la radio 15 Escuchar las cintas 15 Escuchar música desde el reproductor portátil o un dispositivo externo 16 Utilización de un dispositivo USB 16 Grabación a USB 17 Grabación en una CINTA 18 Grabación sincronizada de CD a cinta 18 Códigos de idioma 19 Códigos de área 19...

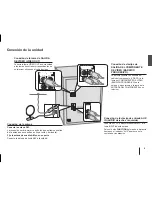
Страница 26: ...uier otro amplificador puede ocasionar mal funcionamiento o un incendio Conecte el extremo negro del cable a los terminales marcados como menos y el otro extreme a los terminales marcados como más Para conectar el cable a los altoparlantes centrales pulse con la yema de los dedos la pestaña de la parte trasera del altoparlante central para abrir las tomas de conexión Inserte el cable y suelte la p...

Страница 27: ...nidad a las tomas de entrada correspondientes en su televisor utilizando el cable de vídeo Conexión de la clavija de entrada AUX IN AUDIO derecha e izquierda Conecte un VCR o dispositivo auxiliar etc a la toma INPUT de esta unidad Pulse el botón FUNCTION del mando a distancia hasta que el indicador AUX aparezca en la ventana de visualización Conexión de la antena Conecte la antena FM La recepción ...

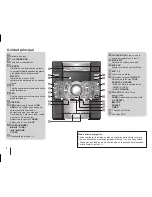
Страница 28: ...n AUX 9 REC PAUSE USB TUNE TUNE CLOCK 10 Compuerta de pletina 1 2 6 Unidad principal 11 OPEN CLOSE Abre o cierra la puerta del compartimento de CD 12 DISC SKIP Seleccione el disco deseado 13 MIC VOL Ajusta el volumen del micrófono 14 MIC 1 2 15 Toma de auriculares 16 Selecciona la función DVD CD Selecciona la función TAPE SET DVD CD PAUSE SET Confirma la configuración TIMER CLOCK DVD CD PAUSE 17 C...

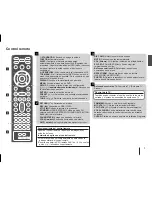
Страница 29: ...a presintonizada de radio TUNE Sintoniza la emisora de radio deseada RETURN Retrocede en el menú REC Grabación en USB CINTA STOP Detiene la lectura o la grabación ST MONO MONO ESTÉREO Estado de modo FM seleccione MONO o ESTÉREO PULANDO ESTE BOTÓN PLAY Inicia la lectura PAUSE STEP Haga una pausa en la lectura SCAN Búsqueda hacia atrás o adelante SKIP Ir al capítulo pista título siguiente o anterior...

Страница 30: ...l 0 9 y a continuación ENTER 6 Vuelva a introducir la nueva contraseña Botones numéricos del 0 9 y a continuación ENTER 7 Seleccione un código para un área geográfica tras la selección los parámetros Rating y y Password clasificación y contraseña estarán ENTER activados Página 19 8 Para confirmar pulse ENTER Asegúrese de finalizar el ajuste del Código de área antes de salir del menú de lo contrari...

Страница 31: ...ñal de barrido progresivo ajuste la opción Escáner Progressivo en On Pulse ENTER para confirmar su selección Si no pulsa ENTER en el transcurso de 10 segundos ésta cambiará a OFF Ajuste la configuración de audio DRC Dynamic Range Control Posibilita un sonido limpio a volúmenes bajos sólo con Dolby Digital Ajústelo en On para lograr este efecto Vocal Seleccione On para mezclar los canales de karaok...

Страница 32: ...concluido por completo esta función muestra el resultado en la pantalla con un sonido de fanfarria ACERCA DEL VÍDEO DIVX DivX es un formato de vídeo digital creado por DivX Inc Este es un dispositivo con certificación oficial DivX Certified que reproduce vídeo DivX Visite www divx com si desea obtener más información y herramientas de software para convertir sus archivos en vídeos DivX ACERCA DEL ...

Страница 33: ...para seleccionar la demora de tiempo entre 10 y 180 minutos tras los que el reproductor se apagará Para comprobar el tiempo restante pulse SLEEP DIMMER ACTIVADO DESCONEXIÓN SLEEP 180 DESCONEXIÓN SLEEP 10 DIMMER DESACTIVADO DIMMER El LED diodo emisor de luz del panel frontal se apaga y la iluminación de la ventana del display se reduce a la mitad El sistema incluye varios campos de sonido preprogra...

Страница 34: ...evemente dos veces para regresar al capítulo pista archivo anterior Pausar una lectura ALL Pulse PAUSE STEP para pausar la lectura Pulse para continuar con la lectura Lectura fotograma a fotograma DVD DivX VCD Pulse repetidamente PAUSE STEP para lograr una lectura fotograma a fotograma Reproducción repetida o aleatoria ALL 1 Pulse repetidamente REPEAT RDM La pista archivo actual se reproducirá rep...

Страница 35: ...rarse en la unidad mantenga pulsado PAUSE STEP durante más de cinco segundos a fin de poder escoger un sistema PAL NTSC AUTO Disco mixto o unidad Flash USB DivX MP3 WMA y JPEG Al reproducir un disco o unidad USB Flash que contenga juntos archivos DivX MP3 WMA y JPEG puede seleccionar el tipo de archive con el botón MENU del control remoto Cambiar los caracteres establecidos para la visualización c...

Страница 36: ...icamente estos estándares Existen muchos tipos diferentes de formatos de discos regrabables incluyendo CD R que contienen archivos MP3 o WMA y estos requieren ciertas condiciones pre existentes menciona das para asegurar una lectura compatible Los clientes deben saber que es necesario tener permiso para realizar descarga de archivos MP3 WMA y música de Internet Nuestra empresa no tiene derecho a c...

Страница 37: ...e la reproducción de la cinta 6 Para detener la reproducción de la cinta PUSH OPEN PUSH OPEN TAPE STOP FUNCTION Escuchar la radio ahora con más opciones Buscar emisoras de radio automáticamente Presionar y mantener pulsado TUNE durante más de 0 5 segundos El sintonizador buscará automáticamente y se detendrá al encontrar una emisora Eliminar todas las emisoras guardadas 1 Mantenga pulsado el botón...

Страница 38: ...tátil cambie a cualquier otra función USB STOP TUNER TAPE FUNCTION ENTER FUNCTION Dispositivos USB compatibles Lector MP3 Lector MP3 tipo Flash Unidad USB Flash dispositivos que admitan USB 2 0 o USB 1 1 Esta función USB puede no estar disponible dependiendo de los dispositivos Requerimientos del dispositivo USB Los dispositivos que requieran la instalación de programas adicionales una vez conecta...

Страница 39: ...na vez más 4 Para detener la grabación pulse TUNER TAPE REC PAUSE USB STOP FUNCTION REC MP3 WMA las demás fuentes AUDIO CD Durante la grabación compruebe lo siguiente Durante la grabación puede comprobar en la pantalla el porcentaje de gra bación de USB Sólo para AUDIO MP3 WMA CD Durante la grabación de MP3 WMA no se emitirá sonido Al detener la grabación durante la reproducción se guardará el arc...

Страница 40: ...a grabación pulse PUSH OPEN TUNER USB REC PAUSE REC PAUSE STOP FUNCTION REC REC Grabación sincronizada de CD a cinta 1 Abra el compartimento de cinta y a continuación inserte una cinta virgen La unidad dispone de 2 compartimen tos de cinta abra el segundo 2 Cierre la compuerta e inserte un CD Sólo para Audio CD 3 Para seleccionar la función de CD pulse 4 Pulse el botón con el equipo parado para ir...

Страница 41: ...s 6570 Albanés 8381 Amárico 6577 Árabe 6582 Armenio 7289 Asamés 6583 Aimara 6588 Azerbaiyano 6590 Bashkir 6665 Vasco 6985 Bengalí 6678 Butaní 6890 Biharí 6672 Bretón 6682 Búlgaro 6671 Birmano 7789 Bielorruso 6669 Chino 9072 Idioma Código Croata 7282 Checo 6783 Danés 6865 Holandés 7876 Inglés 6978 Esperanto 6979 Estonio 6984 Faroés 7079 Fiji 7074 Finlandés 7073 Francés 7082 Frisiano 7089 Gallego 71...

Страница 42: ... está configurada para recibir la salida de señal de video Coloque el disco con la cara reproducible hacia abajo Coloque el disco correctamente en la bandeja dentro de su guía Coloque el disco correctamente en la bandeja dentro del surco guía Limpie el disco Seleccione el modo correcto de entrada de video en la TV para que la imagen de la unidad aparezca en la pantalla de TV No se puede grabar TAP...

Страница 43: ...SUMIDORES DEBEN RECORDAR QUE NO TODOS LOS SISTEMAS DE TELEVISIÓN DE ALTA DEFINICIÓN SON TOTALMENTE COMPATIBLES CON ESTE PRODUCTO Y PODRÍAN OCASIONAR LA VISUALIZACIÓN DE ELEMENTOS EXTRAÑOS EN LA IMAGEN EN CASO DE PROBLEMAS 525 Ó 625 DE IMAGEN EN BARRIDO PROGRESIVO SE RECOMIENDA AL USUARIO CAMBIAR LA CONEXIÓN A LA SALIDA STANDARD DEFINITION DEFINICIÓN ESTANDAR EN CASO DE DUDA EN RELACIÓN A LA COMPAT...

Страница 44: ...Ω Subwoofer 180 W 3 Ω Lector de DVD CD VCD Respuesta de frecuencia audio 40 20 000 Hz Relación señal ruido audio Más de 75 dB 1 kHz Relación señal ruido video Más de 55 dB 1 kHz Gama dinámica audio más de 80 dB Salida de video 1 0 V p p 75 Ω Salida de componente de video Y 1 0 V p p 75 Ω Pb Pr 0 7 V p p 75 Ω Altoparlantes Altavoz frontal Subwoofer Tipo 2 altavoces 2 vías 1 altavoces 1 vías Impedan...

Страница 45: ...23 ...

Страница 46: ...24 ...

Страница 47: ...25 ...

Страница 48: ......

Отзывы: