background image

1

2

Table of Contents

Remote Controller Specifications

........

...............................

2

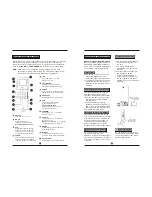
Button Layout and Functions

.................................

.............

3

Handling the Remote Controller

.

...............................

.........

4

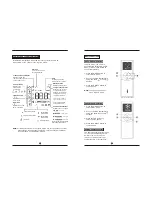
LCD Screen Icons and Indicators

..

.....................................

5

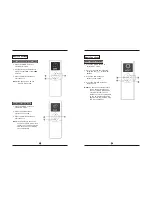
Basic Functions

...........................

..........................................

6

Advanced Functions

................

...............................

............

13

Note:

 T

he layout of the buttons on this remote as depicted here is 

   for the standard model. The actual model purchased may 

   vary slightly from these illustrations.


The signal output sent by this remote controller is processed 

   entirely by the receiving air conditioning system. In the case 

   that any of the functions of the remote are not available for 

   the specific model of the air conditioning unit, those 

   functions will not work.


Your air conditioning unit’s user manual may have additional 

   information regarding the usage of this remote controller.

Notice:

This device complies with all relevant national regulations.

• For Canada, this device is compliant with CAN ICES-3(B)/NMB-3(B).

• For the USA, this device is compliant with section 15 of FCC law.

   Operation is subject to two conditions:

   (1) This device may not cause harmful interference, and

   (2) This device must accept any interference received, including

         interference that may cause undesired operation.

This equipment has been tested and found to comply within the limits for 

a Class B digital device, pursuant to section 15 of FCC law. These limits 

are designed to provide reasonable protection against harmful 

interference in a residential installation. This equipment generates, uses, 

and can radiate radio frequency energy and, if not installed and used in 

accordance with these instructions, may cause harmful interference to 

radio communications. However, there is no guarantee that interference 

will not occur in a particular installation. If this equipment does cause 

harmful interference to radio or television reception, which can be 

determined by turning the equipment off and on again, the user is 

encouraged to try and correct the interference by using one or more of 

the following measures:

• Re-orient or relocate the receiving antenna. 

• Increase the separation distance between the equipment and receiver.

• Connect the equipment to an outlet on a different circuit from that 


which the receiver is currently connected.

• Consult the dealer or an experienced radio/TV technician for help.

Changes or modifications not approved by the party responsible for 

compliance could void the user’s authority to operate the equipment.

Remote Controller Specifications

3.0V dry batteries (R03/LR03x2)(2xAAA)

8m (25 feet)

23°

F - 140

°

F

RG57A6/BGEFU1

Model Number

Rated Voltage

Signal Range

Operational

Temperature

Range

Содержание RG57A6/BGEFU1

Страница 1: ...design and specifications of this product are subject to change without prior notice as development continues Consult with the sales agency or manufacturer for details is a registered trademark of Parker Davis HVAC International Inc Parker Davis HVAC International Inc 3250 NW 107th Ave Doral FL 33172 USA Tel 305 513 4488 Fax 305 513 4499 e mail info pd hvac com Website www pd hvac com Copyright Pa...

Страница 2: ...ted and found to comply within the limits for a Class B digital device pursuant to section 15 of FCC law These limits are designed to provide reasonable protection against harmful interference in a residential installation This equipment generates uses and can radiate radio frequency energy and if not installed and used in accordance with these instructions may cause harmful interference to radio ...

Страница 3: ...ld be used within 8 meters of the unit The unit will beep when signals from the remote are received Curtains direct sunlight etc can interfere with the receiver s infrared signal If the remote controller will not be used for more than 2 months be sure to remove its batteries Do not dispose of batteries as unsorted municipal waste Refer to your local laws for the proper disposal of batteries 3 4 Ha...

Страница 4: ...temp or temp buttons 3 Press the ON OFF button to start the unit Note Fan speed can t be set when in AUTO mode AUTO Mode Operation Setting Temperatures LCD Screen Icons Indicators Basic Functions 5 6 ON OFF The unit is on when this is displayed Transmission Indicator Displays when the remote sends signals to the indoor unit Timer ACTIVE Displays when the timer is set Timer OFF Displays when the ti...

Страница 5: ...uttons 3 Press the ON OFF button to start the unit Note Fan speed can t be set when in DRY mode DRY Dehumidification Mode Basic Functions 1 Press the MODE button to select HEAT mode 2 Set your desired temperature using the temp or temp buttons 3 Press the FAN button to select the fan speed 4 Press the ON OFF button to start the unit Note As the outdoor temperature drops the performance of your uni...

Страница 6: ...ting the TIMER function Basic Functions Ex Setting the unit to turn on after 2 5 hours Ex Setting the unit to turn off after 5 hours TIMER OFF The TIMER OFF feature allows you to set a fixed period of time after which the unit will automatically turn itself off For example it can be scheduled to turn off when the user leaves home for work 1 Press the TIMER button The timer off indicator and the ti...

Страница 7: ...he TIMER ON feature of the system to turn itself on in 6 hours Configure the TIMER OFF feature of the system to turn itself off in 8 hours Setting the TIMER function The example on page 11 shows how to set the system to turn on after 6 hours operate for 2 hours and then turn itself off See the figure below The remote display will be as shown Note If the user wishes to incorporate the scheduling fe...

Страница 8: ...of this moisture has usually evaporated When self clean mode is active the system will clean itself and afterwards will turn itself off automatically This feature can be used as often as needed but is only available in COOL AUTO or DRY mode Turbo Mode Turbo mode forces the unit to reach the set temperature in the quickest time possible In cooling mode this will result in the unit jump starting the...

Отзывы: