background image

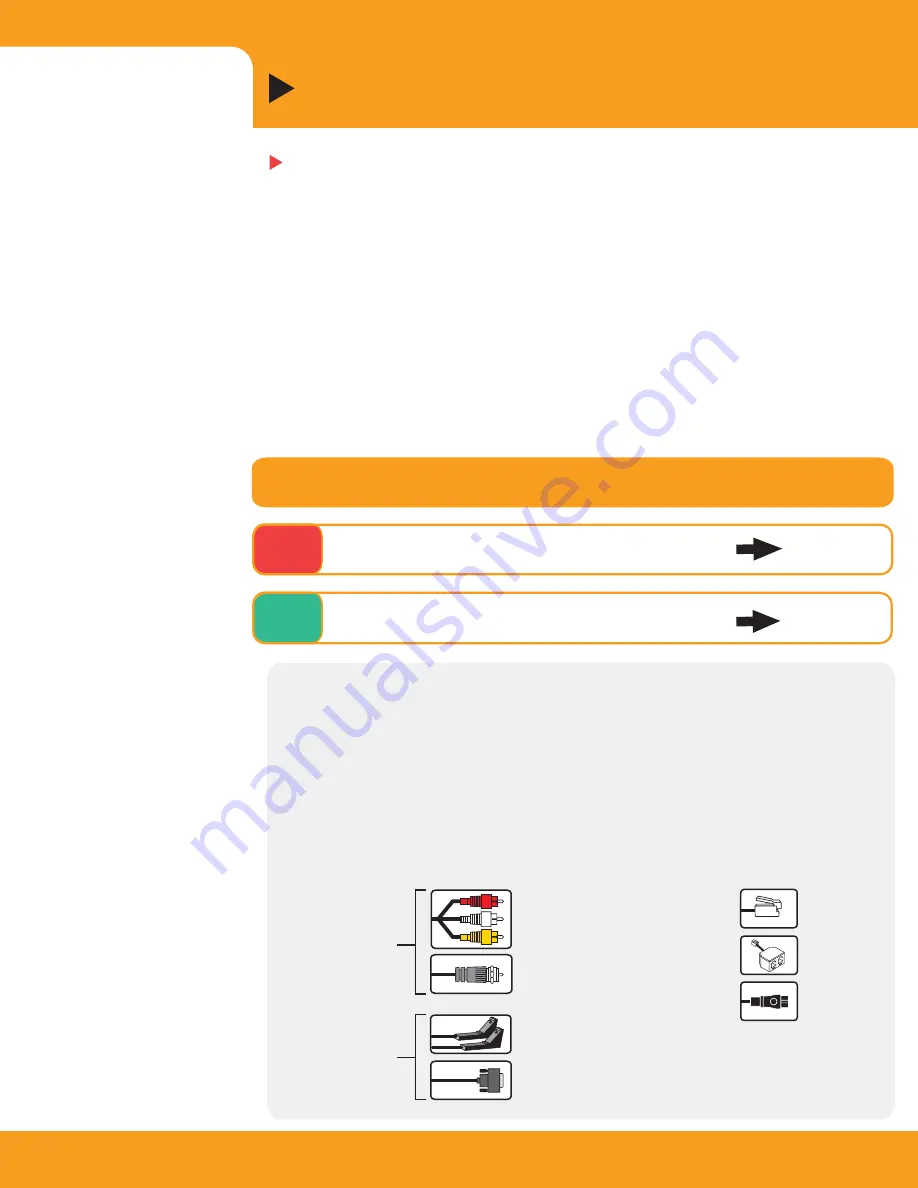
Do you have a satellite or cable box?

STEP 

1

 Connect Your Recorder

2

Let's Get Started!

Connecting your Recorder usually takes less than half an hour. See the 

Installation Guide

 for additional setup information. After connecting, 

completing on-screen Guided Setup should take less than an hour. 

IMPORTANT NOTE: 

You must complete Guided Setup (Step 3, on page 7) before 

you can play and record DVDs.

Upgrade to TiVo Plus

TM

 Service (optional)

Your Recorder comes with TiVo Basic

TM

 service

but that

s just the beginning! To 

get features such as Season Pass

TM 

 recordings, WishList

TM

 searches, TiVo 

Suggestions, and more, upgrade to TiVo Plus. For details, see Chapter 6 in the 

User’s Guide

. To upgrade, visit 

www.tivo.com/upgrade 

or call 1-877-367-8486.


I don't have a satellite or cable box

Option A 

page 3

No

I have a satellite or cable box

Yes

Option B 

page 4

Composite cable with L/R Audio  
(white and red) and Video (yellow)

Audio/Video

Cables

RF Coaxial cable (for RF Bypass only;
see Setup 3 in  the 

Installation Guide

for details.)

IR Control cable

Serial (Data) Control cable (for DIRECTV

®

 satellite receiver or

Motorola/General Instruments  DCT2000 digital cable box)

Phone cord

Phone splitter

Power cord


Control Cables

(allows the

Recorder to

change  channels

on a cable 

or satellite box)

Get to Know Your Cables

The Recorder comes with a Composite A/V cable (shown below). Composite provides 
excellent audio and video, and you can connect the Recorder to a TV or a/v receiver using 
only this cable. All of the setup diagrams show connections using a Composite A/V cable.

The Recorder’s back panel also includes premium connectors for S-Video and Component 
Video cables, and for a Digital Audio cable. If you want the best quality audio and video 
available, and you have equipment that supports these connections, you can purchase these 
additional cables to use instead of the Composite A/V cables shown in the setup diagrams.

Cables included with your Recorder: 

(You may not use all of them.)

Содержание Recorder

Страница 1: ...Start Here 1 Connect Your Recorder 2 Add a VCR optional 3 Complete Guided Setup 4 7 4 7 Register your Recorder at www pioneerelectronics com ...

Страница 2: ...o white and red andVideo yellow Audio Video Cables RFCoaxialcable for RFBypassonly seeSetup 3 in the Installation Guide for details IR Controlcable Serial Data Controlcable for DIRECTV satellite receiver or Motorola GeneralInstruments DCT2000 digitalcable box Phone cord Phone splitter Power cord ControlCables allowsthe Recorder to change channels on a cable or satellite box Get to Know Your Cables...

Страница 3: ...e Recorder to the same phone jack use the provided phone splitter Plug in Recorder power cord Tune TV if necessary to see the Welcome screen Turn on your TV If you do not see the Welcome screen displayed use the Input Source or TV Video button on your TV to select the correct audio video source Press the button until the Welcome screen is displayed OUT IN This setup shows Composite A V cables If y...

Страница 4: ... to the TV Connect phone line to Recorder Note Your satellite or cable box may also require a phone line To connect both the Recorder and the satellite or cable box to the same phone jack use the provided phone splitter in the phone jack on your wall Choose a Control cable for channel changing To record shows or display live TV the Recorder must change the channel on your satellite or cable box To...

Страница 5: ...ters in front of the IR sensor one on top of the box and one on bottom Be sure both emitters stick out about 1 inches directly in front of the IR sensor Then use the adhesive strips provided to keep them in place Now continue with step Plug in all power cords Tune TV if necessary to see the Welcome screen Turn on your TV If you do not see the Welcome screen displayed use the Input Source or TV Vid...

Страница 6: ... Out connector on the VCR to the Antenna In connector on the TV Press the Input Source or TV Video button on your TV until you see channel numbers displayed Then use the buttons on the front of your TV to go to channel 3 or 4 Tune TV if necessary to see the Welcome screen Press the Input Source or TV Video button on your TV until the Welcome screen is displayed Now you re ready to begin Guided Set...

Страница 7: ...ed 25 foot phone cord to complete Guided Setup Afterwards you ll be able to connect your Recorder to a home network and use a shared broadband Internet connection instead of a phone line to make connections to the TiVo service See Chapter 8 Connecting to a Home Network in the User s Guide Having trouble with the Guided Setup phone calls Go back to the Phone Dialing Options screen and try these ste...

Страница 8: ...to go to Now Playing and see all of your recorded programs Watch Live TV Find What s On To see what s on now press LIVE TV GUIDE Press it again to display the TiVo Live Guide You can browse up to three days of program information or up to 14 days with TiVo Plus service choose a program to watch and record shows at the touch of a button TiVo PlusTM Gives You More Upgrade to TiVo Plus service and ge...

Отзывы: