background image

33

6 Finalizing and Erasing

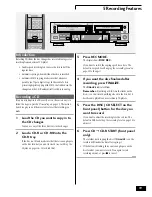
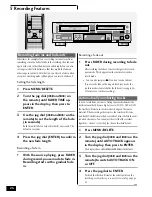
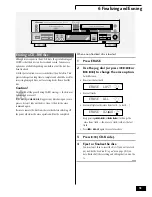
Marking recorded tracks to skip

Although you can’t erase tracks on a CD-R disc, you can set what
are called ‘skip IDs’. These tell a CD player (though many do not
recognize skip IDs) not to play a particular track, but to skip to the
next one on the disc.

You can also set skip IDs on CD-RWs, although it's probably a less
useful feature since you can always erase the last track.

Once a skip ID is set, you can clear it, but be careful: you can set up
to 21 skip IDs per disc, but repeatedly setting and clearing skip IDs
in different recording sessions will reduce this number.

Note:

 Once a disc has been finalized, you can’t set or clear skip

IDs. However, CD-RWs can be un-finalized, so you can always go
back and change those you have set (see p.32 for more on this).

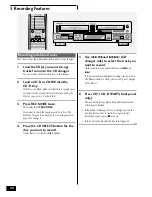
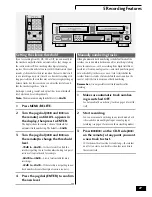
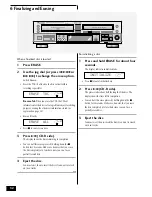
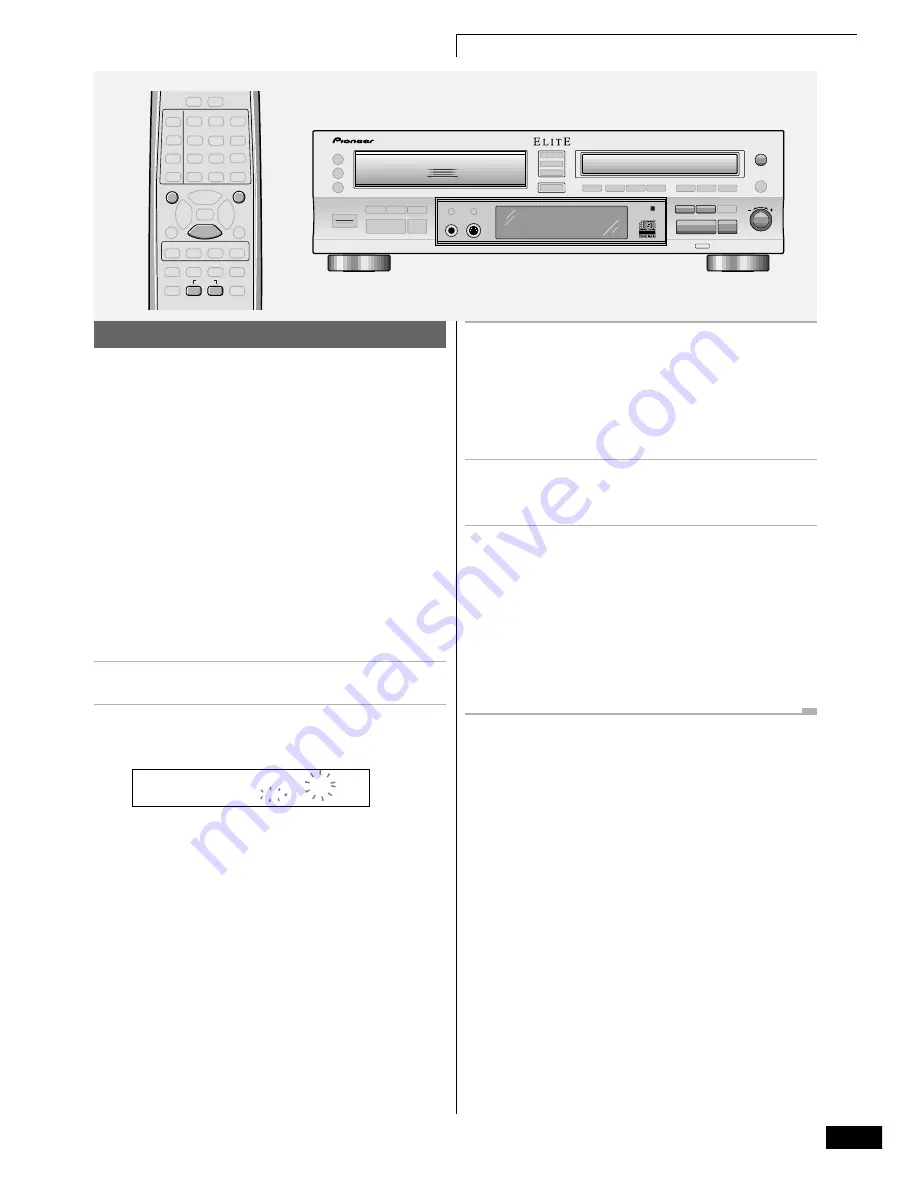
Setting skip IDs:

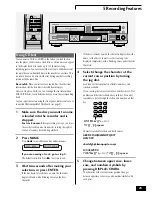
1

Play the track you want to to skip.

2

Press SKIP SET.

The 

SKIP


indicator starts to blink.

SKIP

O2  SKIP  SET?

• If the track you selected in step 1 above already had a skip

ID set, playback jumps to the next track that doesn’t have a
skip ID set.

• Use the 

4

 and 

¢

 buttons (or 

JOG

 dial on the front

panel) if you want to change the track again here.

• If there's no room left on the disc to record another skip ID,

the display will show the message 

SKIP


FULL

.

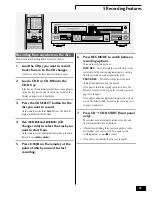
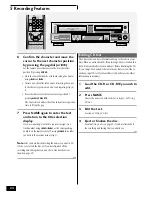
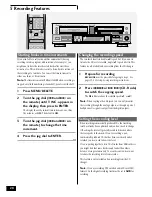
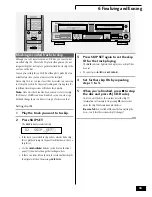
3

Press SKIP SET again to set the skip
ID for the track playing.

The 

SKIP


indicator lights in the display once a skip ID has

been set.

• To cancel, press 

6

 (or 

SKIP


CLEAR

).

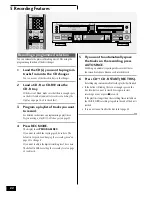
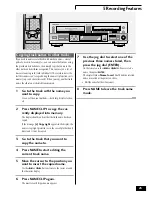
4

Set further skip IDs by repeating
steps 1 to 3.

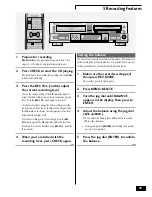
5

When you're finished, press 

7

 to stop

the disc and press 

0

 (CD-R side).

Until you eject the disc, the recorder stores the skip ID
information in its memory. On pressing 

0

, the recorder

writes the skip ID information onto the disc.

Be careful: 

don’t switch off the unit before ejecting the

disc—you’ll lose this sessions skip ID changes!

3

 - COMPACT  DISC  MULTI  CHANGER

COMPACT  DISC  DIGITAL  RECORDER

COMPACT DISC RECORDER / MULTI-CD CHANGER

Hi-bit  Legato  Link  Conversion

CD TEXT

◊ÛB¿ˆ≤≥

CD-R CONTROL

OPEN/CLOSE

4


1

¡


¢

6

7

0

REC VOL

PUSH ENTER

TIME

SET

CLEAR

7

4

¢

SKIP ID

Содержание PDR-W37 Elite

Страница 1: ...COMPACT DISC RECORDER MULTI CD CHANGER PDR W37 Operating Instructions ...

Страница 2: ... the receiver is connected Consult the dealer or an experienced radio TV technician for help Information to User Alteration or modifications carried out without appropriate authorization may invalidate the user s right to operate the equipment CAUTION This product satisfies FCC regulations when shielded cables and connectors are used to connect the unit to other equipment To prevent electromagneti...

Страница 3: ... or other hazards Refer all servicing to qualified service personnel DAMAGE REQUIRING SERVICE Unplug this product from the wall outlet and refer servicing to qualified service personnel under the following conditions When the power supply cord or plug is damaged If liquid has been spilled or objects have fallen into the product If the product has been exposed to rain or water If the product does n...

Страница 4: ... Editing CD text 24 Copying track names to other tracks 25 Recording fade ins and fade outs 26 Automatically numbering tracks 26 Setting the silence threshold 27 Manually numbering tracks 27 Starting tracks in time increments 28 Changing the recording speed 28 Setting the recording level 28 Setting the balance 29 6 Finalizing and Erasing Finalizing a disc 30 Erasing a CD RW disc 31 Marking recorde...

Страница 5: ...l and connect up the recorder to the rest of your system In the second section of the manual starting on page 10 you ll learn how to use the various features of the recorder The final part of the manual provides a list of display messages a troubleshooting section and technical specifications Putting the batteries in the remote 1 Turn over the remote control then press and slide the battery compar...

Страница 6: ...hock Check the power cord once in a while If you find it damaged ask your nearest Pioneer authorized service center or your dealer for a replacement About CD CD R and CD RW Discs This unit is compatible with three different types of compact disc Playback only CDs This unit will playback any ordinary audio CDs carrying the Compact Disc Digital Audio mark shown right CD Recordable discs Recordable C...

Страница 7: ...s can be set and cleared In general current CD players cannot play CD RW discs However this situation may change Playing partially recorded discs Partially recorded discs discs which contain recorded material but have not yet been finalized can be played in the 3 CD changer of this unit with the following limitations It will take longer than usual to read the disc when you load it and start playba...

Страница 8: ...of stereo audio cords supplied connect this unit to your amplifier receiver s analog line inputs outputs Be sure to fully insert each plug for the best connection The plugs and jacks are color coded to make connection easier Connecting the control cord Use a mono miniplug cord not supplied to connect the CONTROL OUT of your Pioneer amplifier or receiver to the CONTROL IN of this unit If you plan t...

Страница 9: ... on the front panel at right DIN connector y e K n o i t c n u F y e K n o i t c n u F 1 F T X E T k c o L l l o r c S 7 2 F P I L C E M A N e s u a P 6 3 F L L O R C S e m o H t s r i f o t r o s r u c e v o M n o i t i s o p r e t c a r a h c e c a p S e c a p S e t e l e D r e t c a r a h c a e t e l e D r e t n E R E T N E d n E t s a l o t r o s r u c e v o M n o i t i s o p r e t c a r a h c...

Страница 10: ...aying press again to restart playback p 14 7 Press to stop playback p 14 1 1 PLAY MODE Set the play mode to play one disc all discs in the changer or all discs in both the changer and CD R p 15 12 PHONES Plug in a pair of headphones 13 KEYBOARD INPUT Connect a key board to input CD text p 9 14 INPUT Use to select the externel input to use optical coaxial or analog line in p 38 41 15 CD R Controls ...

Страница 11: ...SC 1 2 3 Press to select and play disc 1 2 or 3 from the changer p 14 CD R Switch to the CD recorder and play the currently loaded CD CD R CD RW p 14 10 Playback skip buttons PROGRAM Program the playback track order p 35 36 CHECK Check the tracks of a programmed playlist p 35 and monitor the CD changer p 28 CLEAR Clear the last programmed track in program play mode p 35 RANDOM Start random track d...

Страница 12: ...y mode SKIP ON Lights to indicate that a track s skip ID is set SKIP blinks when clearing or setting a skip ID ON does not appear VOL Lights when the volume level is set to something other than 0dB FIX Lights when fixed recording level is on DIG ANA Indicates whether internal recording is via a digital or analog link 5 REC THIS Hi COPY Lights during CD recording and indicates high speed copying 6 ...

Страница 13: ...der automatically copies at double speed so if you re listening to the recording as it s being made it will sound a little strange After the CD in the changer has finished playing the recorder will finalize the CD R to make it playable on most ordinary CD players for more information on this process turn to page 7 This process takes just a few minutes after the CD has been copied Remove the disc f...

Страница 14: ...el To resume playback press again 6 To fast reverse or fast forward press and hold 1 or 41 or on the front panel Release to resume normal playback If you reach the end of the disc while pressing the display shows DISC END and the recorder goes into play pause mode you can still reverse search 7 To skip back or forward to another track press 4 or 41 or on the front panel Pressing once skips to the ...

Страница 15: ... button is lit TIME DISC 1 DISC 2 DISC 3 MENU DELETE PLAY MODE 3 COMPACT DISC MULTI CHANGER COMPACT DISC DIGITAL RECORDER COMPACT DISC RECORDER MULTI CD CHANGER CD SELECT OPEN CLOSE 1 3 2 1 3 2 PLAY MODE 0 0 0 6 Hi bitLegatoLinkConversion CD TEXT ÛB ˆ MENU DELETE Starting playback with a timer You can use this unit with a standard audio timer to start playback at a set time Simply load a disc or d...

Страница 16: ...disc Number of tracks total disc time CD 1 TRK MIN SEC CD1 O3 39 13 Disc name CD 1 NEW MUSIC DISC CD TEXT Artist name CD 1 JAZZ Pfeuti ARTST CD TEXT Number of tracks total disc time CD 2 Disc name CD 2 Artist name CD 2 TIME DISPLAY CHARA 4 SCROLL 3 COMPACT DISC MULTI CHANGER COMPACT DISC DIGITAL RECORDER COMPACT DISC RECORDER MULTI CD CHANGER DISPLAY 41 Hi bitLegatoLinkConversion CD TEXT ÛB ˆ By c...

Страница 17: ... and time displays Note If the CD contains no text information only the time displays are shown During playback or play pause press DISPLAY to switch the display mode There are five different displays Press DISPLAY repeatedly to switch between them Track name It s a Bust TRACK CD TEXT Track number time elapsed TRK MIN SEC CD R O1 O1 1O Track number time remaining CD R O1 O2 54 REMAIN TRK MIN SEC D...

Страница 18: ...isplay mode There are five different displays Press DISPLAY same for both CD changer and CD R sides repeatedly to switch between them Track number elapsed track recording time 1 O1 O1 O1 1O DISC TRK TRK MIN SEC Track number remaining track recording time Disc time remaining CD R AL 44 52 REMAIN TRK MIN SEC Recording time left on CD R CD RW disc CD R AL 73 19 REMAIN MIN SEC Total elapsed recording ...

Страница 19: ... 3 Press REC MODE The display shows DISC REC If you want to switch the copying speed do so here The default is 2x speed See Changing the recording speed on page 28 to change it 4 If you want the disc finalized after recording press FINALIZE The FINALIZE indicator blinks Remember Finalizing a CD R fixes the tracks on the disc you can t record anything else on to the disc but it does become playable...

Страница 20: ...ord On the remote use the three DISC buttons 3 COMPACT DISC MULTI CHANGER COMPACT DISC DIGITAL RECORDER COMPACT DISC RECORDER MULTI CD CHANGER Hi bitLegatoLinkConversion CD TEXT ÛB ˆ CD SELECT START REC THIS CD CD R REC MODE OPEN CLOSE 1 3 2 1 3 2 OPEN CLOSE 7 0 0 0 41 7 0 TIME DISC 1 DISC 2 DISC 3 7 4 5 Use 41 and CD changer side to select the track you want to record On the remote use the number...

Страница 21: ...his will record the rest of the disc or the rest of a playlist when using programmed play starting from the point where you have paused the track TRACK REC This will record the rest of the track starting from the point where you paused If you want to switch the copying speed do so here The default is 2x speed See Changing the recording speed on page 28 to change it If you want to adjust the digita...

Страница 22: ...recording level do so here The default is 0dB See Setting the recording level on page 28 to adjust it TIME DISC 1 DISC 2 DISC 3 MARK 7 4 ABC DEF GHI MNO JKL PQRS TUV WXYZ REC THIS PROGRAM 1 2 3 4 5 6 7 8 9 10 0 10 3 COMPACT DISC MULTI CHANGER COMPACT DISC DIGITAL RECORDER COMPACT DISC RECORDER MULTI CD CHANGER Hi bitLegatoLinkConversion CD TEXT ÛB ˆ START REC THIS CD CD R REC MODE AUTO SPACE OPEN ...

Страница 23: ...s 7 at any time to exit 3 Wait two seconds after making your selection or press ENTER If the disc doesn t already have a name the character display is blank with a blinking cursor on the first character If the disc is already named the character display shows the name or the first 12 characters if it is too long to be displayed completely with a blinking cursor under the first character 4 Select c...

Страница 24: ...t the disc or if you have finished all the recording and editing that you want do to finalize the disc as shown on page 30 Editing CD text The CD recorder can store information for up to three discs at one time When an unfinalized CD R containing CD text is loaded this text will automatically return to memory Before finalizing the CD R you can go back and edit the text as many times as you like or...

Страница 25: ...at the track name has been copied If the message c Copyright appears in the display the name is copyright protected as in the case of playback only discs and it can t be copied 3 Go to the track that you want to copy the name to 4 Press NAME to start editing the current track name 5 Move the cursor to the position you want to insert the copied name Use the 1 and buttons to move the cursor around t...

Страница 26: ... or synchro record mode You can also just press 7 if you don t need a fade out If you record a fade out during all track sync mode the synchro mode is canceled after the fade out see pages 38 41 for more on synchro recording Automatically numbering tracks You can record from any source letting the recorder number the tracks automatically From a digital source CD MD DAT or DCC the recorder will sta...

Страница 27: ...or most recordings 42dB to 24dB If the recorder is not putting in new track numbers because the original source is too noisy 4 Press the jog dial ENTER to confirm the new level Manually numbering tracks Although automatic track numbering is the default mode of the recorder you can number tracks manually as recording is taking place In some cases such as recording from digital satellite or Laserdis...

Страница 28: ...p 2 See pages 19 22 for step by step recording instructions 2 Press 41 or CD R side to switch the copying speed The Hi indicator shows the selected speed x1 or x2 Note When copying at double speed you can only monitor the recording through the analog outputs or through a pair of headphones No signal is output from the digital outputs Setting the recording level When recording commercially produced...

Страница 29: ...s 2 Press CHECK to start the CD playing The track disc to be recorded starts playing and the SCAN indicator starts blinking 3 Press the REC VOL knob to adjust the current recording level You see the current setting If the FIX indicator lights it means the fixed setting is on and you cannot change the level Press the REC VOL knob again to turn it off Use the level meter to gauge the best recording ...

Страница 30: ...lize Check that the disc is free from dust dirt and scratches if necessary clean the disc following the guidelines on page 43 2 Press FINALIZE The recorder goes into record pause mode then the display changes to REC MIN SEC TOC O1 56 Press 7 CD R side here to cancel finalization 3 Press 6 CD R side to start final ization Finalization takes about 2 minutes you ll see how long there is still to go i...

Страница 31: ...sc from the recorder before switching off the power otherwise the erase operation will not be completed When a non finalized disc is loaded 1 Press ERASE 2 Use the jog dial or press 41 or to change the erase option Switch between Erase just the last track ERASE LAST CD RW Erase all tracks ERASE ALL CD RW Erase multiple tracks erase from track to track ERASE O2 1O CD RW Keep pressing 41 or to chang...

Страница 32: ...e The display shows the time remaining to completion You can halt this erase process by holding down the 7 button for 10 seconds Make sure however that you erase the disc completely at a later date since you can t use a partially erased disc 4 Eject the disc You must eject then re insert the disc if you want to record any new tracks Re initializing a disc 1 Press and hold ERASE for about four seco...

Страница 33: ... SET If the track you selected in step 1 above already had a skip ID set playback jumps to the next track that doesn t have a skip ID set Use the 4 and buttons or JOG dial on the front panel if you want to change the track again here If there s no room left on the disc to record another skip ID the display will show the message SKIP FULL 3 Press SKIP SET again to set the skip ID for the track play...

Страница 34: ...ORDER MULTI CD CHANGER Hi bitLegatoLinkConversion CD TEXT ÛB ˆ CD R CONTROL OPEN CLOSE 6 7 0 REC VOL PUSH ENTER 4 Clear further skip IDs by repeating steps 1 to 3 5 When you re finished press 7 to stop the disc and press 0 CD R side Until you eject the disc the recorder stores the skip ID information in its memory On pressing 0 the recorder writes the skip ID information onto the disc Be careful d...

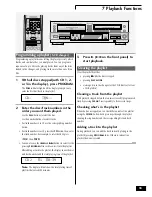
Страница 35: ... playing time of the playlist TRK MIN SEC CD2 O1 O8 39 Note The display will not show the total playing time of playlists that exceed 100 minutes 3 Press 3 6 on the front panel to start playback Clearing the playlist Clear the playlist by either pressing 7 while the disc is stopped pressing PLAY MODE ejecting a disc in the changer or the CD R disc tray to clear a CD R playlist Clearing a track fro...

Страница 36: ...start playback Note Clearing checking and adding tracks to the playlist is the same as for the 3 CD disc changer TIME CD R MARK 7 3 4 ABC DEF GHI MNO JKL PQRS TUV WXYZ REPEAT PROGRAM 1 2 3 4 5 6 7 8 9 10 0 10 Using the repeat modes Use the repeat function to repeat either the current track an entire disc or all discs loaded over and over You can set the repeat mode in normal random or program play...

Страница 37: ...DER to resume playback of a paused disc The FADER indicator in the display blinks and the volume starts to fade in Using the random mode To have the recorder play tracks in a different order each time you play a disc use the random play mode Each track will play just once but the order will be random When all the tracks have been played the disc stops Press RANDOM to start random playback The RDM ...

Страница 38: ...nnected to the analog or digital inputs This is especially useful for cueing up for the next recording and also for checking that tracks are starting in the proper places during automatic track numbering 1 Stop playback of any discs playing in this unit 2 Start playing the source 3 Press INPUT to select the input to be monitored Pressing INPUT repeatedly switches the active input ANALOG OPTICAL 1 ...

Страница 39: ...5 Make sure that the source is not playing then press SYNCHRO Digital synchro recording will not work if the source is already playing Pressing SYNCHRO repeatedly switches the synchro mode 1 track synchro recorder stops recording when it encounters a new track number start ID on the source or 2 seconds of silence all track synchro recorder stops recording when it detects more than 5 seconds of sil...

Страница 40: ...playing Pressing SYNCHRO repeatedly switches the synchro mode 1 track synchro recorder stops recording when it encounters more than 2 seconds of silence all track synchro recorder starts a new track when it encounters another signal after more than 2 seconds of silence Recording stops when the recorder detects more than 5 seconds of continuous silence all track with finalize as all track synchro b...

Страница 41: ...patible Set the source playing if it isn t already and check the display If you see the message Can t REC the digital signal is either a format that the recorder doesn t recognize or the source is copy protected Record through the analog line inputs if you see either message 6 Adjust the recording level if necessary To adjust the recording level see step 4 of Digital synchro recording on page 39 T...

Страница 42: ...s recorded The recorder then goes into record pause If you start recording again a new track is started If you press and hold you can record a blank for as long as you hold down the button Pressing without holding in record pause mode records four seconds of silence from the current position Use this to create spaces between tracks when recording in 1 track synchro mode for example It is not possi...

Страница 43: ...s Wipe lightly from the center of the disc using straight strokes Don t wipe the disc surface using circular strokes Discs to avoid CDs spin at high speed inside the recorder during playback and recording If you can see that a disc is cracked chipped warped or otherwise damaged don t risk using it in your CD recorder you could end up damaging the unit Recording CDs This recorder is designed to let...

Страница 44: ...s can cause problems for the CD recorder The start of the track may not be recorded The track number will be recorded on the disc after the start of the track The beginning of the next track on the DAT is unintentionally recorded To avoid these problems we recommend recording start IDs on the DAT manually if possible Refer to the instructions for your DAT recorder for more information You might al...

Страница 45: ... M C C D r o D V D T A D D M D C g n i r o t i n o m s i t i e c r u o s e h t s y a l p s i d r e d r o c e r e h T p u t e s d r o c e r g n i r u d C C D 8 3 p C E R A M P y r o m e M m a r g o r P A M P s c s i d e h t o t a t a d C O T g n i t i r w s i r e d r o c e r e h T g n i w o h s s i y a l p s i d s i h t e l i h w r e w o p e h t f f o n r u t r e v e N a e r A 4 4 p T E S P I K S e...

Страница 46: ... f I n i a g a n i t i r e t n e c e c i v r e s d e z i r o h t u a r e e n o i P a t c a t n o c K C E H C g n i k n i l b y a l p s i d e s i o n o t e u d s p a h r e p d e r r u c c o r o r r e m e t s y s A y t i c i r t c e l e c i t a t s r o f I n i a g a n i t i g u l p d n a d r o c r e w o p e h t g u l p n U e s a e l p n i a g a d e y a l p s i d s i e g a s s e m e m a s e h t r e t...

Страница 47: ... d o m g n i d r o c e r l a t i g i d l a u n a m 2 4 p K C E H C T U P N I g n i y a l p y d a e r l a s a w r e y a l p e c r u o s e h T e h t n e h w O R H C N Y S s a w n o t t u b d e s s e r p e m i t t r o h s a r e t f A r e y a l p e c r u o s e h t p o t S 1 C N Y S r o L L A C N Y S d e y a l p s i d s i d r o c e r o r h c n y s o t n i s e o g r e d r o c e r e h t d n a e d o m e s...

Страница 48: ...he amplifier and any other components are correct and that all interconnects are firmly connected There may be interference from a nearby TV Switch the TV off during recording or move the unit further away Check that the recording level is not set too high pages 28 39 41 Some analog sources output a very high level signal that may distort the recording In this case turn down the recording level pa...

Страница 49: ...Recording total harmonic distortion 0 004 EIAJ Output voltage 2 0 V Wow flutter Less than measurement limit 0 001 W PEAK EIAJ Number of channels 2 channels stereo Coaxial output 0 5 Vpp 20 75 Ω Optical output 15 to 21 dBm wavelength 660 nm Frequency deflection Level 2 standard mode Recording specification values are for the LINE input analog 3 Input jacks Optical digital input jacks Coaxial digita...

Страница 50: ...el Set the dial and leave it there Taking a minute to do this now will help to prevent hearing damage or loss in the future After all we want you listening for a lifetime WeWantYouListeningForALifetime Used wisely your new sound equipment will provide a lifetime of fun and enjoyment Since hearing damage from loud noise is often undetectable until it is too late this manufacturer and the Electronic...

Страница 51: ......
Страница 52: ...each California 90801 1540 U S A PIONEER ELECTRONICS OF CANADA INC 300 Allstate Parkway Markham Ontario L3R OP2 Canada PIONEER EUROPE NV Haven 1087 Keetberglaan 1 B 9120 Melsele Belgium TEL 03 570 05 11 PIONEER ELECTRONICS AUSTRALIA PTY LTD 178 184 Boundary Road Braeside Victoria 3195 Australia TEL 03 9586 6300 PIONEER ELECTRONICS DE MEXICO S A DE C V San Lorenzo 1009 3er Piso Desp 302 Col Del Val...

Отзывы: