background image

1

En

English

Contents

Safety Precautions ................................... i

Features ................................................... 2

Before Proceeding ................................... 3

Checking supplied accessories .......................... 3

Part Names and Functions ..................... 4

Main unit .............................................................. 4
Remote control unit ............................................ 5
Connection panel
(PDP-50MXE20/PDP-50MXE20-S) ...................... 7
Connection panel (PDP-60MXE20) .................... 8

Installation and Connections ................. 9

Installation of the unit ......................................... 9
Power cord connection ..................................... 11
How to route cables .......................................... 12

Setting the Onscreen Display
Language (Computer Signal) ............... 13

Setting the Onscreen Display
Language (Video Signal) ...................... 14

Additional Information ......................... 15

Cleaning ............................................................. 15
Troubleshooting ................................................ 16
Precautions regarding use ............................... 18
STANDBY/ON indicator .................................... 18
Specifications .................................................... 19

CD-ROM (PIONEER PLASMA-UM)

The Operating Instructions are found in the form of a PDF (Portable Document Format) file inside the accessory CD-
ROM. To view the file, the use of Adobe Reader is required.

For Windows Users:

1

Place the accessory CD-ROM into your computer’s CD-ROM drive.

2

The menu screen should appear automatically.

* If the menu screen does not appear automatically, it can be displayed in the following way:

1

Double-click on the [

My Computer

] icon on your computer’s desktop.

2

Display the contents of the CD-ROM by double-clicking on the CD-ROM drive where the CD-ROM is loaded.

3

Double-click on the file 

start_menu.pdf

.

4

When the menu appears, continue with step 3 below.

3

When the menu appears, click on the icon corresponding to your Plasma Display’s model number.

4

The Operating Instruction PDF file will open.

For Macintosh Users:

1

Place the accessory CD-ROM into your computer’s CD-ROM drive.

2

Double-click on the [PIONEER PLASMA-UM] icon on the computer desktop.

3

From the displayed files, double-click on start_menu.pdf.

4

When the menu appears, click on the icon corresponding to your Plasma Display’s model number.

5

The Operating Instruction PDF file will open.

To Obtain Adobe Reader:

The use of Adobe Reader is required to view the Operating Instruction manual included on the CD-ROM disc,. To obtain
Adobe Reader free of charge, confirm that you are connected to the Internet, then:

1

Click on the [Get Acrobat] icon on the menu screen.

2

Download Adobe Reader from the Adobe download site, and follow the onscreen instructions for installing it
on your computer.

Downloaded From TV-Manual.com Manuals

Содержание PDP-50MXE20

Страница 1: ...rrage Startleitfaden Guida iniziale Startgids Guía resumida Plasma Display Écran à plasma Plasma Display Display a Plasma Plasmascherm Pantalla de plasma PDP 50MXE20 PDP 50MXE20 S PDP 60MXE20 Downloaded From TV Manual com Manuals ...

Страница 2: ...n hierzu erfahren Sie von Ihrem Fachhändler Italiano Questo apparecchio è stato costruito per essere usato come monitor che accompagna un computer Per poter visualizzare su questo schermo segnali video di altro tipo è necessario far uso della scheda video opzionale Per dettagli in proposito rivolgersi al rivenditore Nederlands Dit toestel is ontworpen voor gebruik als een computermonitor U hebt de...

Страница 3: ...tallation be sure to deliver this manual to the customer and explain to the customer how to handle the product If you want to dispose this product do not mix it with general household waste There is a separate collection system for used electronic products in accordance with legislation that requires proper treatment recovery and recycling Private households in the 25 member states of the EU in Sw...

Страница 4: ...e Directive 73 23 EEC amended by 93 68 EEC EMC Directives 89 336 EEC amended by 92 31 EEC and 93 68 EEC D3 4 2 1 9a_En WARNING This equipment is not waterproof To prevent a fire or shock hazard do not place any container filed with liquid near this equipment such as a vase or flower pot or expose it to dripping splashing rain or moisture D3 4 2 1 3_A_En WARNING To prevent a fire hazard do not plac...

Страница 5: ...ing way 1 Double click on the My Computer icon on your computer s desktop 2 Display the contents of the CD ROM by double clicking on the CD ROM drive where the CD ROM is loaded 3 Double click on the file start_menu pdf 4 When the menu appears continue with step 3 below 3 When the menu appears click on the icon corresponding to your Plasma Display s model number 4 The Operating Instruction PDF file...

Страница 6: ... INPUT2 1 Aspect ratio and screen size appearance will differ depending on input signal Free Installation Configuration Broader installation possibilities with thinner lighter high endurance design PDP 50MXE20 PDP 50MXE20 S While producing a large 50 screen image the display is only 99 mm thick and weighs in at only 35 5 kg PDP 60MXE20 While producing a large 60 screen image the display is only 12...

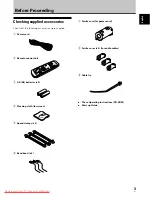
Страница 7: ...ere supplied 1 Power cord 2 Remote control unit 3 AA R6 batteries x 2 4 Cleaning cloth for screen 5 Speed clamps x 3 6 Bead band x 3 7 Ferrite core for power cord 8 Ferrite cores x 3 for audio cables 9 Cable tie These Operating Instructions CD ROM Start up Guide Downloaded From TV Manual com Manuals ...
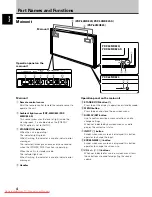
Страница 8: ...tor lights red When flashing the indicator is used to indicate error messages 4 Handles Operation panel on the main unit 5 STANDBY ON button Press to put the display in operation or standby mode 6 MENU button Press to open and close the on screen menu 7 DISPLAY SET button Use to confirm onscreen menu selections and to change settings When not indicated by onscreen menus used to display the current...

Страница 9: ...SUB INPUT button During multi screen display use this button to change inputs to subscreens 7 SPLIT button Press to switch to multi screen display 8 MUTING button Press to mute the volume 9 ID NO SET button Button used by professional installers 0 AUTO SET UP button When using computer signal input automatically sets the POSITION CLOCK and PHASE to optimum values STANDBY ON button Press to put the...

Страница 10: ...emote control unit is operable up to 7 m from the unit and within a 30 angle on each side of the sensor 7 m Remote Sensor Inserting the batteries in the remote control unit Designated batteries Please use size AA R6 or AA LR6 CAUTION Do not use batteries other than those designated and do not mix old and new batteries together since rupture or leakage may result leading to danger of fire personal ...

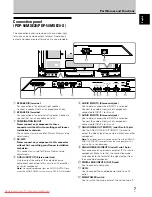
Страница 11: ...DP 50MXE20 PDP 50MXE20 S The connection panel is provided with two video input terminals and one video output terminal Audio input output and speaker output terminals are also provided 6 AUDIO INPUT1 Stereo mini jack Use to obtain sound when INPUT1 is selected Connect the audio output jack of components connected to INPUT1 to this unit 7 AUDIO INPUT2 Stereo mini jack Use to obtain sound when INPUT...

Страница 12: ...or ON standby 6 AUDIO INPUT1 Stereo mini jack Use to obtain sound when INPUT1 is selected Connect the audio output jack of components connected to INPUT1 to this unit Connection panel PDP 60MXE20 The connection panel is provided with two video input terminals and one video output terminal Audio input output and speaker output terminals are also provided 7 AUDIO INPUT2 Stereo mini jack Use to obtai...

Страница 13: ...s or damage Wall mount installation of the unit This unit has been designed with bolt holes for wall mount installation etc The installation holes provided are shown in the accompanying illustration Be sure to attach in 4 or more locations above and below left and right of the center line Use bolts that are long enough to be inserted 12 mm to 18 mm into the main unit from the attaching surface for...

Страница 14: ...iagram Installation and Connections b hole Center line b hole b hole b hole Rear view diagram PDP 50MXE20 PDP 50MXE20 S a hole a hole Air vents fan b hole Center line b hole b hole b hole Center line Rear view diagram PDP 60MXE20 a hole a hole Air vents fan a hole a hole a hole a hole Only for speaker unit Downloaded From TV Manual com Manuals ...

Страница 15: ...voltage other than that indicated AC 100 V to 240 V 50 Hz 60 Hz as this may cause fire or electric shock Attaching the ferrite cores Attach the accessory ferrite core to the end of the power cord as shown in the accompanying illustration Use the provided cable tie to prevent the ferrite core from slipping on the cable If you do not do this this monitor will not conform to mandatory CE or C Tick st...

Страница 16: ... 50MXE20 S PDP 60MXE20 As viewed from the rear of the display 1 2 1 Organize cables together using the provided speed clamps Insert 1 into an appropriate hole on the rear of the unit then snap 2 into the back of 1 to fix the clamp Speed clamps are designed to be difficult to undo once in place Please attach carefully 2 Bunch separated cables together and secure them with the provided bead bands Do...

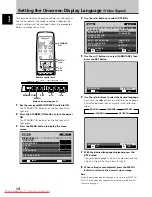
Страница 17: ...DE AUTO FUNCTION PIP DETECT PICTURE STANDARD INACTIVE OFF ACTIVE ENGLISH OFF 5 Use the 5 buttons to select LANGUAGE then press the SET button LANGUAGE ENGLISH SET SET EXIT MENU 6 Use the 2 3 buttons to select the desired language Each time the 2 3 buttons are pressed the language alternates between those available in the following order LANGUAGE ENGLISH SET SET EXIT MENU 7 With the desired languag...

Страница 18: ...DE AUTO FUNCTION PIP DETECT PICTURE STANDARD INACTIVE OFF ACTIVE ENGLISH OFF 5 Use the 5 buttons to select LANGUAGE then press the SET button LANGUAGE ENGLISH SET SET EXIT MENU 6 Use the 2 3 buttons to select the desired language Each time the 2 3 buttons are pressed the language alternates between those available in the following order LANGUAGE ENGLISH SET SET EXIT MENU 7 With the desired languag...

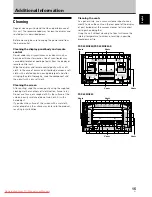
Страница 19: ...he component and then dry it with a dry soft cloth Cleaning the screen After dusting wipe the screen gently using the supplied cleaning cloth or another soft cloth cotton flannel etc Do not use tissue or a rough cloth As the surface of the screen is easily scratched do not rub it or hit it with a hard object If you clean the surface of the screen with a wet cloth water droplets on the surface may ...

Страница 20: ...ower wait for 1 to 2 minutes then try turning power on again If problem persists remove power plug from its outlet and consult a Pioneer service center or your dealer Troubleshooting What may at first seem to be an malfunction may be remedied with a quick check Please check to see if a warning is displayed on the screen If displayed refer to the table below and check the mode If there is no displa...

Страница 21: ...l sliding parts of the Plasma Display panel Not a malfunction Fan speed changes automatically in accordance with ambient conditions Not a malfunction The ON indicator may not light in some cases depending on the settings performed by the installer Consult with your installation technician Problem Possible Solution No power Unit cannot be operated Remote control does not operate Picture is cut off ...

Страница 22: ...ared light In principle the Plasma Display radiates infrared light Depending on the environment in which the monitor is installed and used infrared remote control units for other nearby appliances may fail to operate properly or noise may be heard in wireless headphones In such cases move the affected appliance to a location where its infrared sensor is not affected Electromagnetic interferrence T...

Страница 23: ... VD TTL level positive and negative polarity 2 2 kΩ G ON SYNC 1 Vp p 75 Ω negative sync Compatible with Microsoft Plug Play VESA DDC 1 2B Output Mini D sub 15 pin socket connector 75 Ω with buffer INPUT2 Input DVI D 24 pin connector Digital RGB signal DVI compliant TMDS signal Compatible with Microsoft Plug Play VESA DDC 2B Audio Input AUDIO INPUT for INPUT1 Stereo mini jack L R 500 mVrms more tha...

Страница 24: ...20 En English Downloaded From TV Manual com Manuals ...
Страница 25: ... l installation assurez vous de remettre ce mode d emploi à l utilisateur et de lui expliquer comme utiliser ce produit Si vous souhaitez vous débarrasser de cet appareil ne le mettez pas à la poubelle avec vos ordures ménagères Il existe un système de collecte séparé pour les appareils électroniques usagés qui doivent être récupérés traités et recyclés conformément à la législation Les habitants ...

Страница 26: ... ne l exposez pas à des gouttes d eau des éclaboussures de la pluie ou de l humidité D3 4 2 1 3_A_Fr Milieu de fonctionnement Température et humidité du milieu de fonctionnement De 0 ºC à 40 ºC de 32 ºF à 104 ºF Humidité relative inférieure à 85 orifices de ventilation non obstrués N installez pas l appareil dans un endroit mal ventilé ou un lieu soumis à une forte humidité ou en plein soleil ou à...

Страница 27: ... suivante 1 Double cliquez sur l icône Poste de travail sur le bureau de votre ordinateur 2 Affichez le contenu du CD ROM en double cliquant sur le lecteur de CD ROM où est chargé le CD ROM 3 Double cliquez sur le fichier start_menu pdf 4 Lorsque le menu apparaît continuez à l étape 3 ci après 3 Quand le menu apparaît cliquez sur l icône correspondant au numéro de modèle de votre Écran à plasma 4 ...

Страница 28: ...INT PAR POINT 4 3 et PLEIN ÉCRAN 1 Les signaux pris en compte sont différents à INPUT1 et à INPUT2 1 L aspect du rapport largeur hauteur et de la taille d écran varie selon le signal d entrée Configuration d installation plus libre Possibilités élargies d installation par un solide design plus mince et plus léger PDP 50MXE20 PDP 50MXE20 S Bien qu il fournisse une image de 50 pouces cet écran n a q...

Страница 29: ...fourniture 1 Cordon d alimentation 2 Télécommande 3 2 piles AA R6 4 Chiffon de nettoyage pour l écran 5 3 colliers rapides 6 3 serre câble 7 Noyau en ferrite pour cordon d alimentation 8 3 noyaux en ferrite pour câbles audio 9 Attache de câble Le présent mode d emploi CD ROM Guide de démarrage Downloaded From TV Manual com Manuals ...
Страница 30: ...r 4 Poignées Panneau de commande de l écran à plasma 5 Touche STANDBY ON veille marche Appuyez sur cette touche pour mettre l écran en service ou en veille 6 Touche MENU Appuyez sur cette touche pour ouvrir ou fermer les menus s affichant sur l écran 7 Touche DISPLAY SET écran validation Elle sert à valider les sélections sur les menus de l écran et à modifier les paramètres Lorsqu elle n est pas ...

Страница 31: ... touche pour mettre l écran en service ou en veille Touche DISPLAY Appuyez sur cette touche pour afficher le nom de l entrée et de mode de fonctionnement actuels Touche POINT ZOOM Utilisez cette touche pour choisir et agrandir une partie de l écran Touche FREEZE Quand la fonction d écran de mémo est validée une image fixe est affichée sur le sous écran Touche SWAP Lors d un affichage multi écran u...

Страница 32: ...A LR6 ATTENTION N utilisez pas de piles autres que celles qui sont désignées et ne mélangez pas des piles usées et des neuves car une rupture ou une fuite d électrolyte pourrait en résulter ce qui présenterait un risque d incendie de blessure ou de contamination Lors de la mise en place des piles dans la télécommande insérez les en faisant correspondre leurs polarités et avec celles indiquées sur ...

Страница 33: ...DIO INPUT1 Mini prise stéréo Utilisez cette prise pour disposer des sons appliqués sur INPUT1 Branchez sur cette prise la sortie son de l appareil relié à INPUT1 7 AUDIO INPUT2 Mini prise stéréo Utilisez cette prise pour disposer des sons appliqués sur INPUT2 Branchez sur cette prise la sortie son de l appareil relié à INPUT2 8 ANALOG RGB OUT INPUT1 mini prise D sub à 15 broches Utilisez la prise ...

Страница 34: ...le 6 AUDIO INPUT1 Mini prise stéréo Utilisez cette prise pour disposer des sons appliqués sur INPUT1 Branchez sur cette prise la sortie son de l appareil relié à INPUT1 7 AUDIO INPUT2 Mini prise stéréo Utilisez cette prise pour disposer des sons appliqués sur INPUT2 Branchez sur cette prise la sortie son de l appareil relié à INPUT2 8 ANALOG RGB OUT INPUT1 mini prise D sub à 15 broches Utilisez la...

Страница 35: ...ochage de l écran à plasma à un mur L écran à plasma possède des perçages destinés à permettre sa fixation sur un mur etc Les perçages prévus sont indiqués sur l illustration fournie L écran à plasma doit être maintenu en 4 points minimum placés au dessus et au dessous de l axe horizontal et à droite et à gauche de l axe vertical Dans le cas des perçages a et b utilisez des boulons dont la longueu...

Страница 36: ...rçage b Axe Perçage b Perçage b Perçage b Axe Vue arrière PDP 50MXE20 PDP 50MXE20 S Perçage a Perçage a Ouïes d aération ventilateur Perçage a Perçage a Perçage a Perçage a Perçage b Axe Perçage b Perçage b Perçage b Axe Vue arrière PDP 60MXE20 Perçage a Perçage a Ouïes d aération ventilateur Uniquement pour haut parleur Downloaded From TV Manual com Manuals ...
Страница 37: ...tension prescrite 100 V à 240 V CA 50 Hz 60 Hz tout autre tension peut provoquer un incendie ou une secousse électrique 1 Noyau en ferrite Attache de câble Cordon d alimentation À la prise secteur Le plus près possible À la prise AC IN Fixation des noyaux en ferrite Fixez le noyau en ferrite fourni comme accessoire sur le bout du cordon d alimentation comme indiqué sur cette illustration Utilisez ...

Страница 38: ...z les trous indiqués par le signe selon les besoins Engagez les colliers rapides dans les trous 4 repérés par sur l illustration ci dessous Vue de l arrière de l écran 1 Groupez les câbles en utilisant les colliers rapides fournis Introduisez la partie 1 dans un des perçages à l arrière de l écran à plas ma puis insérez 2 à l arrière de 1 pour assurer la fixation Les colliers rapides sont conçus p...

Страница 39: ...EEZE AUTO SETUP MODE AUTO FUNCTION PIP DETECT PICTURE STANDARD INACTIVE OFF ACTIVE ENGLISH OFF 5 Utilisez les touches 5 pour sélectionner LANGUAGE puis appuyez sur la touche SET LANGUAGE ENGLISH SET SET EXIT MENU 6 Utilisez les touches 2 3 pour sélectionner la langue souhaitée A chaque pression sur les touches 2 3 les langues disponibles changent dans l ordre suivant LANGUAGE FRANÇAIS SET SET EXIT...

Страница 40: ...ZE AUTO SETUP MODE AUTO FUNCTION PIP DETECT PICTURE STANDARD INACTIVE OFF ACTIVE ENGLISH OFF 5 Utilisez les touches 5 pour sélectionner LANGUAGE puis appuyez sur la touche SET LANGUAGE ENGLISH SET SET EXIT MENU 6 Utilisez les touches 2 3 pour sélectionner la langue souhaitée A chaque pression sur les touches 2 3 les langues disponibles changent dans l ordre suivant LANGUAGE FRANÇAIS SET SET EXIT M...

Страница 41: ...c Nettoyage de la surface de l écran Après avoir épousseté l écran frottez le délicatement avec le chiffon de nettoyage fourni ou un autre linge doux coton flanelle etc N utilisez pas de mouchoir en papier ni de chiffon rugueux La surface de l écran peut facilement être rayée ne frottez aucun objet dur sur cette surface Si vous nettoyez la surface de l écran avec un linge humide des goutelettes d ...

Страница 42: ...es Coupez l alimentation principale attendez 1 à 2 minutes et remettez l appareil sous tension Si la difficulté subsiste retirez la fiche d alimentation hors de la prise secteur et consultez un centre de service ou un concessionnaire Pioneer Informations complémentaires Guide de dépannage Une erreur de commande peut parfois être interprétée comme une anomalie de fonctionnement Si une indication es...

Страница 43: ...emèdes possibles Anomalies générales Anomalies qui n en sont pas L image a un format réduit Les caractères affichés sont déformés Un son aigu est parfois émis par l écran à plasma Les portions lumineuses de l image semblent manquer d intensité Les taches ou du bruit se forment sur l écran Des rayures se forment sur l écran L écran à plasma émet des bruits Changement de vitesse du ventilateur Le té...

Страница 44: ...ns lequel l écran est installé et utilisé les unités à commande par infrarouge d autres équipements voisins risquent de ne pas fonctionner correctement et des parasites peuvent être produits dans les écouteurs sans fil Dans ce cas déplacez l équipement à un endroit où son capteur à infrarouge ne sera pas affecté Interférence électromagnétique Cet appareil respecte les normes officielles concernant...

Страница 45: ...et négative 2 2 kOhms G ON SYNC 1 Vcc 75 Ohms synchro négative Compatibilité Microsoft Plug Play VESA DDC 1 2B Sortie Mini D sub 15 broches connecteur femelle 75 Ohms avec tampon INPUT2 Entrée Connecteur DVI D à 24 broche Signal RVB numérique DVI conforme au signal TMDS Compatibilité Microsoft Plug Play VESA DDC 2B Audio Entrée Entrée audio pour INPUT1 Mini prise stéréo G D 500 mV eff plus de 10 k...

Страница 46: ...20 Fr Français Downloaded From TV Manual com Manuals ...
Страница 47: ... dem Kunden diese Anleitung auszuhändigen und ihm die Handhabung des Produkts zu erklären Mischen Sie dieses Produkt wenn Sie es entsorgen wollen nicht mit gewöhnlichen Haushaltsabfällen Es gibt ein getrenntes Sammelsystem für gebrauchte elektronische Produkte über das die richtige Behandlung Rückgewinnung und Wiederverwertung gemäß der bestehenden Gesetzgebung gewährleistet wird Privathaushalte i...

Страница 48: ...an einem unzureichend belüfteten sehr feuchten oder heißen Ort ist zu vermeiden und das Gerät darf weder direkter Sonneneinstrahlung noch starken Kunstlichtquellen ausgesetzt werden D3 4 2 1 7c_A_Ge WARNUNG Das Netzkabel dieses Gerätes ist mit einem dreipoligen einschließlich Erdungsstift Netzstecker ausgestattet der ausschließlich für den Anschluss an eine geerdete Schuko Steckdose vorgesehen ist...

Страница 49: ...t 4 Daraufhin wird die PDF Datei der Bedienungsanleitung geöffnet Für Macintosh Benutzer 1 Legen Sie die mitgelieferte CD ROM in das CD ROM Laufwerk Ihres Macintosh ein 2 Doppelklicken Sie auf das Symbol PIONEER PLASMA UM im Desktop 3 Doppelklicken Sie in der angezeigten Dateiliste auf start_menu pdf 4 Nach Erscheinen des Menüs klicken Sie auf das Symbol das der Modellnummer Ihres Plasma Displays ...

Страница 50: ...rstützen jeweils unterschiedliche Signale 1 Die Darstellungsweise von Bildseitenverhältnis und Bildschirmformat richtet sich nach dem jeweiligen Eingangssignal Frei wählbare Aufstellungskonfiguration Erweiterte Aufstellungsmöglichkeiten dank flacherer leichterer äußerst widerstandsfähiger Ausführung PDP 50MXE20 PDP 50MXE20 S Trotz seines großdimensionierten 50 Zoll Bildschirms besitzt dieses Displ...

Страница 51: ...führten Zubehörteile vollständig vorhanden sind 1 Netzkabel 2 Fernbedienung 3 Mignonzelle R6 Größe AA x 2 4 Reinigungstuch für Bildschirm 5 Schnellverschluss Kabelband x 3 6 Kugelband x 3 7 Ferritkern für Netzkabel 8 Ferritkern x 3 für Audiokabel 9 Kabelband Vorliegende Bedienungsanleitung CD ROM Startleitfaden Downloaded From TV Manual com Manuals ...
Страница 52: ...er Betriebsmodus geschaltet 6 MENU Menütaste Durch Drücken dieser Taste wird die Menüanzeige in den Bildschirm eingeblendet und wieder vom Bildschirm gelöscht 7 DISPLAY SET Anzeigeparameter Taste Eingabetaste Diese Taste wird zum Einstellen bestimmter Geräteparameter in Menüanzeigen sowie zum Registrieren der neuen Einstellungen verwendet Sofern diese Taste nicht in einer Menüanzeige mit einer and...

Страница 53: ... kann ein gewünschter Bildausschnitt vergrößert werden FREEZE Standbild Taste Bei aktivierter Standbild Funktion wird ein Standbild als Nebenbild angezeigt SWAP Bildwechseltaste Bei Mehrbildanzeige dient diese Taste zum Vertauschen der Eingangssignalquellen von Hauptbild und Nebenbild PIP SHIFT Nebenbild Verschiebungstaste Im Bild im Bild Modus der Mehrbildanzeige Funktion dient diese Taste zum Ve...

Страница 54: ...links und rechts neben dem Sensor Einlegen der Batterien in die Fernbedienung Den Deckel leicht eindrücken und zum Abnehmen in Pfeilrichtung schieben Vorgeschriebene Batterien Bitte verwenden Sie ausschließlich Mignonzellen des Typs R6 oder LR6 Größe AA VORSICHT Verwenden Sie keine anderen als die vorgeschriebenen Batterien und legen Sie nicht eine gebrauchte und eine frische Batterie gemeinsam ei...

Страница 55: ... Gerätes 7 AUDIO INPUT2 Stereo Minibuchse Audio Eingang 2 Diese Buchse dient zur Eingabe des Tonsignals wenn der Eingang INPUT2 gewählt ist Verbinden Sie diese Buchse mit der Audio Ausgangsbuchse des an INPUT2 des Plasma Displays angeschlossenen Gerätes 8 ANALOG RGB OUT INPUT1 15 polige Mini D Sub Buchse Video Ausgangsbuchse Verwenden Sie die Buchse ANALOG RGB OUT INPUT1 zur Ausgabe des Videosigna...

Страница 56: ...g INPUT1 gewählt ist Verbinden Sie diese Buchse mit der Audio Ausgangsbuchse des an INPUT1 des Plasma Displays angeschlossenen Gerätes 7 AUDIO INPUT2 Stereo Minibuchse Audio Eingang 2 Diese Buchse dient zur Eingabe des Tonsignals wenn der Eingang INPUT2 gewählt ist Verbinden Sie diese Buchse mit der Audio Ausgangsbuchse des an INPUT2 des Plasma Displays angeschlossenen Gerätes 8 ANALOG RGB OUT INP...

Страница 57: ...fahr dass das Gerät umkippt bzw herunterfällt wodurch Verletzungen und Sachschäden verursacht werden können Wandmontage Dieses Plasma Display ist mit Bohrungen versehen die eine Wandmontage usw ermöglichen Die Lage der zur Montage zu verwendenden Bohrungen ist dem beigefügten Schema zu entnehmen Achten Sie darauf das Plasma Display an mindestens 4 Stellen oberhalb und unterhalb der Mittellinie sow...

Страница 58: ...entilationsschlitze Ventilator Bohrung b Bohrung b Bohrung b Bohrung b Bohrung a Bohrung a Bohrung a Plasma Display Schraube Montage halterung usw Bohrung a Bohrung a Bohrung a Bohrung a Nur für Lautsprecher Bohrung b Mittellinie Mittellinie Rückansicht PDP 60MXE20 Ventilationsschlitze Ventilator Bohrung b Bohrung b Bohrung b Bohrung a Bohrung a Downloaded From TV Manual com Manuals ...
Страница 59: ... zu verschrauben VERBOTEN Schließen Sie das Plasma Display ausschließlich an eine Netzsteckdose an die die vorgeschriebene Netzspannung 100 V bis 240 V Wechselspannung 50 Hz 60 Hz führt Anderenfalls besteht die Gefahr von Brand und elektrischem Schlag Befestigen der Ferritkerne Befestigen Sie den mitgelieferten Ferritkern wie in der nachstehenden Abbildung gezeigt am Ende des Netzkabels Verwenden ...

Страница 60: ...bnutzt und beim Entfernen beschädigt wird 1 Fassen Sie die verschiedenen Kabel mit Hilfe der mitgelieferten Schnellverschluss Kabelbänder zusammen Schieben Sie Teil 1 in das dafür vorgesehene Loch an der Rückseite des Gerätes und stecken Sie dann Stift 2 in das Loch an der Rückseite von Teil 1 um das Kabelband zu sichern Schnellverschluss Kabelbänder sind so ausgelegt dass sie nach dem Anbringen n...

Страница 61: ... TIMER SETTING SCREEN MGT SPLIT FREEZE AUTO SETUP MODE AUTO FUNCTION PIP DETECT PICTURE STANDARD INACTIVE OFF ACTIVE ENGLISH OFF 5 Betätigen Sie 5 zur Wahl von LANGUAGE und drücken Sie dann SET LANGUAGE ENGLISH SET SET EXIT MENU 6 Betätigen Sie 2 3 zur Wahl der gewünschten Sprache Bei jeder Betätigung von 2 3 wird in der folgenden Reihenfolge zwischen den verschiedenen Einstellungen umgeschaltet L...

Страница 62: ... TIMER SETTING SCREEN MGT SPLIT FREEZE AUTO SETUP MODE AUTO FUNCTION PIP DETECT PICTURE STANDARD INACTIVE OFF ACTIVE ENGLISH OFF 5 Betätigen Sie 5 zur Wahl von LANGUAGE und drücken Sie dann SET LANGUAGE ENGLISH SET SET EXIT MENU 6 Betätigen Sie 2 3 zur Wahl der gewünschten Sprache Bei jeder Betätigung von 2 3 wird in der folgenden Reihenfolge zwischen den verschiedenen Einstellungen umgeschaltet L...

Страница 63: ... Reiben Sie den Bildschirm nach dem Abstauben des Plasma Displays mit dem mitgelieferten Reinigungstuch oder einem weichen Tuch aus Baumwolle Flanell usw sacht ab Verwenden Sie weder Papiertücher noch einen rauhen Lappen zum Reinigen des Bildschirms Da die Oberfläche leicht zerkratzt werden kann darf der Bildschirm nicht mit einem harten Gegenstand berührt werden Bei Verwendung eines feuchten Tuch...

Страница 64: ...r Kompatibilität der PC Signale und ändern Sie die Ausgangssignal Einstellung des Personalcomputers entsprechend Schalten Sie den MAIN POWER Schalter aus Beträgt die Umgebungstemperatur mehr als 40 C Entfernen Sie ggf Gegenstände die die Ventilationsschlitze an der Rückwand des Plasma Displays blockieren Eine Funktionsstörung des Ventilators liegt vor Schalten Sie unverzüglich die Stromzufuhr aus ...

Страница 65: ...lich vom Gehäuse zu hören Die hellen Bildstellen wirken verblasst Flecken erscheinen im Bild oder das Bild ist verrauscht Streifen erscheinen auf dem Bildschirm Geräusche sind aus dem Geräteinneren zu hören Die Ventilator Drehzahl ändert sich Die grüne ON Anzeige leuchtet nicht Ist das korrekte Bildschirmformat gewählt worden Nehmen Sie eine Justierung im BILDSCHIRM Modus der Menüanzeige vor Falls...

Страница 66: ...ufleuchten Dieses Phänomen ist technisch bedingt es handelt sich dabei nicht um eine Funktionsstörung des Gerätes Zusätzliche Informationen Hinweis zur Abstrahlung von Infrarotlicht Dieses Plasma Display strahlt Infrarotlicht ab Dies kann je nach den Bedingungen am Aufstellungsort beim Betrieb des Displays dazu führen dass die Übermittlung von Infrarotsignalen der Fernbedienungen anderer Geräte in...

Страница 67: ... höher als 10 kΩ AUDIO INPUT für INPUT2 Stereo Minibuchse L R 500 mV eff höher als 10 kΩ Ausgang AUDIO OUTPUT Stereo Minibuchse L R 500 mV eff maximal geringer als 5 kΩ SPEAKER L R 6 Ω bis 16 Ω 9 W 9 W an 6 Ω Steuerung RS 232C 9 polige D Sub Steckbuchse COMBINATION IN OUT 6 polige Mini DIN Buchse x 2 Mitgeliefertes Zubehör Netzkabel 1 Fernbedienung 1 Mignonzellen R6 Größe AA 2 Reinigungstuch für B...

Страница 68: ...20 Ge Deutsch Downloaded From TV Manual com Manuals ...

Страница 69: ...ota per i rivenditori Al termine dell installazione ricordarsi di consegnare questo manuale al cliente e di spiegare al cliente stesso le modalità di uso del prodotto Se si vuole eliminare questo prodotto non gettarlo insieme ai rifiuti domestici Esiste un sistema di raccolta differenziata in conformità alle leggi che richiedono appositi trattamenti recupero e riciclo I privati cittadini dei venti...

Страница 70: ...i riesce ad inserire la spina nella presa di corrente di casa rivolgersi ad un elettricista qualificato per far sostituire la presa alla parete con una dotata di attacco per la messa a terra Non annullare la scopo di sicurezza della spina con messa a terra D3 4 2 1 6_A_It ATTENZIONE Questo simbolo si riferisce a pratiche pericolose o insicure che possono causare gravi infortuni anche mortali AVVER...

Страница 71: ...chermata del menu non dovesse apparire automaticamente può venire visualizzata nel modo seguente 1 Fare un doppio clic sull icona Risorse del Computer del desktop del proprio computer 2 Visualizzare il contenuto del CD ROM facendo clic sull icona dell unità CD ROM in cui è caricato 3 Fare doppio clic sul file start_menu pdf 4 Quando appare il menu continuare con la fase 3 che segue 3 Quando appare...

Страница 72: ...ga incredibilmente la gamma dei possibili luoghi e sistemi di installazione Alta affidabilità per applicazioni commerciali Il pannello è dotato della capacità di eliminare la luminanza di picco in concomitanza con la visione del programma e della possibilità di modificare la velocità della ventola di raffreddamento in relazione ai cambiamenti delle condizioni ambientali tutte caratteristiche che l...

Страница 73: ...ndo 3 Batterie tipo AA R6 x 2 4 Panno per la pulizia per lo schermo 5 Fermacavi ad uso rapido x 3 6 Fascette fermacavo a catenella x 3 7 Nucleo in ferrite per il cavo di alimentazione 8 Nuclei in ferrite x 3 per i cavi audio 9 Laccio di arresto Questo manuale di istruzioni per l uso CD ROM Guida iniziale Informazioni generali Downloaded From TV Manual com Manuals ...

Страница 74: ...a lampeggiante indica la presenza di un messaggio di errore 4 Manici Pannello dei comandi dell apparecchio principale 5 Tasto della modalità di attesa STANDBY ON Per commutare l apparecchio dalla modalità di attesa alla modalità operativa e viceversa 6 Tasto del menù MENU Premerlo per visualizzare o disattivare il menù sullo schermo 7 Tasto di visualizzazione e impostazione DISPLAY SET Usarlo per ...

Страница 75: ...ata nella schermata secondaria un immagine ferma Tasto di scambio SWAP Nel corso della visualizzazione multischermi usare questo tasto per passare dallo schermo principale allo schermo secondario e viceversa Tasto di spostamento di posizione PIP SHIFT Nel corso dell uso della funzione di visualizzazione immagine nell immagine durante la visualizzazione multischermi usare questo tasto per spostare ...

Страница 76: ...e del sensore ubicato sul pannello anteriore del monitor al plasma Il telecomando può funzionare sino ad una distanza massima dal monitor di circa 7 m ed entro una deviazione di circa 30 rispetto alla perpendicolare che unisce il telecomando al monitor Inserimento delle batterie nel telecomando Batterie designate Usare batterie di dimensioni AA R6 o AA LR6 AVVERTENZE Non usare batterie diverse da ...

Страница 77: ...o in caso di selezione dell ingresso INPUT1 Collegarvi la spina del sonoro in uscita dai componenti collegati agli ingressi INPUT1 di questo apparecchio 7 Presa di ingresso audio AUDIO INPUT2 minipresa stereo Usata per l ingresso del sonoro in caso di selezione dell ingresso INPUT2 Collegarvi la spina del sonoro in uscita dai componenti collegati agli ingressi INPUT2 di questo apparecchio 8 Presa ...

Страница 78: ...gresso INPUT1 Collegarvi la spina del sonoro in uscita dai componenti collegati agli ingressi INPUT1 di questo apparecchio 7 Presa di ingresso audio AUDIO INPUT2 minipresa stereo Usata per l ingresso del sonoro in caso di selezione dell ingresso INPUT2 Collegarvi la spina del sonoro in uscita dai componenti collegati agli ingressi INPUT2 di questo apparecchio 8 Presa di uscita analogica ANALOG RGB...

Страница 79: ...ntaggio alla parete o in altri modi La posizione dei fori forniti per l installazione è indicata in figura Fissare sempre lo schermo in almeno quattro punti sopra e sotto e a destra e a sinistra delle linee centrali orizzontale e verticale Usare bulloni di lunghezza sufficiente a consentirne l inserimento nell apparecchio per un minimo di 12 mm ed un massimo di 18 mm a misurare dalla superficie di...

Страница 80: ...Da 12 mm a 18 mm Da 12 mm a 14 mm Vista posteriore PDP 50MXE20 PDP 50MXE20 S Vista laterale Foro a Foro a Installazione e collegamenti Fessure di ventilazione Foro a Foro a Foro a Foro a Foro b Linea centrale Foro b Foro b Foro b Linea centrale Vista posteriore PDP 60MXE20 Foro a Foro a Fessure di ventilazione Solo per l unità altoparlante Downloaded From TV Manual com Manuals ...
Страница 81: ...erse da quelle indicate corrente alternata a tensione da 100 V a 240 V 50 Hz 60 Hz onde evitare possibili incendi o folgorazioni Installazione dei nuclei in ferrite Applicare il nucleo in ferrite in dotazione all estremità del cavo nel modo visto in figura Per evitare che il nucleo in ferrite possano scivolare lungo il cavo fermarli con gli appositi lacci in dotazione In caso contrario il monitor ...

Страница 82: ...acavi ad uso rapido Inserire la parte 1 nell apposito foro presente sul lato posteriore dell apparecchio inserire poi la parte 2 nel foro sul retro della parte 1 e spingere sino a quando scatta in posizione I fermacavi ad uso rapido sono costruiti in modo da essere difficilmente riapribili una volta messi in posizione Fare attenzione alla chiusura Montare i fermacavi ad uso rapido inserendoli oppo...

Страница 83: ... opportunamente sui tasti 5 e sino a selezionare la voce LANGUAGE lingua e premere poi il tasto SET LANGUAGE ENGLISH SET SET EXIT MENU 6 Agire opportunamente sui tasti 2 e 3 sino a selezionare la lingua desiderata Ad ogni successiva pressione dei tasti 2 e 3 la lingua visualizzata passa attraverso tutte le lingue disponibili nell ordine seguente LANGUAGE ITALIANO SET SET EXIT MENU 7 Una volta ragg...

Страница 84: ...Agire opportunamente sui tasti 5 e sino a selezionare la voce LANGUAGE lingua e premere poi il tasto SET LANGUAGE ENGLISH SET SET EXIT MENU 6 Agire opportunamente sui tasti 2 e 3 sino a selezionare la lingua desiderata Ad ogni successiva pressione dei tasti 2 e 3 la lingua visualizzata passa attraverso tutte le lingue disponibili nell ordine seguente LANGUAGE ITALIANO SET SET EXIT MENU 7 Una volta...

Страница 85: ...izia dello schermo Dopo la pulizia pulire il pannello con la dovuta cura usando il panno in dotazione o un altro panno morbido in cotone flanella ecc Non far uso di fazzolettini di carta o di panni ruvidi La superficie si riga facilmente e non deve quindi essere strofinata o urtata con oggetti duri Se si pulisce la superficie del pannello con un panno inumidito le gocce di acqua sulla sua superfic...

Страница 86: ...te non sia superiore a 40 C Togliere gli oggetti che si trovino eventualmente a bloccare le fessure di ventilazione del pannello al plasma Il ventilatore di raffreddamento non funziona regolarmente Spegnere immediatamente l apparecchio togliere la spina del cavo di alimentazione dalla presa di corrente alternata di rete e rivolgersi al rivenditore o a un centro di servizio Pioneer Si sta tentando ...

Страница 87: ...rificare che la regolazione IMMAGINE sia corretta Problema Possibili soluzioni Problemi di carattere generale Problemi comunemente scambiati per guasti Lo schermo viene visualizzato in piccole dimensioni Lettere visualizzate spezzate Suono acuto talvolta proveniente dall apparecchio Le porzioni luminose dell immagine sembrano perdere di intensità Sullo schermo compaiono macchie o disturbi Sullo sc...

Страница 88: ...nzione di protezione del pannello al plasma si attiva se il sistema non rileva che poco o nessun movimento sullo schermo per un periodo di tre minuti circa la funzione è automatica e non può venire disattivata Pixel non funzionali Questo pannello a plasma è composto di un numero molto alto di pixel allineati in modo estremamente preciso ma occasionalmente un numero ridotto di pixel possono non acc...

Страница 89: ...ltre 10 kΩ Uscita AUDIO OUTPUT Minispine stereo L R 500 m Vrms meno di 5 kΩ SPEAKER altoparlanti L R da 6 Ω a 16 Ω 9 W 9 W a 6 Ω Comandi RS 232C connettore D sub a 9 poli connettore maschio COMBINATION IN OUT due connettori mini DIN a 6 poli Accessori Cavo di alimentazione 1 Telecomando 1 Batterie tipo AA R6 2 Panno per la pulizia per lo schermo 1 Fermacavi ad uso rapido 3 Fascette fermacavo a cat...

Страница 90: ...20 It Italiano Downloaded From TV Manual com Manuals ...

Страница 91: ...dleiding na de installatie aan de klant te overhandigen en de klant uit te leggen hoe hij of zij met het product dient om te gaan Deponeer dit product niet bij het gewone huishoudelijk afval wanneer u het wilt verwijderen Er bestaat een speciaal wettelijk voorgeschreven verzamelsysteem voor de juiste behandeling het opnieuw bruikbaar maken en de recycling van gebruikte elektronische producten In d...

Страница 92: ...n op de achterkant van het apparaat D3 4 2 1 4_A_Du Lees zorgvuldig de volgende informatie voordat u de stekker de eerste maal in het stopcontact steekt WAARSCHUWING Dit apparaat is uitgerust met een drie draden geaarde stekker de stekker heeft dus een derde pen aardpen Deze stekker past alleen in een geaard stopcontact Als u de stekker niet in het stopcontact kunt steken moet u contact opnemen me...

Страница 93: ...mputer op het bureaublad van uw computer 2 Laat de inhoud van de CD ROM verschijnen door dubbelklikken op het CD ROM station waarin de CD ROM is geplaatst 3 Dubbelklik op het bestand start_menu pdf 4 Wanneer het menu verschijnt gaat u door naar stap 3 hieronder 3 Wanneer het menu verschijnt klikt u op het pictogram dat overeenkomt met het modelnummer van uw plasmascherm 4 Het PDF bestand van de Ge...

Страница 94: ...betrouwbaarheid voor commerciële toepassingen Het plasmascherm is uitgerust met diverse voorzieningen die garant staan voor een hoge betrouwbaarheid bij commerciële toepassingen zoals de mogelijkheid om de piek lichtopbrengst te verlagen overeenkomstig het programma dat wordt weergegeven en wijziging van de snelheid van de koelventilator overeenkomstig de omgevingscondities Deze eigenschappen zorg...

Страница 95: ...eleverd 1 Netsnoer 2 Afstandsbediening 3 AA R6 batterijen x 2 4 Reinigingsdoekje voor beeldscherm 5 Snelklemmen x 3 6 Kraalbinders x 3 Voor u verder gaat 7 Ferrietkern voor netsnoer 8 Ferrietkernen x 3 voor audiokabels 9 Kabelriempje Deze gebruiksaanwijzing CD ROM Startgids Downloaded From TV Manual com Manuals ...

Страница 96: ...ze een bepaalde foutmelding aan 4 Handgrepen Bedieningspaneel op het hoofdtoestel 5 STANDBY ON toets Druk hierop om het display aan of uit standby te zetten 6 MENU toets Druk hierop om het in beeld menuscherm te openen of te sluiten 7 DISPLAY SET toets Gebruik deze toets om een in het beeldschermmenu gemaakte selectie te bevestigen en om instellingen te wijzigen Wanneer de toets niet gebruikt word...

Страница 97: ...beeldweergave op deze toets voor het verwisselen van het hoofdbeeld en het subbeeld PIP SHIFT toets Bij gebruik van de beeld in beeld modus met multibeeldweergave kunt u deze toets gebruiken om de plaats van het subbeeld te veranderen VOLUME toetsen Gebruik deze toetsen om de geluidssterkte te regelen CLEAR toets Deze toets wordt enkel gebruikt door professionele installateurs Benaming en functie ...

Страница 98: ...n de signalen belemmerd wordt of het bereik verkort De sterkte van de door het scherm geproduceerde infrarode straling zal afhangen van het weergegeven beeld Voorgeschreven batterijen Gebruik formaat AA R6 of AA LR6 batterijen VOORZICHTIG Gebruik geen andere batterijen dan de voorgeschreven batterijen en gebruik ook niet gelijktijdig een oude en een nieuwe batterij want dit kan resulteren in barst...

Страница 99: ...ve wanneer INPUT1 is gekozen Verbind deze aansluiting met de audio uitgangsaansluiting van de apparatuur die is aangesloten op de INPUT1 aansluiting van het plasmascherm 7 AUDIO INPUT2 stereo ministekkerbus Gebruik deze aansluiting voor de geluidsweergave wanneer INPUT2 is gekozen Verbind deze aansluiting met de audio uitgangsaansluiting van de apparatuur die is aangesloten op de INPUT2 aansluitin...

Страница 100: ...sweergave wanneer INPUT1 is gekozen Verbind deze aansluiting met de audio uitgangsaansluiting van de apparatuur die is aangesloten op de INPUT1 aansluiting van het plasmascherm 7 AUDIO INPUT2 stereo ministekkerbus Gebruik deze aansluiting voor de geluidsweergave wanneer INPUT2 is gekozen Verbind deze aansluiting met de audio uitgangsaansluiting van de apparatuur die is aangesloten op de INPUT2 aan...

Страница 101: ...rpen met bevestigingsgaten voor wandbevestiging enz De aangebrachte bevestigingsgaten zijn aangegeven in de bijbehorende afbeelding U moet het toestel op tenminste 4 punten vastmaken boven en onder links en rechts Gebruik bouten die lang genoeg zijn om 12 mm tot 18 mm in het toestel te steken vanaf het oppervlak waarop of waaraan het toestel bevestigd wordt zowel voor de a gaten als de b gaten Zie...

Страница 102: ...tallatiebeugel enz 12 mm tot 18 mm 12 mm tot 14 mm Achteraanzicht PDP 50MXE20 PDP 50MXE20 S Zijaanzicht a gat a gat Ventilatie openingen ventilator a gat a gat a gat a gat b gat Middenlijn b gat b gat b gat Middenlijn Achteraanzicht PDP 60MXE20 a gat a gat Ventilatie openingen ventilator Alleen voor de luidspreker Downloaded From TV Manual com Manuals ...
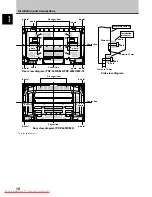
Страница 103: ...ng dan die zijn aangegeven 100 V tot 240 V wisselstroom 50 Hz 60 Hz aangezien dit kan leiden tot brand of een elektrische schok Ferrietkern Kabelriempje Netsnoer Naar stopcontact Zo dicht mogelijk bij de stekker Naar AC IN aansluiting Opmerking U moet de bijgeleverde ferrietkern aan de audiokabel bevestigen Wikkel de audiokabel niet bijgeleverd eenmaal om de ferrietkern en maak dan de sluiting vas...

Страница 104: ...nadat ze eenmaal aangebracht zijn Wees daarom voorzichtig bij het bevestigen van de klemmen Verwijderen van de snelklemmen Draai de snelklem 90 met een tang en trek hem naar buiten In sommige gevallen kan de klem na verloop van tijd versleten zijn en beschadigd raken wanneer u hem verwijdert Vastmaken van de snelklemmen aan het plasmascherm Gebruik indien nodig de gaten voorzien van het teken 2 Bu...

Страница 105: ... SETUP MODE AUTO FUNCTION PIP DETECT PICTURE STANDARD INACTIVE OFF ACTIVE ENGLISH OFF 5 Gebruik de 5 toetsen om LANGUAGE te kiezen en druk vervolgens op de SET toets LANGUAGE ENGLISH SET SET EXIT MENU 6 Gebruik de 2 3 toetsen om de gewenste taal te kiezen Bij enkele malen indrukken van de 2 3 toetsen worden de beschikbare talen als volgt doorlopen LANGUAGE ENGLISH SET SET EXIT MENU 7 Druk op de SE...

Страница 106: ... SETUP MODE AUTO FUNCTION PIP DETECT PICTURE STANDARD INACTIVE OFF ACTIVE ENGLISH OFF 5 Gebruik de 5 toetsen om LANGUAGE te kiezen en druk vervolgens op de SET toets LANGUAGE ENGLISH SET SET EXIT MENU 6 Gebruik de 2 3 toetsen om de gewenste taal te kiezen Bij enkele malen indrukken van de 2 3 toetsen worden de beschikbare talen als volgt doorlopen LANGUAGE ENGLISH SET SET EXIT MENU 7 Druk op de SE...

Страница 107: ...chte doek af Schoonmaken van het scherm Na het stoffen kunt u het scherm voorzichtig afnemen met het meegeleverde reinigingsdoekje of met een andere zachte doek katoen flanel enz Gebruik geen tissues of ruwe stof Omdat het oppervlak van het scherm gemakkelijk krast mag u er niet hard op wrijven of het aanraken met harde voorwerpen Als u het oppervlak van het scherm met een natte doek afneemt kunne...

Страница 108: ...kamertemperatuur hoger dan 40 C Verwijder eventuele voorwerpen die de ventilatie openingen van het plasmascherm afsluiten De koelventilator is defect Schakel het toestel onmiddellijk uit en trek de stekker uit het stopcontact Neem contact op met een Pioneer servicecentrum of uw dealer Er wordt een verkeerde bediening uitgevoerd Controleer de ingangssignalen aansluitingen en de diverse instellingen...

Страница 109: ... Probleem Mogelijke oplossing Het beeld wordt klein op het scherm getoond De weergave van tekst op het scherm is niet continu Soms klinkt er een hard geluid uit de behuizing Heldere partijen in beeld lijken hun intensiteit te verliezen Er verschijnen vlekjes of ruis op het scherm Er verschijnen strepen op het scherm Er klinkt geluid uit het binnenwerk van het toestel De snelheid van de ventilator ...

Страница 110: ...t er enkele pixels niet oplichten of dat deze onregelmatig oplichten Dit is onvermijdelijk bij de vervaardiging van plasmaschermen en duidt niet op een defect van het toestel Betreffende infraroodlichtlight Het plasmascherm straalt infraroodlicht uit Afhankelijk van de plaats waar het toestel staat en de omgeving waarin het toestel gebruikt wordt is het mogelijk dat infrarood afstandsbedieningen v...

Страница 111: ...UT2 Ingang DVI D 24 pins aansluiting Digitaal RGB signaal TMDS signaal voldoet aan DVI Geschikt voor Microsoft Plug Play VESA DDC 2B Audio Ingang AUDIO INPUT voor INPUT1 Stereo ministekkerbus L R 500 mVrms meer dan 10 kΩ AUDIO INPUT voor INPUT2 Stereo ministekkerbus L R 500 mVrms meer dan 10 kΩ Uitgang AUDIO OUTPUT Stereo ministekkerbus L R 500 mVrms max minder dan 5 kΩ SPEAKER L R 6 Ω tot 16 Ω 9 ...

Страница 112: ...20 Du Nederlands Downloaded From TV Manual com Manuals ...
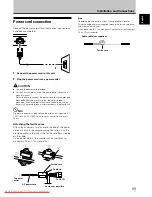
Страница 113: ...e manual al cliente y de explicarle al cliente la forma de utilizar el producto Si desea deshacerse de este producto no lo mezcle con los residuos generales de su hogar De conformidad con la legislación vigente existe un sistema de recogida distinto para los productos electrónicos que requieren un procedimiento adecuado de tratamiento recuperación y reciclado Las viviendas privadas en los 25 estad...

Страница 114: ...erra Esta clavija sólo se adapta en una toma de corriente del tipo de toma de tierra Si no puede insertar la clavija en la toma de corriente llame a un electricista profesional para que le reemplace la toma de corriente por otra con toma de tierra que sea adecuada No elimine el dispositivo de seguridad de la clavija con toma de tierra D3 4 2 1 6_A_Sp ADVERTENCIA Este símbolo se refiere a un peligr...

Страница 115: ... en el icono de Mi PC en el escritorio del ordenador 2 Visualice el contenido del CD ROM haciendo doble clic en la unidad de CD ROM en la que se haya introducido el CD ROM 3 Haga doble clic en el archivo start_menu pdf 4 Cuando aparezca el menú prosiga desde el paso 3 siguiente 3 Cuando aparezca el menú haga clic en el icono correspondiente al número de modelo de su pantalla de plasma 4 Se abrirá ...

Страница 116: ...stalación en muchos lugares Alta fiabilidad para aplicaciones comerciales La pantalla está provista de características que le otorgan fiabilidad para aplicaciones comerciales incluyendo la posibilidad de suprimir la luminancia pico de acuerdo con el programa que se mira y de cambiar la velocidad del ventilador de enfriamiento de acuerdo con los cambios producidos en el lugar de funcionamiento Esta...

Страница 117: ... de instrucciones CD ROM Guía resumida Comprobación de los accesorios suministrados Compruebe que no le falte ninguno de los accesorios siguientes 1 Cable de alimentación 2 Mando a distancia 3 2 pilas AA R6 4 Paño de limpieza para la pantalla 5 3 abrazaderas rápidas 6 3 bandas de cuentas Antes de proseguir Downloaded From TV Manual com Manuals ...
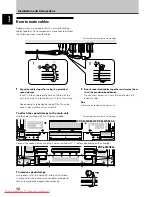
Страница 118: ...erando la función de GEST POTENCIA Cuando la unidad está en el modo de espera El indicador se enciende en rojo Cuando el indicador parpadea se emplea para indicar mensajes de error 4 Asideros Panel de operaciones de la unidad principal 5 Botón STANDBY ON Púlselo para poner la pantalla en funcionamiento o en el modo de espera 6 Botón MENU Púlselo para abrir y cerrar el menú en pantalla 7 Botón DISP...

Страница 119: ...a pantalla emplee este botón para cambiar entre la pantalla principal y la pantalla secundaria Botón PIP SHIFT Cuando emplee el modo de imagen dentro de imagen con la visualización de pantallas múltiples emplee este botón para mover la posición de la pantalla secundaria Botones VOLUME Utilícelos para ajustar el volumen Botón CLEAR Es un botón que utilizan los instaladores profesionales Nombres de ...

Страница 120: ... intensidad de los rayos infrarrojos descargados desde la pantalla cambiará según la imagen visualizada Pilas designadas Emplee pilas del tamaño AA R6 o AA LR6 PRECAUCIÓN No emplee pilas que no sean las designadas y no mezcle pilas usadas con pilas nuevas al mismo tiempo porque podrían echarse a perder y producir fugas de líquido ocasionando peligro de incendio heridas personales o contaminación C...

Страница 121: ...itoma estéreo Se utiliza para obtener sonido cuando se selecciona INPUT1 Conecte la toma de salida de audio de los componentes conectados a INPUT1 de esta unidad 7 AUDIO INPUT2 minitoma estéreo Se utiliza para obtener sonido cuando se selecciona INPUT2 Conecte la toma de salida de audio de los componentes conectados a INPUT2 de esta unidad 8 ANALOG RGB OUT INPUT1 mini D sub de 15 contactos Emplee ...

Страница 122: ...btener sonido cuando se selecciona INPUT1 Conecte la toma de salida de audio de los componentes conectados a INPUT1 de esta unidad 7 AUDIO INPUT2 minitoma estéreo Se utiliza para obtener sonido cuando se selecciona INPUT2 Conecte la toma de salida de audio de los componentes conectados a INPUT2 de esta unidad 8 ANALOG RGB OUT INPUT1 mini D sub de 15 contactos Emplee el conector ANALOG RGB OUT INPU...

Страница 123: ...a unidad está diseñada con orificios para pernos para la instalación en una pared etc Los orificios de instalación proporcionados se muestran en la ilustración adjunta Asegúrese de colocar pernos en 4 o más lugares de las partes superior inferior izquierda y derecha de la línea central Para los orificios a y b utilice pernos que sean lo suficientemente largos como para poder ser insertados de 12 m...

Страница 124: ...ta posterior PDP 50MXE20 PDP 50MXE20 S Diagrama de la vista lateral Orificio a Instalación y conexiones Rejillas de ventilación ventilador Orificio a Orificio a Orificio a Orificio a Orificio a Orificio b Línea central Orificio b Orificio b Orificio b Línea central Diagrama de la vista posterior PDP 60MXE20 Orificio a Rejillas de ventilación ventilador Orificio a Sólo para la unidad de altavoces D...

Страница 125: ...O No utilice una tensión de alimentación que no sea la indicada 100 V a 240 V CA 50 Hz 60 Hz porque podría causar un incendio o descargas eléctricas Colocación de los núcleos de ferrita Coloque el núcleo de ferrita accesorio al extremo del cable de alimentación como se muestra en la ilustración adjunta Emplee las abrazaderas de cables suministradas para evitar que el núcleo de ferrita resbale por ...

Страница 126: ...orificios marcados con el signo como sea necesario 1 Organice juntos los cables utilizando las abrazaderas rápidas suministradas Inserte 1 en un orificio apropiado de la parte posterior de la unidad y luego introduzca 2 en la parte posterior de 1 para fijar la abrazadera Las abrazaderas rápidas han sido diseñadas de forma que resulta difícil abrirlas una vez instaladas Colóquelas por lo tanto con ...

Страница 127: ... FREEZE AUTO SETUP MODE AUTO FUNCTION PIP DETECT PICTURE STANDARD INACTIVE OFF ACTIVE ENGLISH OFF 5 Emplee los botones 5 para seleccionar LANGUAGE y presione entonces el botón SET LANGUAGE ENGLISH SET SET EXIT MENU 6 Empleando los botones 2 3 seleccione el idioma deseado Cada vez que se presionan los botones 2 3 el idioma va cambiando entre los que hay disponibles en el orden siguiente LANGUAGE ES...

Страница 128: ...FREEZE AUTO SETUP MODE AUTO FUNCTION PIP DETECT PICTURE STANDARD INACTIVE OFF ACTIVE ENGLISH OFF 5 Emplee los botones 5 para seleccionar LANGUAGE y presione entonces el botón SET LANGUAGE ENGLISH SET SET EXIT MENU 6 Empleando los botones 2 3 seleccione el idioma deseado Cada vez que se presionan los botones 2 3 el idioma va cambiando entre los que hay disponibles en el orden siguiente LANGUAGE ESP...

Страница 129: ...ve y seco Limpieza de la pantalla Después de haber quitado el polvo frote con cuidado la pantalla con el paño de limpieza suministrado u otro paño suave algodón franela etc No utilice papel de tisú ni paños toscos Puesto que la superficie de la pantalla se raya con facilidad no la frote ni golpee con un objeto duro Si limpia la superficie de la pantalla con un paño humedecido las gotas de agua de ...

Страница 130: ...s que obstruyan las rejillas de ventilación de la pantalla de plasma Ha funcionado mal el enfriamiento Desconecte inmediatamente la alimentación desenchufe la clavija de la toma de corriente y consulte a un centro de servicio Pioneer o a su distribuidor Se ha intentado una operación inválida Compruebe las señales de entrada las conexiones y demás ajustes Desconecte la alimentación principal espere...

Страница 131: ...cionamiento La velocidad del ventilador cambia automáticamente de acuerdo con las condiciones ambientales No se trata de un mal funcionamiento El indicador ON no se enciende algunas veces dependiendo de los ajustes realizados por el instalador Consulte al técnico en instalaciones Problema Posible solución No se conecta la alimentación La unidad no funciona El mando a distancia no funciona Se corta...

Страница 132: ...n precisión pero es posible que algunas veces uno o más píxeles no se enciendan o que se enciendan de forma desordenada Esto son efectos secundarios inevitables del proceso de fabricación y no indican un mal funcionamiento Acerca de la luz de rayos infrarrojos En principio la pantalla de plasma radia rayos infrarrojos Dependiendo del entorno en el que se ha instalado y en el que se emplea el monit...

Страница 133: ...nector DVI D de 24 contactos Señal RGB digital DVI según la señal TMDS Compatible con Plug Play de Microsoft VESA DDC 2B Audio Entrada AUDIO INPUT para INPUT1 Minitoma estéreo Izq der L R 500 mVrms más de 10 kΩ AUDIO INPUT para INPUT2 Minitoma estéreo Izq der L R 500 mVrms más de 10 kΩ Salida AUDIO OUTPUT Minitoma estéreo Izq der L R 500 mVrms máx menos de 5 kΩ SPEAKER Izq der L R 6 Ω a 16 Ω 9 W 9...

Страница 134: ...20 Sp Español Downloaded From TV Manual com Manuals ...
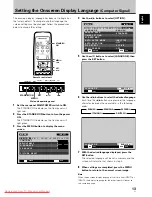
Страница 135: ... 請仔細閱讀 安全預防措施 和本 啟動指南 您就 會知道如何適當地操作本電漿顯示器 請妥善保存本手冊 以供未來參考之用 安裝作業的注意事項 本產品的銷售包括以具有足夠技術與能力的合格人員來安裝 請 務必讓專門的安裝人員或是您的經銷商來為您安裝並設定本產 品 由於安裝錯誤或裝載 錯誤使用 人為修改或自然災害所引 發之損壞的賠償問題 PIONEER不負任何責任 經銷商的注意事項 安裝完成之後 請務必將本手冊交付顧客並說明如何使用本產 品 Downloaded From TV Manual com Manuals ...
Страница 136: ...或不安全的使用會 造成對人體的嚴重傷害甚至死亡 i D3 4 2 1 7c_A_ChH 注意 在台灣本機隨附之電源線必須連接至110伏的AC電源插座 為確保正常的散熱 請將本裝置與其他設備 牆壁或其他物品稍微保 持距離 一般約距離10公分以上 避免安裝在會阻擋通風口並導致 內部過熱的下列場所 以免造成危險 請勿嘗試將本裝置安裝於通風不良的狹小空間中 請勿放置在地毯上 請勿在本裝置上覆蓋布等織品 請勿側放 請勿倒置 如果打算安裝於特殊的位置 例如貼著牆壁 請垂直置放 請務必 先詢問您的Pioneer經銷商 小心 決定本產品的安裝位置時請務必確認可方便使用主機插頭 和插座 Downloaded From TV Manual com Manuals ...
Страница 137: ...der 使用Windows的用戶 1 將隨機光碟置入您電腦的光碟機內 2 選單畫面此時應會自動出現 若選單畫面沒有自動出現 可透過下列方式顯示 1 雙擊電腦桌面上的 我的電腦 圖示 2 雙擊當中置有光碟的光碟機以顯示光碟的內容 3 雙擊start_menu pdf檔案 4 當選單出現 繼續執行接下來的步驟 3 3 當選單出現 點選與您電漿顯示器型號相符的圖示 4 PDF檔案的操作手冊將會開啟 使用Macintosh 的用戶 1 將隨機光碟置入您電腦的光碟機內 2 雙擊電腦桌面上的 PIONEER PLASMA UM 圖示 3 從顯示的檔案之中 雙擊start_menu pdf檔案 4 當選單出現 點選與您電漿顯示器型號相符的圖示 5 PDF檔案的操作手冊將會開啟 欲取得Adobe Reader Adobe Reader的使用主要是為了能夠檢視收錄在光碟片上的操作手冊 欲取得免費的Adobe...

Страница 138: ...SXGA 和1600 1200 UXGA 訊 號的壓縮顯示畫面 此外 在畫面的寬高比率和大小設定值的支援 方面 包括 DOT BY DOT 4 3 和 FULL 1 所支援信號在INPUT1與INPUT2不盡相同 1 顯示出來的畫面寬高比率和大小依輸入訊號而有不同 自由調整的安裝配置 更寬廣的安裝能力 更薄 更輕盈 更長效能的設計 PDP 50MXE20 PDP 50MXE20 S 以僅僅9 9公分厚 35 5公斤重的規格 此顯示器能呈現50吋的大螢 幕畫面 PDP 60MXE20 以僅僅12 2公分厚 61 5公斤重的規格 此顯示器能呈現60吋的大螢 幕畫面 另外它高效率的散熱設計成功地改善了各種環境下的操作狀況 它 更薄 更輕盈的設計結合了更長效能的結構 大大地擴展了可能的 安裝位置和方式 商業用途的高可靠性 本顯示器的功能提供了在商業用途的高可靠性 包括壓縮最高亮度 使其與觀賞的節目...

Страница 139: ...3 ChH 中文 開始之前 檢查隨附的配件 請檢查下列隨附的配件 1 電源線 2 遙控器 3 三號 R6 電池 2 4 清潔布 用來擦拭面板 5 快速夾 3 6 珠鏈帶 3 7 鐵氧體磁芯 電源線用 8 鐵氧體磁芯 3 音頻連接線用 9 紮線帶 本操作手冊 光碟 啟動指南 Downloaded From TV Manual com Manuals ...

Страница 140: ...亮度 當 ENERGY SAVE 選 項設定為 AUTO 時 本感應器會自動啟用 3 STANDBY ON指示燈 本機正在操作時 指示燈會亮起綠燈 指示燈閃爍時表示錯誤訊息 指示燈每秒閃一次綠燈表示 POWER MGT 功能以啟動 本機處於待機模式時 指示燈會亮起紅燈 指示燈閃爍時表示錯誤訊息 4 把手 主機上的操作面板 5 STANDBY ON 按鈕 按下此按鈕開啟顯示器或使其進入待機狀態 6 MENU 按鈕 按下此按鈕開啟或關閉螢幕上的功能表 7 DISPLAY SET 按鈕 用這些按鈕來確認螢幕上的功能表選項 並變更設定值 不用在螢幕上的功能表項目中時 這些按鈕可用來顯示目 前的設定狀態 8 INPUT 按鈕 除了當選單畫面顯示外 操作此按鈕也可以變更輸入 9 SCREEN SIZE 按鈕 除了當選單畫面顯示外 操作此按鈕也可以變更畫面大 小 0 VOL 按鈕 不用在螢幕上的功能表項...

Страница 141: ...UP 按鈕 使用電腦訊號輸入時 按下此按鈕可自動將 POSITION CLOCK 和 PHASE 最佳化 STANDBY ON 按鈕 按下此按鈕開啟顯示器或使其進入待機狀態 DISPLAY 按鈕 按下此按鈕 檢視本機目前的輸入和設定模式 POINT ZOOM 按鈕 使用此按鈕選取並放大螢幕上的某一部份 FREEZE 按鈕 當定格畫面 memo screen 功能啟用 一靜止的影像會 顯示於子畫面中 SWAP 按鈕 在多重畫面顯示狀態下 用此按鈕在主畫面和子畫面間做 切換 PIP SHIFT 按鈕 搭配多重畫面顯示使用子母畫面模式時 使用此鈕可移動 子畫面的位置 VOLUME 按鈕 用來調整音量 CLEAR 按鈕 為專業安裝人員所用按鈕 配件名稱及功能 1 SCREEN SIZE 按鈕 按下此按鈕選擇畫面的大小 2 INPUT 按鈕 按下此按鈕選擇輸入 3 MENU 按鈕 按下此按鈕開啟或關...

Страница 142: ...所釋放的紅外線之影響力依顯示的畫面有不同 遙控器的操作範圍 操作遙控器時 請將它指向位於主機前面板上的遙控訊號 感應器 遙控器與主機之間的操作距離可達7公尺 離感應 器兩邊的操作角度在30度以內 置入遙控器的電池 指定電池 請使用三號 R6 或三號 LR6 型電池 小心 請勿使用指定電池以外的電池 請勿將舊電池與新電池混 用 以免發生電池破裂或液體外洩 從而導致火災 人身傷 害或環境污染 請根據說明圖所示的正 負 極來將電池置入遙控器內 電池置入錯誤可能會發生電池破裂或液體外洩 從而導致火 災 人身傷害或環境污染 請勿對電池進行加熱 分解或將其丟入水火中 以免發生電 池破裂或液體外洩 從而導致火災 人身傷害 長時間不使用遙控器時 請將電池從遙控器中取出 並分別 存放 長時間不使用而將電池置於遙控器內可能會發生電池 液體外洩 從而導致火災 人身傷害或環境污染 一邊向下輕壓 一邊依箭頭方向滑出...

Страница 143: ...來源元件的聲音至影 音擴大機或類似的元件 附註 在MAIN POWER開關切至OFF或ON 待機 時 AUDIO OUTPUT 音源孔將不會產生任何聲音的輸出 6 AUDIO INPUT1 立體聲迷你插孔 選取INPUT1時 用此插孔接收聲音 它用來連接已連接至 本裝置的INPUT1的元件之聲音輸出插孔 7 AUDIO INPUT2 立體聲迷你插孔 選取INPUT2時 用此插孔接收聲音 它用來連接已連接至本裝置的INPUT2的元件之聲音輸出插 孔 8 ANALOG RGB OUT INPUT1 迷你D sub 15接腳 使用此ANALOG RGB OUT INPUT1 端子來輸出影像訊號 至外部監視器或其他元件 附註 當主機關閉或處於待機模式時 影像訊號不會經由 ANALOG RGB OUT INPUT1 端子輸出 9 ANALOG RGB IN INPUT1 迷你D sub 15接腳 連...

Страница 144: ...源元件的聲音至影 音擴大機或類似的元件 附註 在MAIN POWER開關切至OFF或ON 待機 時 AUDIO OUTPUT 音源孔將不會產生任何聲音的輸出 6 AUDIO INPUT1 立體聲迷你插孔 選取INPUT1時 用此插孔接收聲音 它用來連接已連接至 本裝置的INPUT1的元件之聲音輸出插孔 7 AUDIO INPUT2 立體聲迷你插孔 選取INPUT2時 用此插孔接收聲音 它用來連接已連接至本裝置的INPUT2的元件之聲音輸出插 孔 8 ANALOG RGB OUT INPUT1 迷你D sub 15接腳 使用此ANALOG RGB OUT INPUT1 端子來輸出影像訊號 至外部監視器或其他元件 附註 當主機關閉或處於待機模式時 影像訊號不會經由 ANALOG RGB OUT INPUT1 端子輸出 9 ANALOG RGB IN INPUT1 迷你D sub 15接腳 連接...

Страница 145: ...重量 而且必須是安定平 坦的表面 否則本機可能會掉下或損壞 安裝後 請採取適當的措施防止安裝機器掉下 否則會因掉下而 導致人員受傷或機器損壞 在牆壁上裝載本機 本裝置設計有專為安裝於牆上使用的螺栓洞 下列圖例表示 本機上的牆上安裝洞 務必在中線的上 下 左 右固定四個以上的位置 請使用長度在1 2公分到1 8公分的螺栓插入主機固定面上 的a洞和b洞中 請參考下列圖例中的側視圖 本裝飾是由玻璃所構成的 請務必將它安裝在平坦且無翹 曲的表面 小心 將本機安裝於牆壁上時 必須由具有相關技術知識與能力的職業技 術人員來進行 詳情請逕洽經銷商 不適當或不足夠的安裝將會導 致事故 損壞或人身受傷 小心 非專業安裝技師或服務人員 不得動手將把手拆除或回裝 在移動顯示器時 應始終由兩人按照圖示方法握住後方把手 絕對不要嘗試只抓住一個把手來移動本電漿顯示器 Downloaded From TV Manual...

Страница 146: ... 中線 b洞 b洞 b洞 中線 a洞 b洞 螺栓 螺栓 固定面 安裝夾等 1 2公分至1 8公分 1 2公分至1 4公分 後視圖 PDP 50MXE20 PDP 50MXE20 S 側視圖 a洞 a洞 安裝與連接 通風口 風扇 a洞 a洞 a洞 a洞 b洞 中線 b洞 b洞 b洞 中線 後視圖 PDP 60MXE20 a洞 a洞 通風口 風扇 只用於揚聲器 Downloaded From TV Manual com Manuals ...

Страница 147: ... 100 V至 240 V 50 Hz 60 Hz 因為這樣可能會導致火災或漏電的危險 安裝鐵氧體磁芯 ferrite cores 請依照附圖所示 將隨機附贈的鐵氧體磁芯安裝到電源線的 端部 請使用隨機附贈的電源線 以免鐵氧體磁芯從線上滑 落 若您未將它裝上 此顯示器將不符合歐盟共同標準 CE 或 澳洲 C tick 及中華民國 BSMI 認證所制定的標準 附註 有關音頻連接線的部份 請將隨機附贈的鐵氧體磁芯裝上 請將音頻連接線 未附 在鐵氧體磁芯上繞上一圈 然後再將扣釣 catch 扣上 若您未將它裝上 此顯示器將不符合歐盟共同標準 CE 或澳洲 C tick 及中華民國 BSMI 認證所制定的標準 音頻連接線 未附 鐵氧體磁芯 鐵氧體磁芯 紮線帶 AC電源線 連接至電源 插座 盡可能插緊 連接至AC IN Downloaded From TV Manual com Manuals ...

Страница 148: ...0度 然後把它向外拉 有些時候快 速夾會隨時間經過而變質 在移除時可能會有損壞 將快速夾接到主機上 請視需要使用標示 記號的安裝孔 1 使用隨附的快速夾將纜線綁成一束 將1插入本裝置背面板上適當的洞中 然後將2扣進1後 面的洞來固定快速夾 此快速夾一但扣上就很難再重新打開 請小心使用 視情形而定 將快速夾接到主機背面板下4個標有小黑點 的洞裡 2 將纜線綁成一束 再用隨附的珠鏈帶固定住 在纜線兩端切忌過度用力 附註 可向左或向右繞線 PDP 50MXE20 PDP 50MXE20 S PDP 60MXE20 Downloaded From TV Manual com Manuals ...

Страница 149: ... 選取的語言會被設定到記憶體內 然後會返回步驟4中的 畫面 8 設定完成之後 按下MENU按鈕 返回正常螢幕顯示畫面 附註 螢幕顯示語言設定的對象是INPUT1或INPUT2其中一個時 其他輸出的 畫面顯示語言也會設為同一種語言 3 ENGLISH 2 3 DEUTSCH 2 3 FRANÇAIS 2 3 ESPAÑOL 2 3 ITALIANO 2 1 設定背面板MAIN POWER開關為開啟 ON 前面板上的STANDBY ON指示燈會亮紅燈 2 按下STANDBY ON按鈕來開啟電源 ON 前面板上的STANDBY ON指示燈會亮綠燈 3 按下MENU按鈕 顯示功能表畫面 SCREEN SETUP OPTION 0 0 0 CONTRAST 0 BRIGHTNESS H ENHANCE V ENHANCE PICTURE RESET PICTURE MENU INPUT1 ENTER...

Страница 150: ... 3 按鈕選擇想要的語言 每按一次 2 3 按鈕 就會依底下的順序交替變化顯示 的語言 LANGUAGE ENGLISH SET SET EXIT MENU 7 想要的語言顯示出來之後 按下SET按鈕 選取的語言會被設定到記憶體內 然後會返回步驟4中的 畫面 8 設定完成之後 按下MENU按鈕 返回正常螢幕顯示畫面 附註 螢幕顯示語言設定的對象是INPUT1或INPUT2其中一個時 其他輸出的 畫面顯示語言也會設為同一種語言 3 ENGLISH 2 3 DEUTSCH 2 3 FRANÇAIS 2 3 ESPAÑOL 2 3 ITALIANO 2 1 設定背面板MAIN POWER開關為開啟 ON 前面板上的STANDBY ON指示燈會亮紅燈 2 按下STANDBY ON按鈕來開啟電源 ON 前面板上的STANDBY ON指示燈會亮綠燈 3 按下MENU按鈕 顯示功能表畫面 MENU IN...

Страница 151: ...拭顯示器和遙控器 為避免績灰過 多 請以稀釋過的中性清潔劑沾濕軟布並將它徹底擰乾之 後 再用它擦拭本機和遙控器 再用乾布來插乾它們 清潔螢幕 除塵後 請用配件中提供的拭布或其他柔軟布料 綿 絨等 布料 輕輕擦拭屏幕 請勿使用面紙或粗布 由於屏幕表面 容易刮傷 請勿令其遭到摩擦或硬物撞擊 如果使用濕布擦拭表面 擦過部分所殘餘的水珠可能會滲入 機體內部而造成故障 清潔通風口 一般會使用吸塵器每個月清潔顯示器後面板上的通風口裡的 積灰一次 清潔時請將吸塵器的開到最小 使用本裝置卻不清潔積灰將造成內部溫度增高 可能導致故 障或起火 通風口 通風口 通風口 通風口 PDP 50MXE20 PDP 50MXE20 S 通風口 通風口 通風口 通風口 PDP 60MXE20 Downloaded From TV Manual com Manuals ...

Страница 152: ...NING THERMAL ALERT SHUT DOWN WARNING FAN FAILURE SHUT DOWN ERROR INVALID KEY ENTRY SHUT DOWN 解決方法 本裝置不支援目前的輸入訊 號 請檢查 電腦訊號相容 性對照表 並適當地變更 電腦的輸出訊號設定值 請關閉主電源 請檢查周圍環境溫度是否超 過40 C 請移除任何擋住擋住電漿顯 示器冷卻風扇的物品 冷卻風扇故障 請立刻關閉 電源 從插座上拔下電源插 頭 並洽詢Pioneer客服中 心或您的經銷商 嘗試使用的操作動作無效 請檢查輸入訊號 連接狀態 和其他設定值 請關閉主電源 等待1到2分 鐘後再嘗試重新開機一次 如果問題持續發生 請從插 座上拔下電源插頭 並洽詢 Pioneer客服中心或您的經 銷商 關於自我診斷模式 出現在顯示器螢幕底下的訊息指出是操作還是連接的問題 確認過訊息內容之後 請檢查顯示器...

Страница 153: ...的設定是否正確 選擇的輸入是否正確 輸入訊號是否不相容 PICTURE 設定是否正確 問題 可能的解決方法 螢幕上顯示的畫面大小 螢幕上的文字過於分散 有時候機殼會傳出尖銳的聲 音 影像中明亮的部分似乎明暗度 不正常 螢幕上出現亮點或傳出雜訊 螢幕出現異常的線條 本機內部傳出聲音 風扇速度改變 ON 綠色 指示燈不亮 請確定選擇的畫面大小正確嗎 請調整功能表中的 SCREEN 模式裡的設定值 如果情況還是沒有獲得改善 本機可能有設定畫面可顯示範圍 請檢查您的個人電腦輸入訊號相容 表 周圍溫度的升降變化會造成機殼中傳出聲音 這不是故障 當影像輸入訊號層級過高時 明亮的部分其明暗度可能無法正常顯示 請增加對比度的調整層級再檢查畫面 可能是發動機被其他裝置的無線電波所干擾 例如吹風機 吸塵器 電鑽 車輛的點煙器等 或是自 動橫溫裝置 霓虹標誌或電線的放電作用也會干擾 可能是被電視台 FM電台 地...

Страница 154: ...發 光 或有光度搖擺不定情形 此屬製造過程中不可避免的產 品副作用現象 關於紅外線 電漿顯示器原則上會產生紅外線 不過這須視顯示器安裝及 使用地點的所在環境條件而定 紅外線遙控器裝置可能會致 使附近設備無法正常運作 或導致無線耳機於收聽時出現雜 音 發生此種情形時 請將受到影響的設備移動至紅外線感 應器無法影響的地點 電磁干擾 本機在製造上為符合官方電磁干擾條件的標準 但仍可能產 生某種程度的無線電雜訊 此種雜訊幾可忽略 倘若有AM收 音機 電腦或影音設備安裝位置太過接近顯示器時 請於此 時將受到影響設備移動至可不受影響的地點 驅動雜音 Drive Noise 電源打開時 可能會聽到某種程度的驅動雜音 這是很正常 的現象 並非故障 電漿顯示器溫度 顯示器在長時間使用下 顯示器某些零件可能會蓄積熱量 因而使顯示器熱度逐漸升高難以觸摸 這是很正常的現象 並非故障 其他要小心的地方 如果在操作過...

Страница 155: ... 15接腳 插槽連接頭 RGB訊號 G ON SYNC相容 RGB 0 7 Vp p 75 Ω 非同步 HD VS VD TTL level 正負級 2 2 kΩ G ON SYNC 1 Vp p 75 Ω 負同步 與Microsoft Plug Play 功能相容 VESA DDC 1 2B 輸出 迷你 D sub 15接腳 插槽連接頭 75 Ω 具緩衝功能 其他資訊 INPUT2 輸入 DVI D 24 接腳 連接頭 數位RGB訊號 DVI相依TMDS訊號 與Microsoft Plug Play 功能相容 VESA DDC 2B 聲音 輸入 AUDIO INPUT INPUT1 立體聲迷你插孔 L R 500 mVrms 大於10 kΩ AUDIO INPUT INPUT2 立體聲迷你插孔 L R 500 mVrms 大於10 kΩ 輸出 AUDIO OUTPUT 立體聲迷你插孔 L...

Страница 156: ... Harbour City 11 Canton Road Tsim Sha Tsui Kowloon Hong Kong TEL 852 2848 6488 PIONEER ELECTRONICS ASIACENTRE PTE LTD 253 Alexandra Road 04 01 Singapore 159936 TEL 65 6472 1111 PIONEER GULF FZE Lob 11 017 Jebel Ali Free Zone P O BOX 61226 Jebel Ali Dubai TEL 971 4 8815756 PIONEER ELECTRONICS DE MEXICO S A DE C V Blvd Manuel Avila Camacho 138 10 piso Col Lomas de Chapultepec Mexico D F 11000 TEL 55...

Отзывы: