


13
English
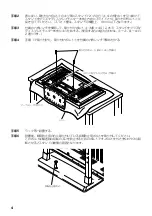
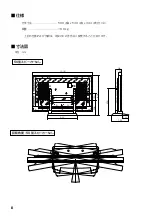
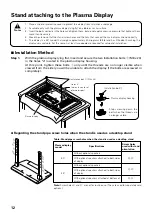
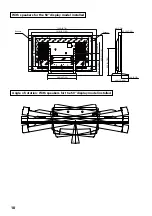
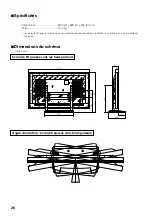
Step 2.
As shown in figure, hook the stand pipe holes (either pipe
A
or
B
) onto the screw heads
of the installation bolts
1
, then slide the stand upwards to the main plasma display until
it engages the installation bolts
1
(once put together with the display, the stand will
slides no more than 19 mm (3/4 inch)).
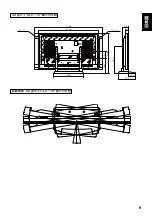
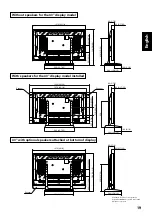
Step 3.
Pass the installation bolts
2
(M8 x 40) through the stand pipes and tighten the installa-
tion bolts securely with the included hexagonal wrench (The holes shpuld be used in the
proper combinations,
A
–
A
' and
B
–
B
').
Step 4.
Using the hexagonal wrench provided, tighten the installation bolts
1
that were inserted
in Step 1.
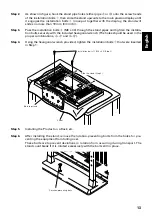
Installation bolts
2
(M8 x 40) (Step 3)
Table top stand
Sheet
Slide the stand (Step 2)
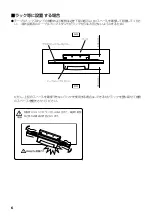
Step 5.
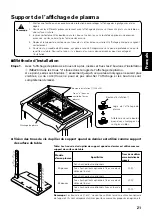
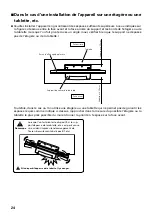
Installing the Product on a Rack, etc.
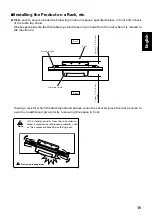
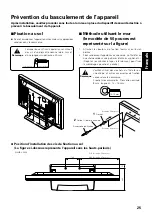
Step 6.
After installing the stand, remove the rotation-preventing bolts from the holes for pre-
venting the equipment from falling over.
These bolts are to prevent deviations in rotation from occurring during transport. The
stand could break if it is rotated excessively with the bolts still in place.
Rotation-preventing bolts


