DVR-231-S
63
5
6
7
8
5
6
7
8
C
D
F
A
B
E
1
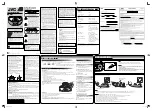
Remove the aluminum tape.
2
Unhook the four hooks.
3
Remove the front bezel.
4
Remove the four screws.
5
Remove the one screw.
6
Remove the top cover.
7
Remove the two screws.
8
Remove the clamper section.
9
Clean the pickup lens.
Cleaning the pickup lens
2
Pickup lens
Aluminum tape
Front bezel
Clamper section
Top cover
2
5
4
2
1
2
3
Bottom view
2
4
4
4
7
7
6
8
Before shipment, be sure to clean the pickup lens,
using the following cleaning materials:
Cleaning liquid
: GEM1004
Cleaning paper
: GED-008
Содержание DVR-233-S
Страница 30: ...DVR 231 S 30 1 2 3 4 1 2 3 4 C D F A B E ...
Страница 36: ...DVR 231 S 36 1 2 3 4 1 2 3 4 C D F A B E 4 2 MAIN ASSY SIDE A C MAIN ASSY C ...
Страница 37: ...DVR 231 S 37 5 6 7 8 5 6 7 8 C D F A B E SIDE A C VNP1999 A to DRIVE ASSY R9R CN301 A CN3801 CN2301 ...
Страница 38: ...DVR 231 S 38 1 2 3 4 1 2 3 4 C D F A B E SIDE B C MAIN ASSY C ...
Страница 39: ...DVR 231 S 39 5 6 7 8 5 6 7 8 C D F A B E SIDE B C VNP1999 A ...
Страница 41: ...DVR 231 S 41 5 6 7 8 5 6 7 8 C D F A B E SIDE B SIDE B D D POWER SUPPLY UNIT D ...
Страница 69: ...DVR 231 S 69 5 6 7 8 5 6 7 8 C D F A B E Video Driver LA73054 JCKB ASSY IC401 Block Diagram ...


