English
Français
Italiano
Nederlands
PyÒÒÍËÈ
<CRD4215-A> 13
12
ENG/MASTER 96 INST
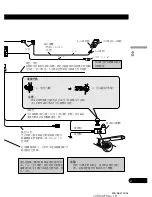
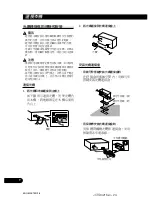
Before installing the unit
• Remove the trim ring and the
mounting sleeve.
Extend top and bottom of the trim ring
outwards to remove the trim ring. And
then loosen the screws (2 mm
×
3 mm)
to remove the mounting sleeve.
• When reattaching the trim ring, push
the trim ring onto the unit until it
clicks after reattaching the mounting
sleeve. (If the trim ring is attached
upside down, the trim ring will not
fit properly.)
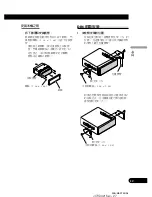
DIN Front-mount
1. Decide the position of the side
brackets.
• When installing in a shallow space,
change the position of side brackets
(small). In this case, stick concealing
tape on parts that protrude from the
dashboard.
• If you prefer an off-set installation
in which the front panel is pushed
further back, when there is a space
available at the back of the unit, use
the side brackets (large).
Flush surface screw (5 mm
×
6 mm)
Side bracket (large)
Flush surface screw (5 mm
×
6 mm)
Side bracket (small)
Concealing tape
Mounting sleeve
Trim ring
Screw (2 mm
×
3 mm)


