background image


Installation Guide

Single Handle Kitchen Faucet: 

2GB250

• 

2CL250

• 

2MT250

• 

2LG250

• 

This product meets the following standards: 

ASME A112.18.1  

• 

ANSI A117.1  

• 

ANSI / NSF 61, SECTION 9 

• 

CUPC / IAPMO LISTED / ADA COMPLIANT

• 

CONTAINS NO MORE THAN 0.25% WEIGHTED AVERAGE 

• 

LEAD CONTENT

REV-01 25, 13

Engineering Excellence

Pioneer Industries, Inc.   © 2013

Engineering Excellence

Engineering Excellence 

Содержание 2GB250

Страница 1: ...roduct meets the following standards ASME A112 18 1 ANSI A117 1 ANSI NSF 61 SECTION 9 CUPC IAPMO LISTED ADA COMPLIANT CONTAINS NO MORE THAN 0 25 WEIGHTED AVERAGE LEAD CONTENT REV 01 25 13 Engineering Excellence Pioneer Industries Inc 2013 Engineering Excellence Engineering Excellence ...

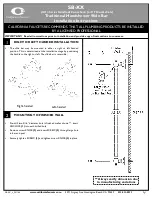
Страница 2: ...fore you begin installation Carefully shut off both hot and cold water supplies from under the sink Plug the sink drain with a soft cloth to prevent intrusion of debris or the loss of any faucet parts For replacement installations carefully remove the existing faucet and clean the entire surface of the sink mounting holes Pioneer reserves the right to make changes in the design of faucets without ...

Страница 3: ...e deck plate D through the hoses underneath of the faucet Insert the faucet through mounting surface hole For single hole installation 2 Note The faucet escutcheon is supplied with rubber washer to form watertight seal Do not use rubber washer and plumbers putty both to form watertight seal Slide the escutcheon H to the faucet body for 2LG250 2MT250 2GB250 Slide the washer I through the hoses and ...

Страница 4: ...EV 01 25 13 Faucet Installation 3 Slide the mounting kit F along with shank from underneath of the mounting surface 4 Thread the mounting kit F with the help of provided mounting tool J Do not overtighten ...

Страница 5: ...weight along with the spray hose C such a way that pull down spray head easily retractable 7 Connect the spray hose C to the spray head outlet A Do not overtighten Turn on main supply stops Check of any leaks Make sure all the connection are secure Remove aerator and turn on handle to flush and allow water to run at full flow for at least one minute Turn off handle Replace aerator ...

Страница 6: ...r ring O and locknut P counterclockwise Use two fingers to raise the red adjusting ring Q Turn adjustment ring counterclockwise to decrease the temperature setting and clockwise to increase the temperature Replace adjust ing ring Reassemble and test until desired safe temperature is reached Note Ensure proper alignment of cartridge with notch in faucet body For more care information or trouble sho...

Страница 7: ...7 REV 01 25 13 3325 S Garfield Ave Commerce CA 90040 Telephone 800 338 9468 323 888 8873 Fax 323 888 9515 Hours M F 7 30am to 5 00pm PST www pioneerind com Engineering Excellence Engineering Excellence ...

Отзывы: