Operating Instructions
NOTE: “UP” and “DOWN” arrow buttons on the control
panel and remote control have dual function capabilities:
Use the UP arrow to adjust TIME / TEMP, or HI / LOW
settings.
Use the DOWN arrow to adjust TIME / TEMP, or °C / °F
settings.
1. Plug the power cord directly into a conventional 120V 15
amp grounded outlet and press the MASTER POWER
switch on the back of the heater.
2. Press the POWER button on the front control panel or
on the remote control to start the heater. The LED will
display the default setting (72°F / 22°C).
NOTE: If the current ambient temperature is greater than the
set temperature, the HI / LOW display, fan and Quartz
bulbs will not operate.
To alternate between F° and C°:
1. Pressing the °C / °F / Down button, you can switch the
temperature format from Fahrenheit to Celsius, and vice
versa.
To set Timer:
1. Pressing the TIME button, the LED display will switch
from the temperature status to the TIME status and
begin to flash. The default time will display “-” which
means the TIME is not activated, and the heater will
remain on.
2. You must press the HI/LOW/UP button or the
C°/F°/DOWN within (5) seconds to set the time. Each
time you press the HI/LOW/UP button, the time will
increase by 0.5 hours. Pressing C°/F°/DOWN will
decrease by 0.5 hours. The maximum amount of time is
8 hours; once you reach 8.0, the time will return to “-”
and start at 0.5 again.
3. Holding down each button (for 2 seconds) while setting
the time will change the time quicker. If no button is
pressed within (5) seconds, the time status will switch
back to the temperature status.
To set Temperature:
1. Pressing the TEMP button, the LED display will switch
to the TEMP status and begin to flash. You must press
the HI/LOW/UP button or the C°/F°/DOWN within (5)
seconds to set the temperature.
2. Pressing the the HI/LOW/UP button will increase the
temperature setting by 1°. Pressing the C°/F°/DOWN
button will decrease the temperature setting by 1°. The
maximum temperatuse setting is 86°F (30°C).
3. Holding down either button while setting the
temperature will increase or decrease the temperature
quicker. If no button is pressed within (5) seconds, the
time status will switch back to the temperature status.
To set Heat Output:
1. The default setting is HI. Press the HI/LOW/UP button
to switch from HI (1500W) to LOW (750W).
To calibrate Temperature setting:
1. Hold down the TEMP button for (5) seconds to switch to
thermostat calibration status. The LED display will
begin to flash. The default setting on the display is 00.
2. Press the the HI/LOW/UP or C°/F°/DOWN buttons to
scroll up or down for the correct calibration. The
displayed temperature should match your wall or
free-standing thermometer within (4) degrees.
3. Once the desired temperature is set, press TEMP button
to save your settings
NOTE: To reset back to factory settings, press and hold the
TIME button for (5) seconds.
To turn heater off:
1. Press POWER button on control panel or remote
control. Fan will continue to run in cool down mode.
2. When fan has shut down, you can unplug heater.
Aero Bella Infrared Quartz Room Furnace
Page 3
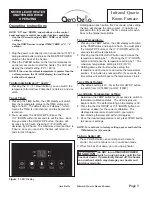
Figure 1.
LED Display
Do NOT turn off MASTER POWER
switch or unplug heater until the fan
has shut down! If prematurely turned off, the heater
can overheat, which may damage your heater and
void your warranty.
CAUTION
NEVER LEAVE HEATER
UNATTENDED WHILE
OPERATING
Infrared Quartz
Room Furnace
TM


